Resizing my Ill-Fitting Quilted Jacket

A long time ago I had made a quilted jacket from a pattern I had used before. Funny, the other jacket fit perfectly and was so comfy. But for unknown reasons this time I was shocked to find this jacket was way too bulky for me in the shoulders and made me look and feel like a bear.

I didn’t like it at all, but I had put so much work into it I just couldn’t throw it away. Sadly I couldn’t figure out how or where to take it in to fix it.

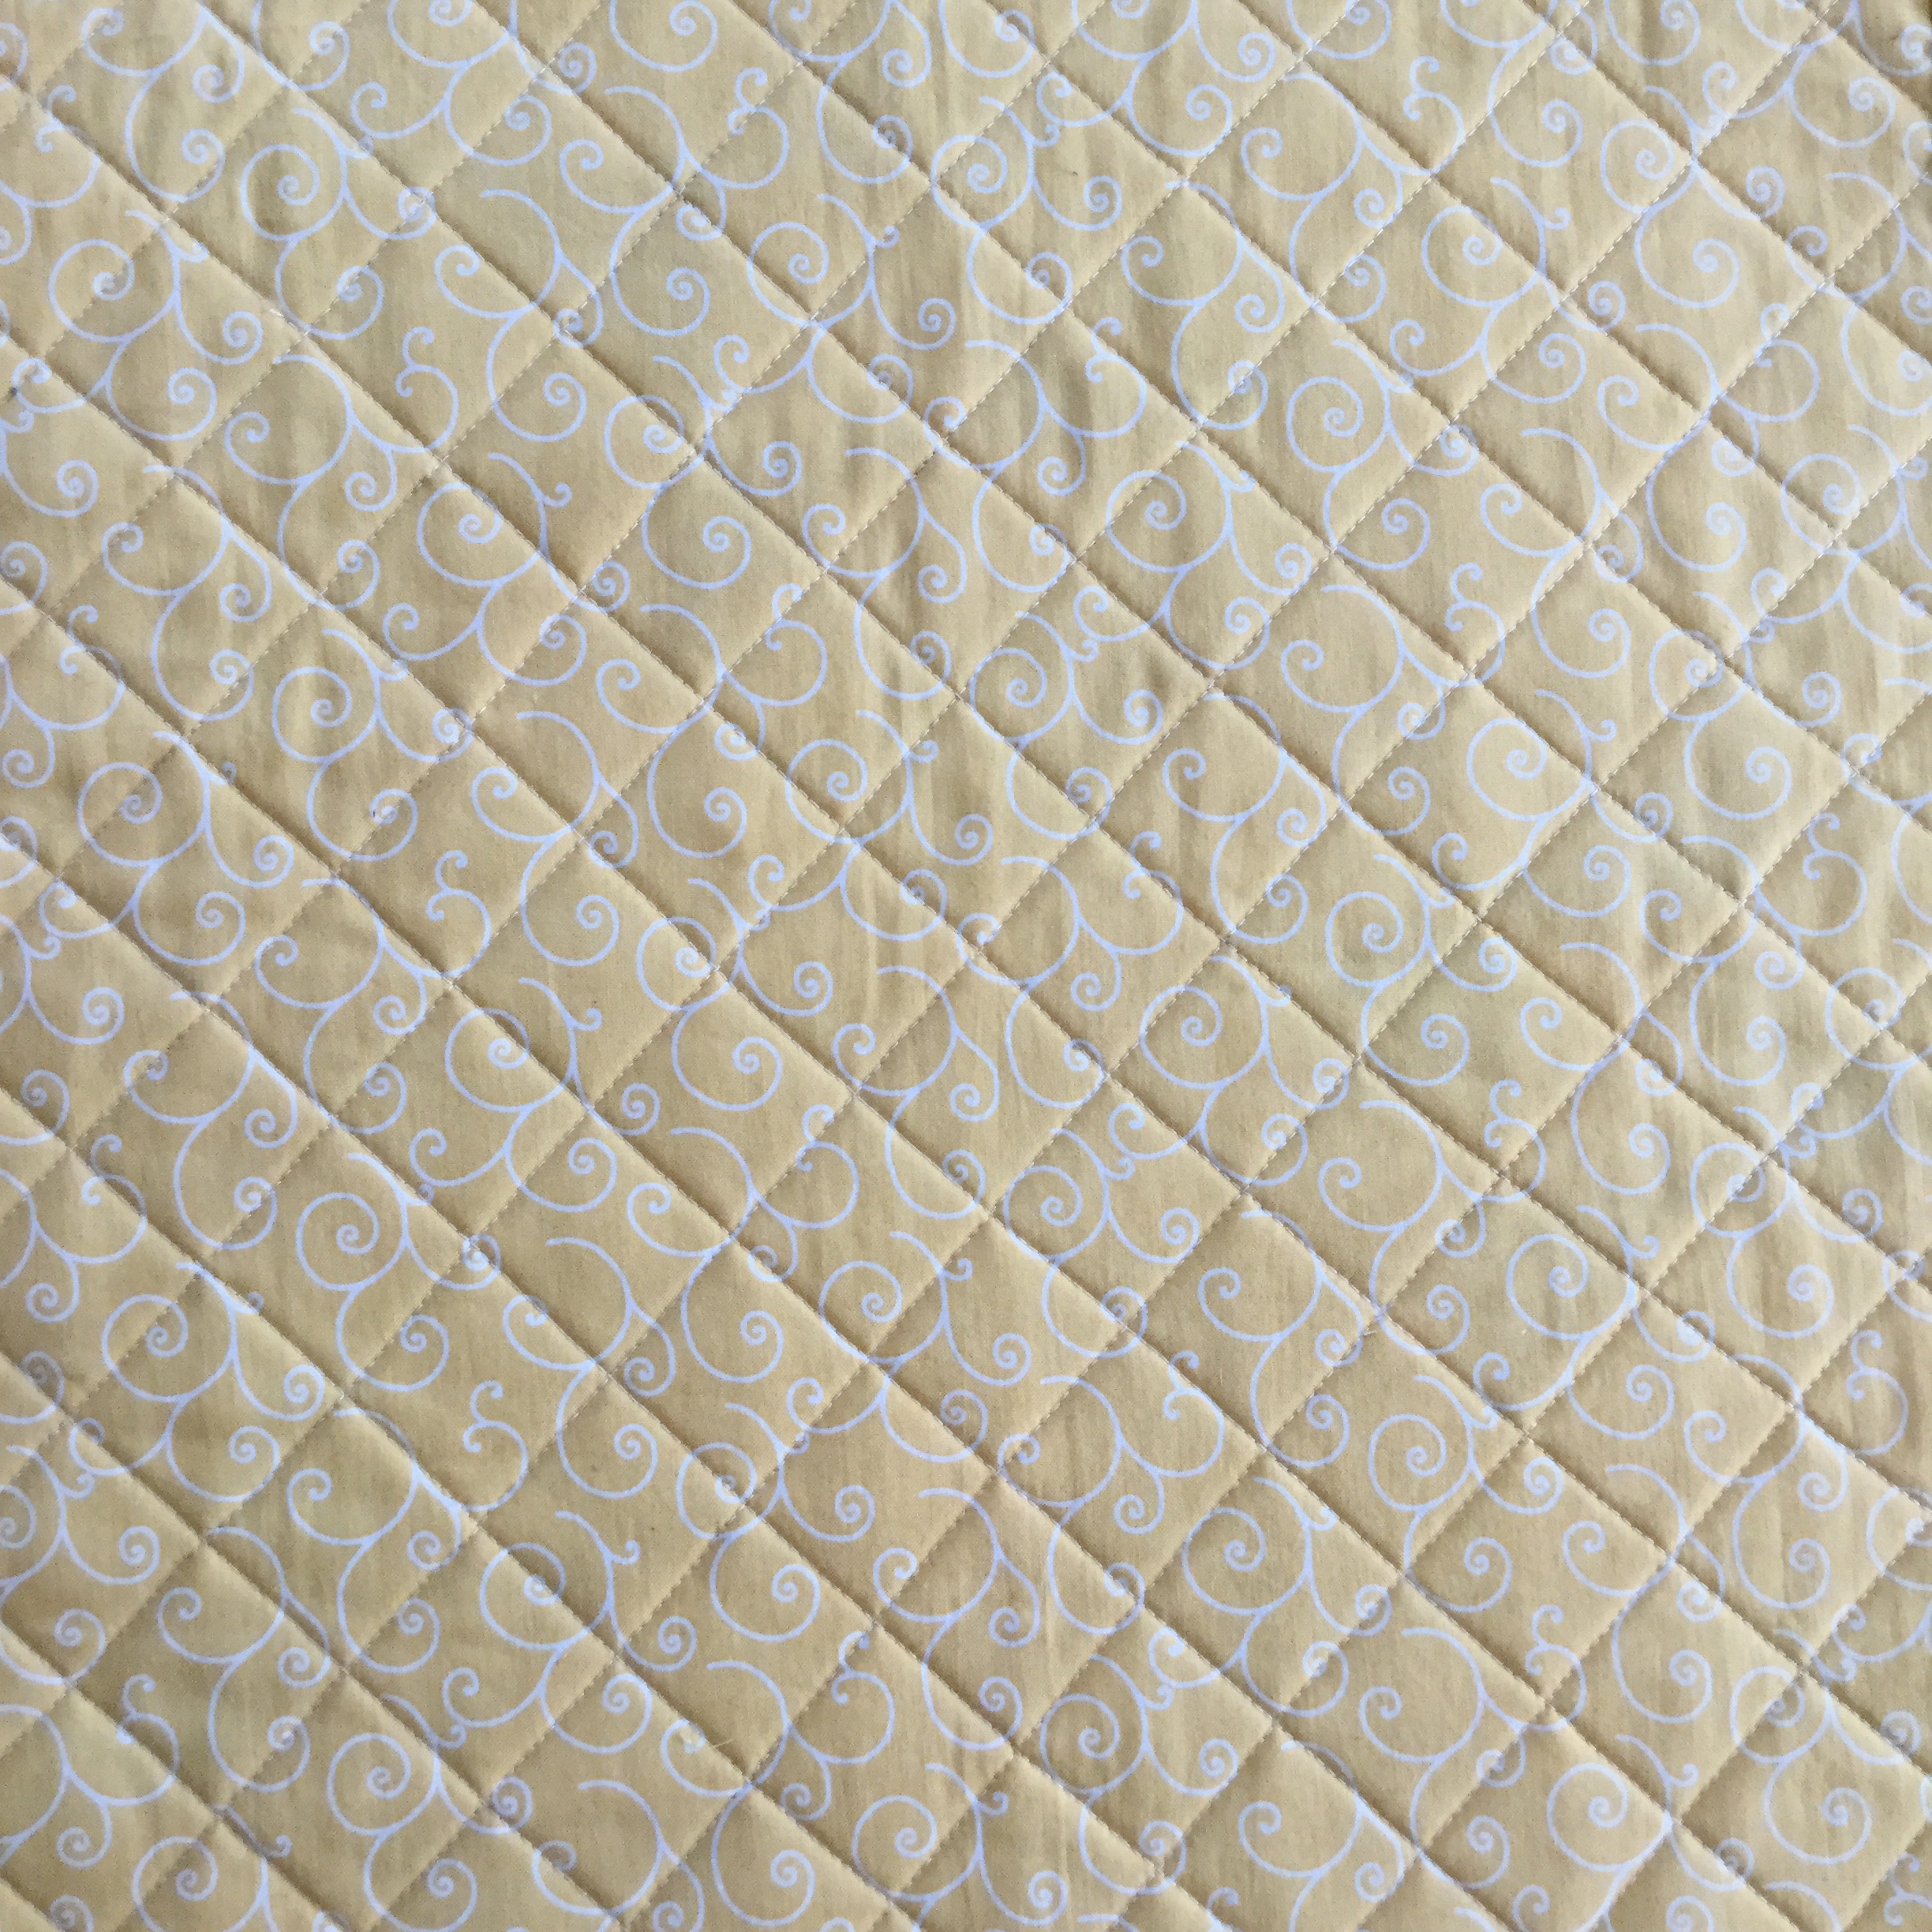
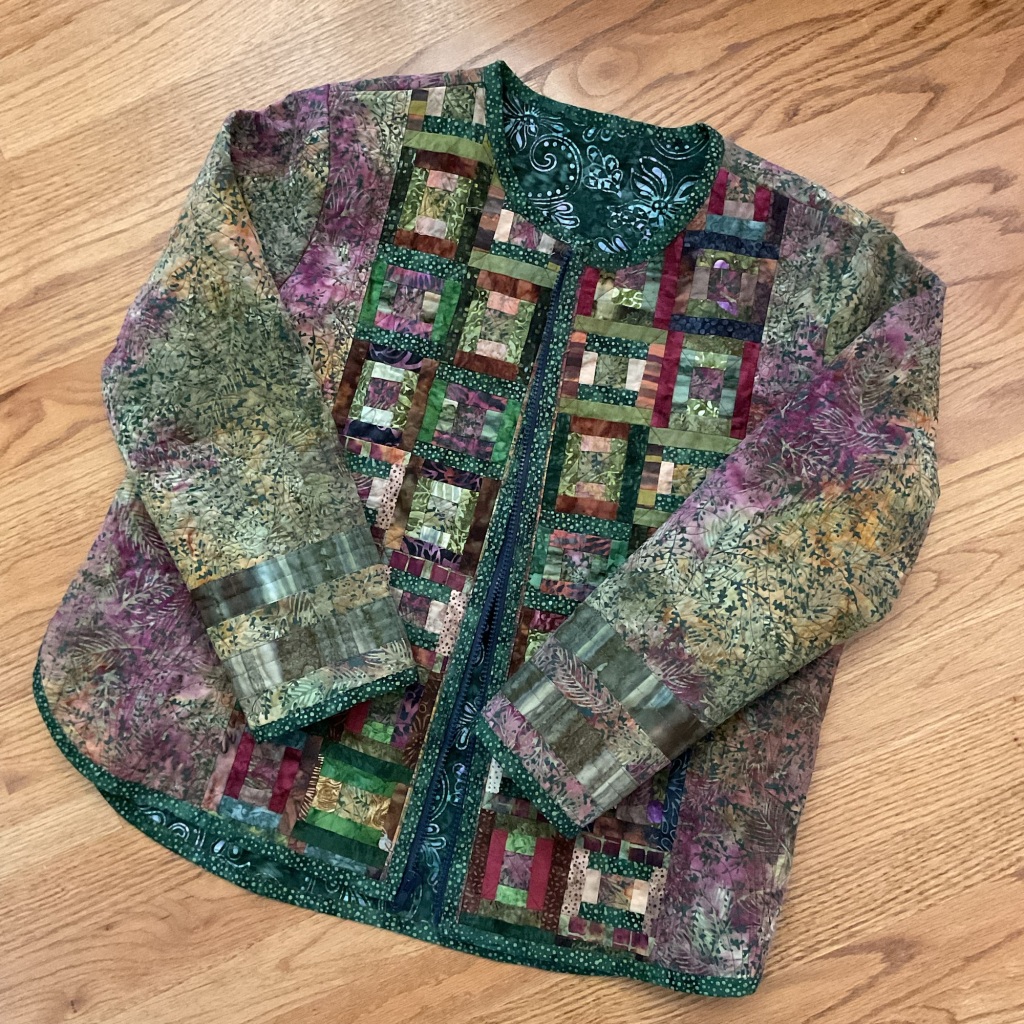
So it stayed, unused, in my closet for a few years. I never took a photo with it on, but you can see in the photo above and below how the shoulder seams are unflattering and the bulk at the bottom.

I couldn’t figure out how or where to take in the side seams or sleeves to fix the problems. So it sat in my closet. I never wore it.

Since quilted jackets are coming back in style, I started to think about making another quilted jacket and using one of the newer patterns. I researched jacket patterns on Pinterest and found several I liked, and finally chose one called the Tamarack Jacket.

Then it dawned on me—what if I used this new pattern to completely recut and reconstruct the jacket in my closet instead of starting over from scratch?

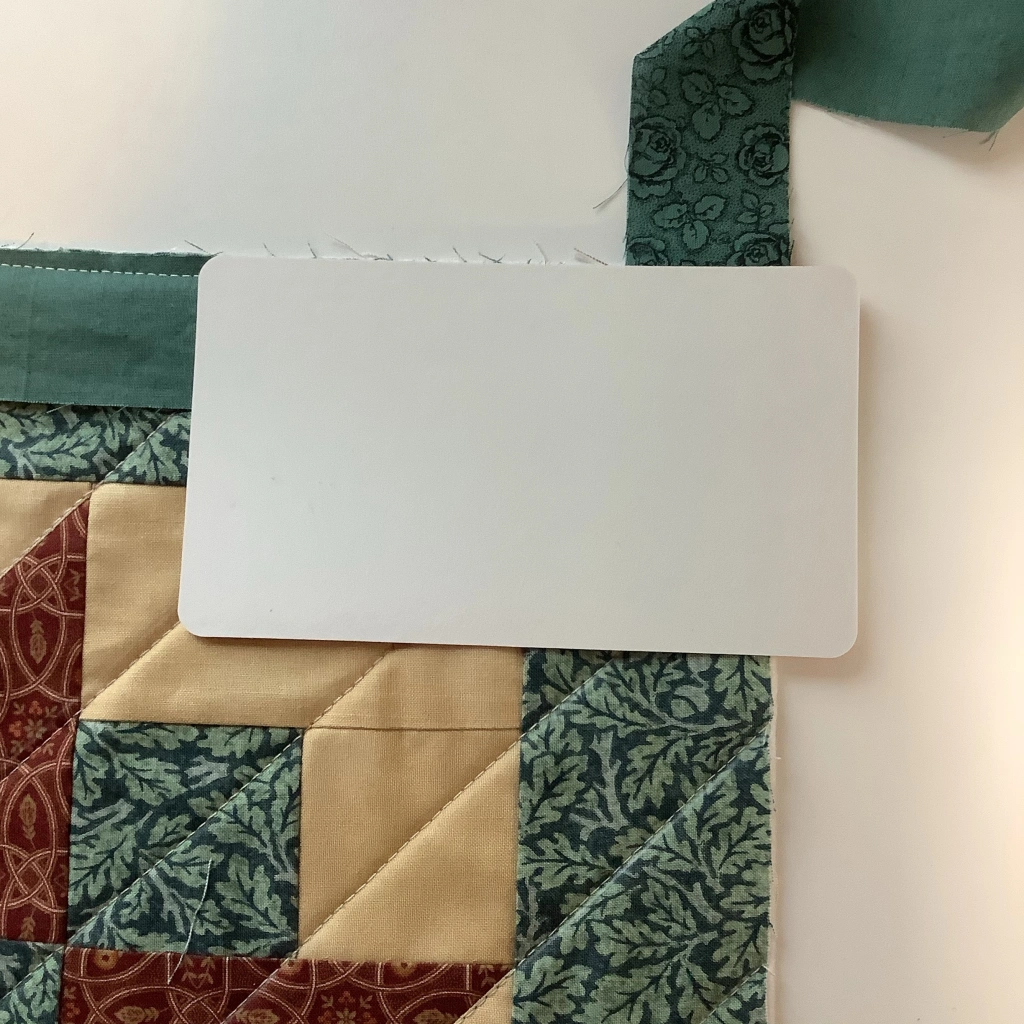
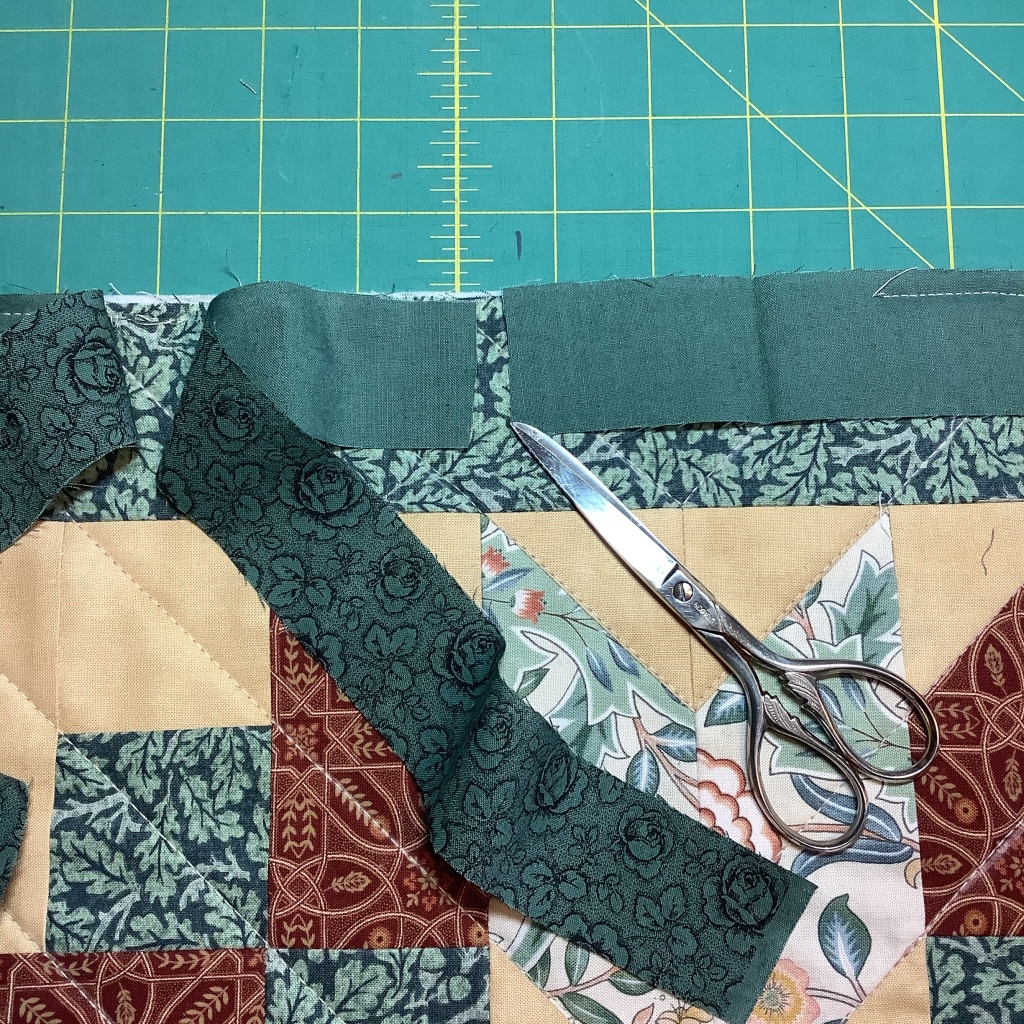
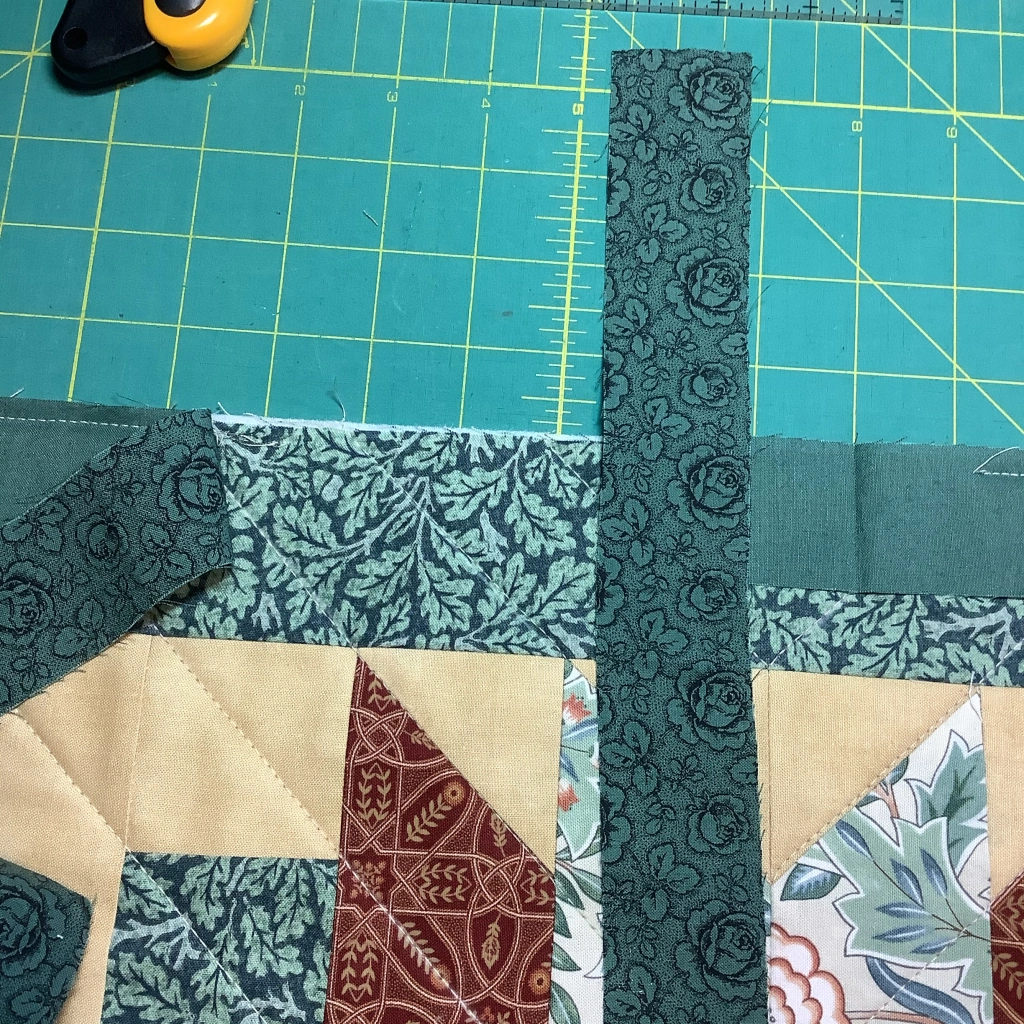
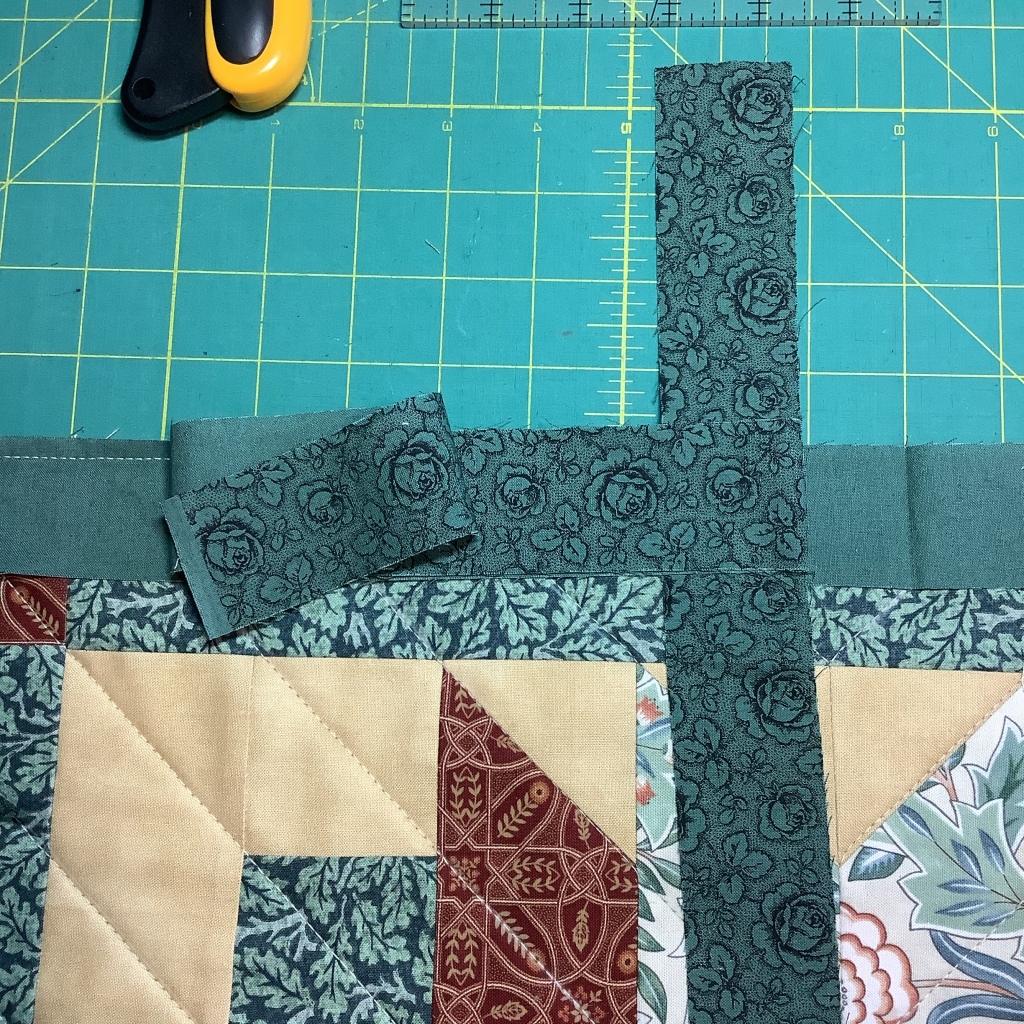
I wish I had taken more photos to share with you as I got out my seam ripper and went to work unsewing all the seams in the jacket I would never wear.

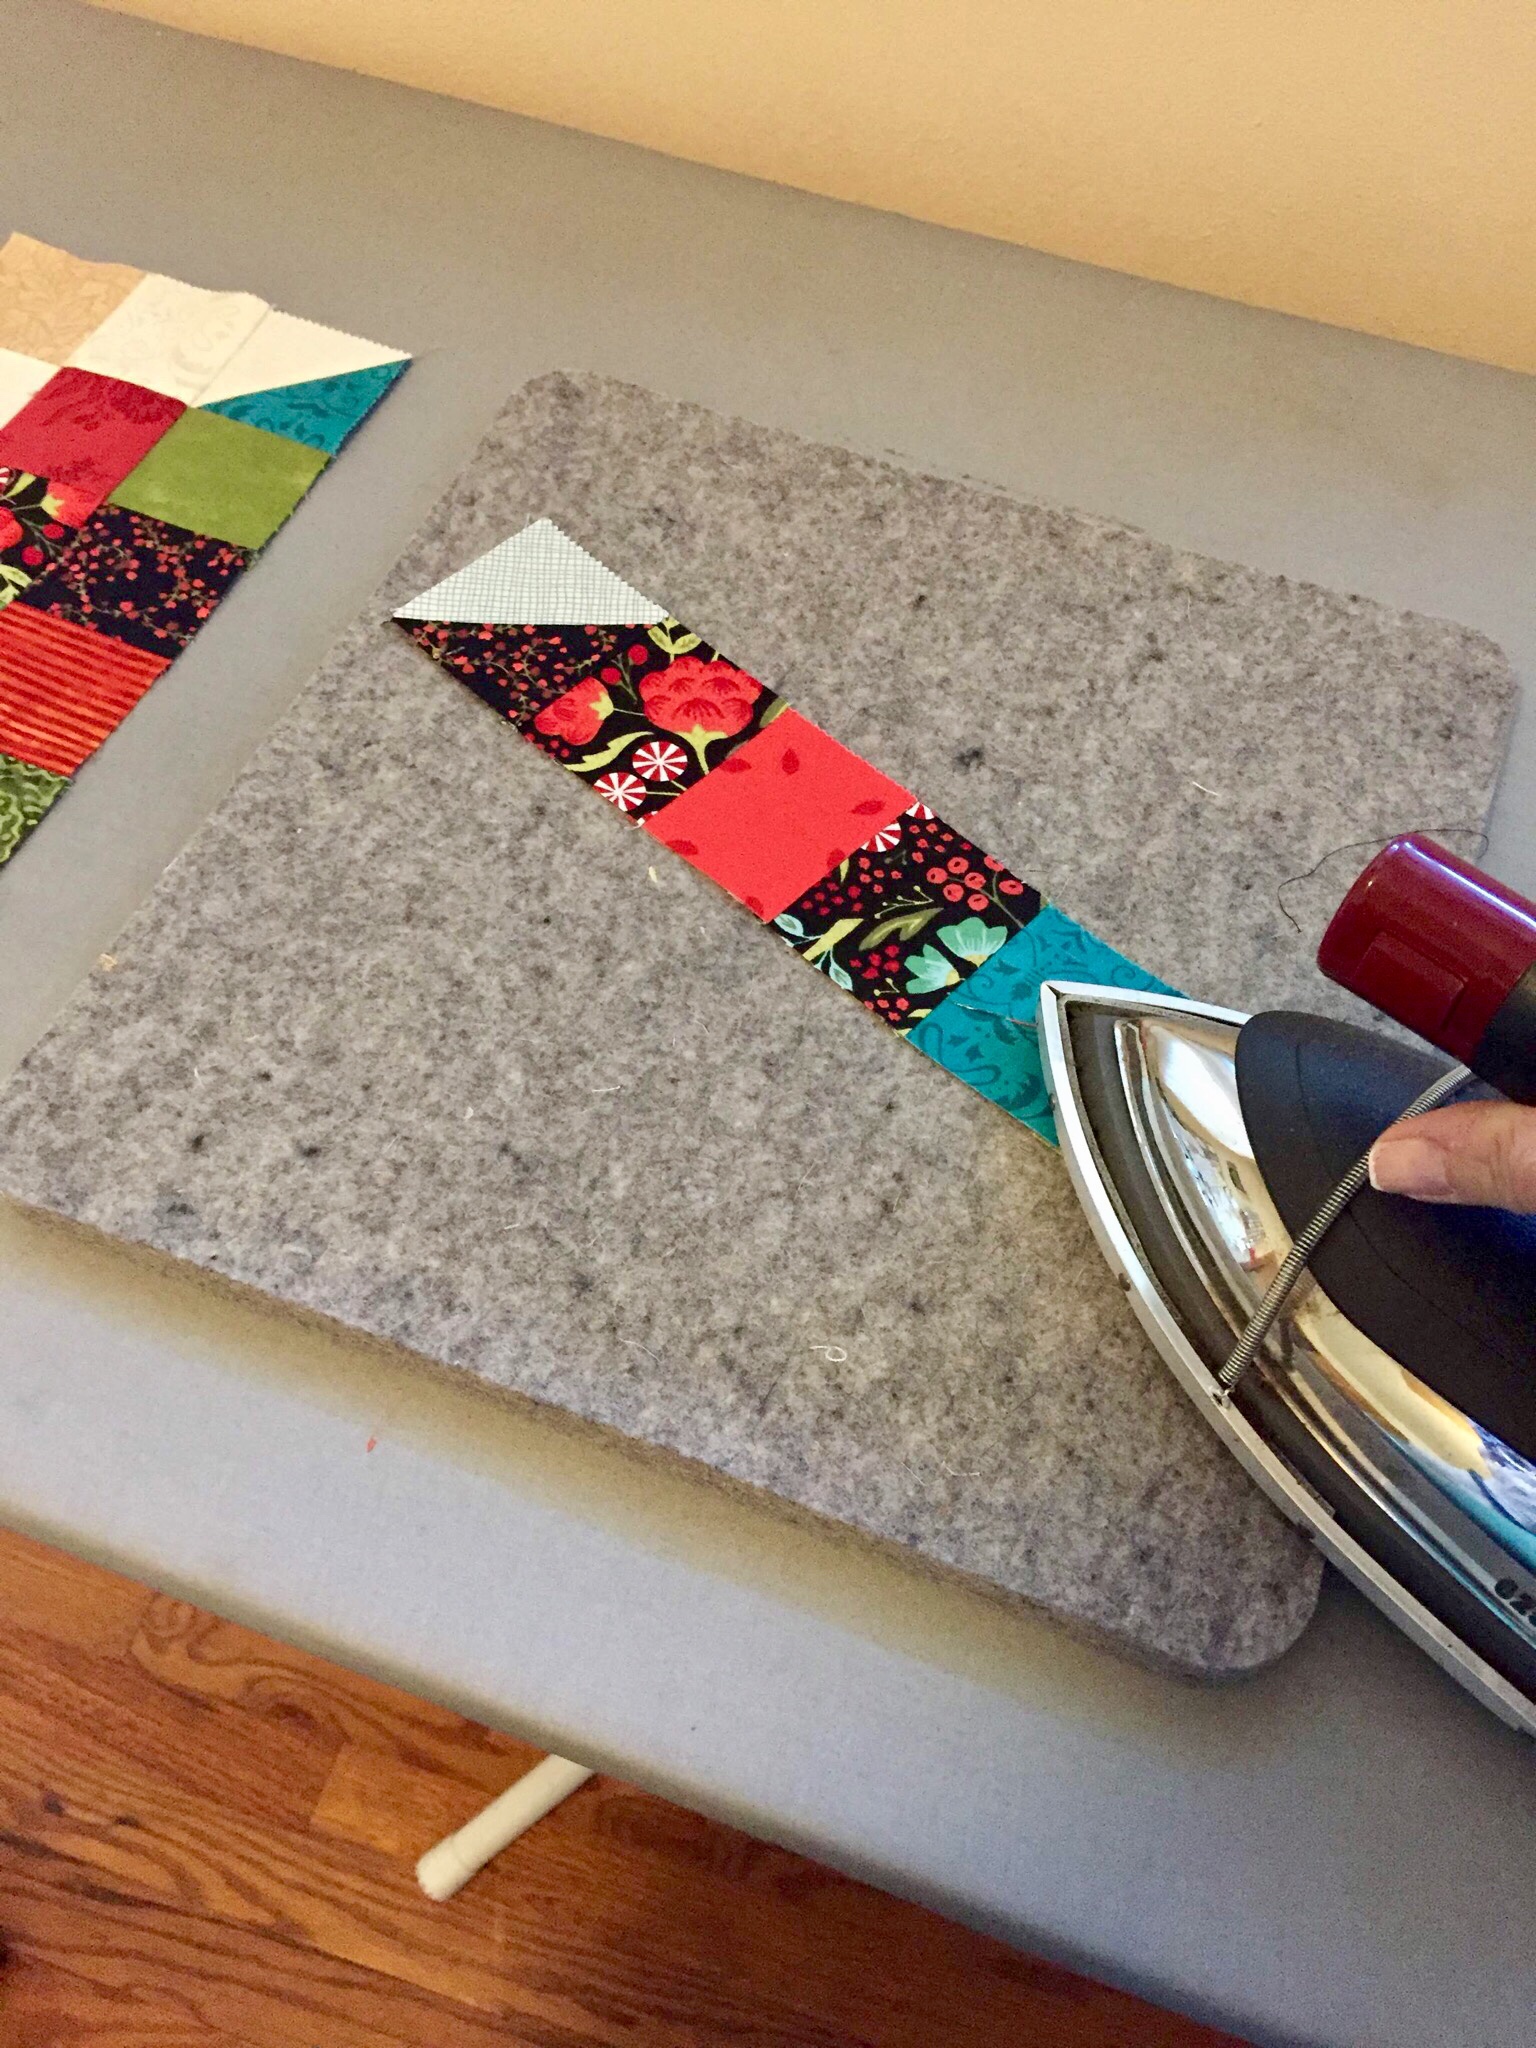
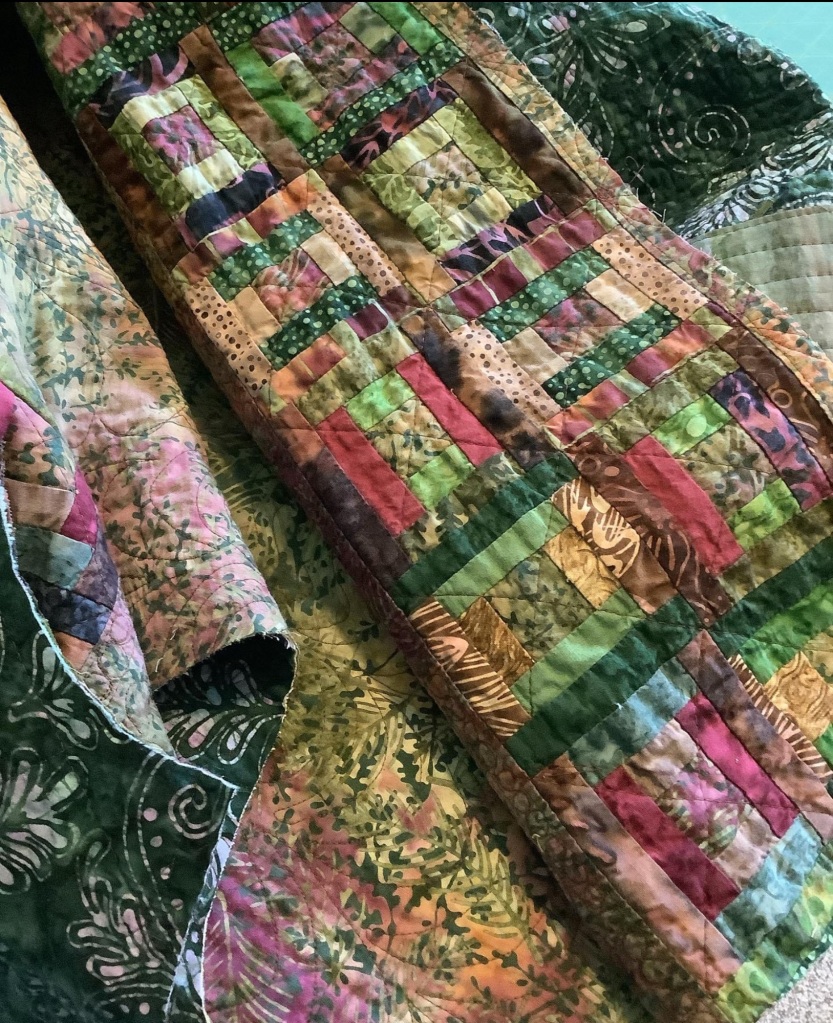
Here (above) are the remnants of the knit ribbing and some of the extra fabric cut off after recutting the new pattern pieces.

Because the jacket was too big, I had plenty of room to use the new pattern pieces to recut them. The only place I had trouble was the length. Since the original pattern featured knit ribbing in the collar, cuffs, and bottom, I had to create more quilted fabric to add to it.

Luckily I had more of the coordinating batik fabric and was able to add lining & batting along with piecing strips together to make the sleeves the right length for the new pattern. But sadly, there wasn’t enough fabric left to lengthen the jacket so I chose not to add the pockets and make a shorter version.

You can see the bands of coordinating fabrics I used to lengthen the cuff of the sleeves in the photo above and below.

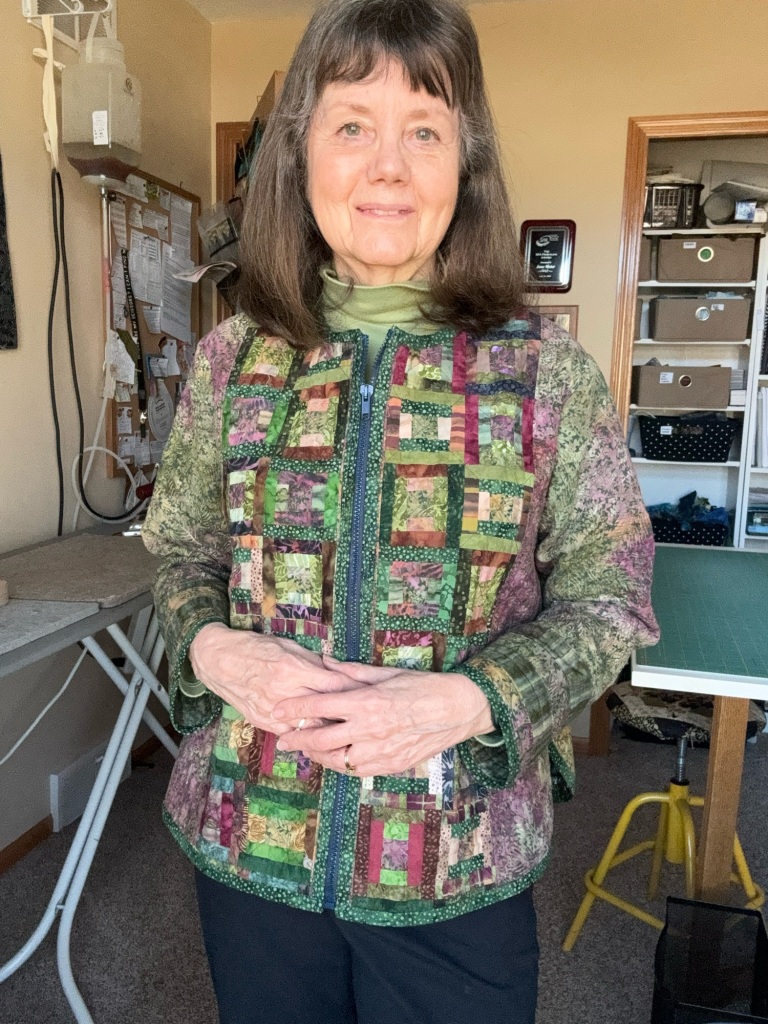
All that’s left to do is add a separating zipper that I’ll topstitch down the front and it’s done. And although it’s mot perfect, it has been transformed into a better fitting jacket that I will want to wear!

I did a little “cat walk” video on my instagram page, which I can’t replicate here, but if you’re interested, you can view it at this link:

https://www.instagram.com/reel/CvdGKjupLIY/?igsh=MWgyOGlhdTdyczJjZw==

So if, like me, you’ve made a garment that doesn’t fit and it’s sitting in your closet, never worn, I hope this post might encourage you to salvage it by un-sewing and recutting/resewing it with a new pattern.

Until next time, HAPPY QUILTING!

Jane, Mulberry Patch Quilts

How to Bind Your Quilted Wall Hanging with 1-1/2” Single Fold Binding

How to Bind Your Quilted Wall Hanging with 1-1/2” Single Fold Binding

Normally I bind my quilts (baby quilts, lap quilts, bed quilts) using double folded straight-of-grain binding cut between 2-1/4 to 2-1/2 inches wide, folded in half (wrong sides together) and sewn on the quilt. For more info on that process, go to my blog post: How to Bind a Quilt—The Secret to Perfect Corners. Double fold is great for projects that will take need to stand up to a lot of wear and tear.

But I’ve found that single fold binding is perfect for most of my smaller projects, like wall hangings, table toppers, etc. I think it has a better look…not as thick and bulky, but nice and crisp. Plus you save on fabric. Here’s how to do it.

Cut 1-1/2 inch strips straight-of-grain

Whether I’m making double fold or single fold binding, I always cut on the straight of grain (from selvedge to selvedge). The only exception to this rule are projects that have curved edges…something with rounded corners, scallops, or completely round. That’s the only time I bother to cut on the bias. For most of my art quilts, wall hangings, or runners (which all have straight edges) cutting 1-1/2 inch strips on the straight-of-grain is fine.

First, figure out how many strips to cut. Take the measurement of the parameter of your project by adding up the length of the sides, top, and bottom and cut the number of 1-1/2 inch wide strips you need to equal that number plus a few extra inches. It never hurts to have too much.

Sew the strips ends right sides together at a 90 degree angle and sew from one corner (where they meet) to the other corner (I’m pointing to it with my tweezers).

Trim the seams to about 1/4 inch and press each open.

Starting in the center of one side of the project and leaving a long tail (about 6 inches or more) start sewing one side of the binding to the right side of the project. When you’re 1/4 inch from the corner, stop with the needle down, pivot, and sew off the corner edge at a 45 degree angle.

Take it out from under the presser foot and turn to the next unsewn edge. Flip the binding up so it’s parallel to this next edge.

When I get junk mail, I save those laminated cards they often send. They’re perfect for this technique. Any thin plastic card or index card will work. This technique will help you get the feel for how to get perfect mitered corners on your binding. Just place the card across top raw edge of the quilt/binding (top) and bring the binding down across the top of the card and flush with the raw edge of the next edge to sew.

Bring the binding over the card, flush with edge of next portion & pin

I put a pin just below the card to keep it in place and then slip the card out.

Then continue sewing from the edge to the next corner and repeat the process until you come to where you started. Stop sewing several inches from the beginning and take it to your cutting table.

You’ll have a “tail” on each end and several inches (about 8-10”) between where you started & stopped sewing in the middle of one side.

To join these two tail ends, trim the right side tail of your binding so it ends half way between the beginning & the end of your sewing.

Lay that trimmed binding piece over the end you just trimmed.

Place your left tail over the right & fold it back until it’s in line with the right edge of that extra piece of binding and cut it at that fold. Perfect! (The ends of the binding tails will overlap by the width of that extra binding, which in this case is 1-1/2 inches, but this trick works with any size binding and NO MATH or special tools needed! So I always do it. Yay.

To make it really nice, use your ruler & a fabric marker to draw a 45 degree line as a guide to sew on.

Then overlap the binding ends as shown above & sew right sides together on that drawn line.

Double-check to be sure it’s sewn the right way (ask me how I know), and then trim the seam to 1/4 inch and press open. Line up the raw edges and finish sewing the binding to the quilt.

Tada! All sewn. All that’s left it to fold it to the back & hand sew.

First iron the binding out from the right side, all the way around.

Turn the quilt over and from the back turn the raw edge of the binding in half so it meets the raw edge of the quilt (at the corners too)…

Then fold in again, bringing the folded edge over so it covers the stitching and pin. Stop at the corner, pinning as close as you can to a 1/4” from the edge.

To make a crisp mitered corner lay a pin or stiletto across the corner edge of the binding just to hold it in place (see photo) …

…while folding the next edge & pin. See how nicely the corner miters? Continue folding/pinning around the quilt.

Then sew the folded/pinned edge to the back by hand.

Don’t the corners look great? …From the back…

…as well as the front!

Double Star Barn Quilted Wall Hanging/Table Topper

All Done! I’m in the process of creating a pdf pattern for my newest quilted wall hanging/table topper called “Double Star Barn”. I’m thrilled to be able to share it with you in my Etsy Shop and it should be available in just a day or two, so be sure to check Mulberry Patch Quilts if you’re interested.

Would you like to learn how to add “triangle corners” to easily hang your quilt? Check our my blog How to use Corner Triangles to Hang a Quilted Wall Hanging.

I hope these tips and tricks were helpful for your next project. And that the photos helped the explanation.

Until next time, HAPPY QUILTING,

Jane

Mulberry Patch Quilts

Easy Patchwork: Triangle Corner made with a Square, or “Snowball” Corners

Easy Patchwork: Triangle Corner made with a Square, or “Snowball” Corners

It’s easy to make a triangle on the corner of a block, no math involved. I first heard of this technique from an amazing quilt teacher, Mary Ellen Hopkins, who wrote groundbreaking quilting books like “It’s OK if You Sit on My Quilt”, and “Connecting Triangles” among others. Mary Ellen was probably best known for creating the connector and perfect piecing triangles concepts. I was so lucky to have the opportunity to see her at her lecture in Milwaukee just a few years before she passed away (in 2013). Not only did she make quilting fun, her sense of humor and showmanship shined during what I would call her “performance” instead of her lecture.

Here’s how to do this technique. In this example, I’ll add a triangle to the top of a rectangle. I cut a square the same width as the rectangle. On the wrong side of the square, I drew a line from one corner to the opposite corner. Since I’ll be sewing on this line, I like to use a very fine point sharpie or a mechanical pencil with a light hand—just dark enough to see.

Draw a line corner to corner.

Place the rectangle right side up and the marked square right side down on top of it (right sides together) paying attention to the orientation of the angle.

Then sew on the drawn line.

If I’m making more than one I like to sew one after the other (chain piecing) without having to cut the threads in-between until I’m finished.

Then I take it to the ironing board (love my wool pressing surface by the way) and I give it a good press as is to set the seam.

Then I gently open the seam by folding the edge of the square to meet the opposite corner.

Press, then lift the top layer up to reveal the two layers beneath it…
Trim bottom 2 layers with 1/4” seam.
You’ll end up with a beautiful triangle…no math necessary.

This video might make it easier to understand…just hit the play button below.

These corner triangles (made with marked squares) are sometimes referred to as “snowball” corners, or “snowballed”. You can use them to make all sorts of blocks: snowball, flying geese, or star points. Let me show you a few examples.

By adding a second triangle (same angle orientation) to the bottom, I’ve made a simple parallelogram.

Or by adding them to four corners of a square, I can make a snowball block. Here’s one of my baby quilts featuring the snowball. I’ve added color triangles to the white squares & white triangles to the color blocks.

But look what happens when

I added the triangles to only opposite sides of the squares. I sewed grey to opposite sides of each square and it’s the arrangement of the squares that makes the Xs & Os design.
This is the exact same idea, but they form stretched stars in my lap quilt made with red and white scraps. It’s all in the colors & block arrangement that gives the illusion of stars.
And by adding the “snowballed” corners to 2 corners on the same side of some squares it creates these adorable stars on my baby quilt made with 30s reproduction fabrics and bleached muslin,

So give this technique a try. And play with different sizes and shapes. The sky’s the limit! Have fun.

Until next time, HAPPY QUILTING

Jane

Mulberry Patch Quilts

How to Use Corner Triangles to Hang a Quilted Wall Hanging

How to Use Corner Triangles to Hang a Quilted Wall Hanging

I have found an easy way to hang smaller quilted wall hangings or art quilts on your wall…hanging corner triangles. They’re so easy to incorporate into your binding. Here’s how.

After you’ve finished quilting your wall hanging and have trimmed the edges to prepare it for binding, you can add these corner hanging triangles to the back.

Cut two 5” squares. I like to use the same fabric as the backing, but if you don’t have enough, any fabric scraps will work. I like to try to match the background so they will blend in and you don’t notice them when you look at the back. This is especially nice if you’ve made a wall hanging that you might want to use as a table topper too. It looks nice and won’t interfere. But if your item will only be hung on a wall, matching the fabric really doesn’t matter. You can even use leftover charm squares, or muslin.

Cut two squares approximately 5” each.

Fold each of the squares wrong sides together corner to corner and give them a good press with a hot iron.

Pin each triangle to the top corners of the back of your wall hanging, with the raw edges of the triangle matching the raw edges of your quilt.

With your sewing machine baste the triangle edges to the quilt using a walking foot and a scant quarter inch seam.

The raw edges are on the outer edges & the folded edge is towards the inside.

Bind your wall hanging in the usual manner, incorporating the basted triangle edges with the edges of the quilt. Once bound, all you need is a thin wooden dowel cut slightly shorter than the quilt. The thickness depends on how heavy the wall hanging is. This particular wall hanging is 20 x 20 inches square. I used a quarter-inch dowel, but even a thinner one would have been substantial enough to carry the weight.

Just slip both ends of the wooden dowel inside both triangle corners and you’re ready to hang it on your wall with a nail, or hook.

This wall hanging pattern will be available at my Etsy Shop soon!

For smaller art quilts or wall hangings I start with smaller squares (4”) and use thinner wooden dowels. I’ve even found wooden skewers to be long and thick enough for small projects. Experiment to see what size works best for your quilt.

This mini is 13 inches wide.
…so I used smaller squares & inserted a wooden skewer (cut to fit).

Keep in mind, this technique won’t work for large or heavy quilts/wall hangings. They might need more support in the center. It will all depend on the width and weight of the wall hanging.

For larger items, I use sew in a “hanging sleeve” that goes all the way across the top of the quilt back, so the quilt’s weight is more evenly distributed.

If you’re interested in making a full length hanging sleeve, see my blog on hanging quilts.

I hope this was helpful. Until next time,

HAPPY QUILTING,

Jane, Mulberry Patch Quilts

Quilt Studio Makeover: Design Wall

Quilt Studio Makeover: Design Wall

It’s so nice to be able to place your fabric pieces on the wall when you’re piecing or designing your quilt. I had a small design wall in my tiny quilt studio at our old house. But after gaining a little square footage at our new location (and more wall space), I decided that a larger design wall was in order.

It’s easy to do-it-yourself! Here’s how I did it.

Insulation board— I headed off to my local home improvement store to pick up some insulation board. Since I have a small car, we can’t fit the standard six feet sheets into it, But I was able to find some the perfect size … 2 x 2 foot.

Measuring the space available on my largest wall, I found making my design wall 6 feet x 6 feet would use the 2×2 boards most efficiently, and still be enough space for most of the quilts I do. So I bought 9. If you’ve got the space in your car, it’s a little cheaper to buy the 6 foot boards. But this was ideal for me.

Next I taped the boards together using heavy duty strapping tape. I did both the fronts and the backs of each seam. Duct tape will work, but it’ll show more easily through the flannel covering. The hardest part was finding an area on our floor large enough to lay them all out. A carpeted surface isn’t ideal, it’s best to do this step on a hard surface.

I found it easiest to tape my insulation board pieces in columns & then tape the columns together by rows. Hmmm…kind of like putting together a quilt.

Here it is (above) all taped together on both the front and the back sides.

FLANNEL– You’ll need a soft material (like cotton flannel) that fabric pieces will cling to to cover your insulation board. White or a soft light neutral are the best choices of color. I headed off to my local big box fabric store thinking I could find some inexpensive white wide flannel by the yard. Nope! Any other color or pattern BUT not white! Ugh!

So instead I found these white flannel sheets at a nearby Kohl’s…on sale!…perfect! This one was full size & I only used the flat sheet so the fitted sheet can be cut up and used in another project(s), like my charity baby quilts.

Sorry, I forgot to take a photo–but I laid the flannel sheet on the floor, placed the best looking (& smoothest) side of the taped insulation board on top of it, and worked folded the flannel over, trimming it as needed, and taping it to the back with duct tape. I worked the wrinkles out (taught but not too tight) as I went. You could also use a staple gun, but be sure your staples are short enough that they don’t go all the way through the board.

All that’s left to do is to mount it on your wall. How? There are a few options. You could try heavy duty sticky-back Velcro. Or picture hangers. But I chose to use drywall screws with washers. The insulation board is light weight, so I only needed about ten. They’re not pretty, but I hardly notice them. And it’s very sturdy.

You’ll notice in the photo above that I used a couple of boxes to hold it up so I could stand back and judge the placement on the wall before I committed to it and screwed it to the wall.

Here’s a closeup of the washer & screw. The washer needs a hole large enough for the screw to fit through, but small enough to keep the screw head from going through. I imagine you could camouflage it with a dab of white paint.

I can’t tell you how helpful having a larger design wall is. I love it. Most fabric pieces stay put without assistance, but I have the option to stick pins in the fabric to insure they don’t fall off before I get the chance to sew them all together. And it only took an afternoon to do make it.

So get going and give it a try. I’m sure you’ll love yours too.

You can make yours as small or as large as you like. You’re only limited by the size of your wall and your flannel covering.

Until next time, HAPPY QUILTING!

Jane

Mulberry Patch Quilts

PS: I’ve been asked about the project on the design wall in the photos. It’s a pattern by The Pattern Basket called “Star Drops” and it’s alot of fun to make. It’s made of layer cake (10″ squares) and mine is a Moda fabric by Robin Pickens called “Dandi-Annie”. Love it!💕

Quilt Studio Makeover: Layout

Quilt Studio Makeover: Layout

Is it a sewing room? A quilt studio? What do you call your spot? Whatever you call it, it’s a space set aside to create something beautiful; a special spot to get those creative juices flowing and enjoy some time doing what you love.

We’ve just moved into a new home, so of course I immediately claimed one of the extra bedrooms for my sewing/quilting/creative space. What I love about this room (besides the fact that it’s larger than what I had before), is the view and wonderful lighting.

Where to begin?

So where to start? It was like a fresh canvas… Where will I put everything, and (hardest of all) where should I begin? I guess the layout comes first.

I’ve got an app on my iPad called “Floorplans” by Green Tea LLC Software. In this app, I can draw the floor-plan of my room and add furniture and move around on the screen to see how it looks. It’s a great way to rearrange everything without physically having to move it.

Here are some of the many layouts I tried. Note: there’s a large window at the top, and a closet and door at the bottom of the pictures. The app has alot of built in furniture to choose from, but not a sewing cabinet, cutting table or ironing board, so I improvised with their computer table and tables just changing their size to match my furniture.

Layout #1. Not bad, I can see out the window while I sew, but the light’s not coming in on my left side and I also want the left side of my sewing table away from the wall so I can fit larger projects under my needle.

Layout #2. No…this one’s not quite right either. I don’t want the ironing board jutting out over and blocking the window.

Layout #3. So this is it (above). I finally decided on this layout (although I switched the bookcases around). And after moving everything around to match the layout drawing, I’m pretty happy with it.

I like the proximity of everything to my ironing board… I can walk all the way around the cutting table, and easily have access to the design wall and storage closet.

I like to glance out the window every once in awhile as I’m sewing away…and the extra daylight on my sewing is very helpful.

Note about the view–It’s hard to believe we’ve had 3 snowstorms since October! Looking out the window now, you don’t see any snow…only bare trees and green grass (and some leaves that missed the last raking!). The temps are now up to 50 degrees, but they’ll dip back down with more snow in just a few days. It’s “anything-can-happen” weather in Wisconsin!

Most of the bookshelves from my old quilt studio fit inside the closet here, so when we moved in my sister and I took the doors off the closet for easier access. (BTW, I’m indebted to my wonderful sister, who drove over & spent a few weeks helping us purge, pack, clean, & get ready for the move. I don’t know what I would have done without her!…thanks again Judi!!)

In the next post, I’ll tell you about the design wall with a little DIY hints.

Until next time, HAPPY QUILTING!

Jane

Mulberry Patch Quilts

Tuesdays Tips -Quilting: HST Tip Tool

Tuesdays Tips -Quilting: HST Tip Tool

Hi! Thought you might enjoy a quick tip when you need to join half square triangles (HST) the traditional way–by sewing two triangles together.

I’m working on a Christmas quilt, and the pattern calls for cutting squares in half (corner to corner) and sewing them together.

I usually make my HST by cutting squares a bit larger, stacking them right sides together, drawing a line from corner to corner, sewing 1/4″ on either side of the line, cutting between the lines, pressing and squaring them up to size. You know the drill.

Or (if I have the right size die) I’ll use my Accuquilt to cut perfect triangles with the dog ears pre-trimmed. But for this pattern, I didn’t have the right size die.

So…I happened to remember a sweet little tool I got at the Quilt Expo quite awhile back (and amazingly was able to find it)! It’s a Porter & Fons Triangle Trimmer. It made the job so much easier.

Just line it up with the corner and trim!

Why? Because it makes the triangles easier to line up, and easier to feed through the machine (easier to get the trimmed edge under to needle than that tiny point).

And because once they’re opened up and pressed, there are no dog ears to trim.

I was lucky…these HST finished up right on target, so there was no need to spend time squaring.

So if you’re into a project that calls for sewing HST the old fashioned way…take a look in your tool stash. You just might have forgot about this great little tool.

Hope this tip was helpful. Until next time,

HAPPY QUILTING!

Jane

Mulberry Patch Quilts

Tuesday Tips Quilting: Straight Lines

Tuesday Tips Quilting: Straight Lines

Have you ever intended to quilt some beautiful straight lines on your quilted project with your domestic sewing machine and walking foot, thinking you can easily eyeball it from block to block, only to finish a few rows and find you wavered a bit? …that the lines aren’t quite as straight as you’d like?

I know I have. It’s not as easy to sew nice straight lines as you’d think, without a little guidance.

Sure, you can mark one straight line on your quilt and then use the edge of your walking foot to keep every consecutive line straight. But even so you might not keep the lines perfectly straight as you travel along. And maybe you don’t want your lines so close together.

Another option is marking the lines on your quilt using a long ruler & some kind of removable marker (like chalk, disappearing ink, water soluble ink, or pencil). But that’s time consuming and adds another step of getting rid of the marks after you’re done.

So, what’s the solution? My tip is to use good old blue painter’s tape (usually blue, sometimes green).

I just roll out a long piece and tape it onto the quilt, using the blocks (or a ruler) to make sure it’s straight and where I want the stitching.

Line your needle up to one side of the tape or the other and sew away!

Just be sure you sew close to, but not on top of, the tape! Remember, it’s not a race..you can sew slowly.

The strip is reusable…I was able to use the same strip of tape about 10 times or more, so I only needed a couple of long strips to “mark” the entire baby quilt.

And voila! Done in no time, with no marks to wash out.

Love it!❤️

That’s it for Tuesday Tips! Until next time, HAPPY QUILTING!

Jane

Mulberry Patch Quilts

My Favorite Iron for Quilting

My Favorite Iron for Quilting

One New Year resolution for 2019 is to organize leftover scraps, so I decided to spend a little time this morning ironing the mess. It just makes it so much easier to find what I need. That made me think about how much I love my iron…and about sharing that with you.

You may remember the earlier blog about the problems I had with the Rowenta Pro Steam Iron. I desperately needed a new iron. There are so many irons out there, I had no idea where to start.

Then I remembered the iron I used while I was at the quilting retreat at The Jones Mansion …a gravity fed iron. It was by far the BEST iron I’d ever used.

The model I decided to purchase was the Hot Steam Gravity Feed Iron, and I ordered it through Wawak.com sewing supplies (right around $100, including the iron, hot plate, hose, & water tank).

It was easy to hang the water tank from a plant hanger I attached to the wall above my window. And it uses tap water with a demineralizer (resin) that only needs replacing a couple times a year. It heats up fast, creates nice flat seams, and the on-demand steam by pressing the thumb switch is wonderful.

The only downside is that it’s not very portable. Because of the water tank, it is easiest to keep it in one spot.

Here’s the water tank…

And my lovely iron…I’ve had it since 2014 (for 6 years now) and still love it! ❤️

Paired with my homemade large ironing board surface and my new Wooly ironing mat, I’m a very happy camper (or I should say happy quilter)!

Until next time, HAPPY QUILTING,

Jane

Mulberry Patch Quilts

Mellow Yellow Organizer

Mellow Yellow Organizer

So I’m enjoying a few days on a quilting retreat at the lovely Jones Mansion Retreat Center. I always enjoy a few days away to relax, refresh, regenerate with a few quilting friends (new and old). I always get a lot of projects done (or at least started) and I always get inspired by my friends and their projects. So much creativity and talent!

This week I was in a room I’ve never had before — the Ivy Room. Isn’t it beautiful?

I’ve been able to enter small art quilts in the first two challenges of Project Quilting Season 9, and made woven fabric into a cell phone bag for the third challenge. But between all that was going on this week, plus packing and organizing for the retreat, I didn’t seem to have time for this challenge.

Then, today, the wonderful owner of the mansion gave us her own pattern and her tutoring skills (she’s an expert quilter and seamstress) to make an organizing mat to go under our sewing machines. I ran down to the local fabric store and found the perfect fabric … one with yellow measuring tape, and the other with spools of thread–many of them yellow.

Isn’t it the cutest?

After sewing it together, I added some YELLOW rick-rack and pink binding with a serpentine stitch.

Here it is…ta-da!

It’ll keep all my needed gadgets right by me and help keep things organized… Hmmmm…it has lots of YELLOW, and finding all my sewing gadgets and goodies at the ready makes me MELLOW! So … I know it’s a bit of a stretch, but I entered it in the “Mellow Yellow” challenge for Project Quilting Season 9 this week!❤️. I hope you’ll click on the link and vote for your favorite quilted entries. Voting begins Sunday (Feb 25) through Friday (Mar 2, 2018).

The mat will be great to bring along to retreats and classes, and it can do double-duty as a dust cover when I’m away from my machine… (which is never for long)!

Super cool. Thanks so much Lori!

For more info on other fabulous quilting (and sewing) retreats at the Jones Mansion In Historic Mineral Point, Wisconsin, see my earlier blog here Or visit their website here. You can even rent out the space for your very own retreat with friends.

Until next time, HAPPY QUILTING!

Jane

Mulberry Patch Quilts

.