Newborn Charity Quilt

Newborn Charity Quilt

Mikayla’s Grace is a wonderful charity in my area of Wisconsin that supports families with a baby in the NICU (neonatal ICU) and those who experience the death of a child or pregnancy loss at hospitals in the Dane County area.

Crafters from all over make beautiful handmade baby items that they sew, knit or crochet and send to Mikayla’s Grace — from gowns, hats, and booties, to baby blankets and quilts. Several times a year volunteers meet to assemble these donations into care packages and deliver them to local hospitals to distribute.

Melissa recently sent out an email asking for several handmade items that are needed for their next assembly day this June, including a special need for larger “newborn-size” blankets and quilts (from 22 to 30 inches square).

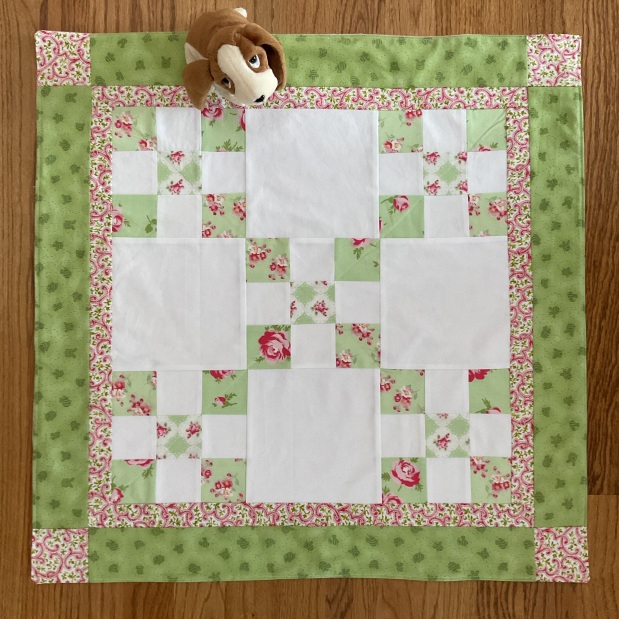
I’ve been thinking about devoting a few days to make some of these quilts to donate, and when I saw that this week’s Project Quilting Challenge was “Irish Chain” it was a perfect opportunity to join in on the challenge AND make the charity quilts. I have some pink cotton fabrics —charms, jelly rolls, layer cakes, and squares — left over from other projects. And found some pink flannel for the backing.

My first step was to pull fabrics from my stash that go together. For this little quilt, I found a few left-over layer cake squares with some other yardage.

Layer cakes aren’t ideal for strip quilting the sets for the single Irish chain, but I come from a frugal generation, and wanted to use up what I had. I was able to cut enough fabric to make the strip sets for two quilts. I drafted a quick little pattern on my Electric Quilt (EQ8) software to get an idea of how much background and border fabrics I needed and to make sure it ended up the right size.

The strips were cut 2-1/2” wide (the length of the layer cake) and sewn together in strip sets of three fabrics each (see photo). I pressed each seam towards the floral fabric.

Next, I sub-cut the strip sets 2-1/2” wide and then sewed them together into 9-patches (see photos).

You can see through my window that we’re having a snowstorm today, so it’s the perfect day to be in the sewing room!

The hardest part is finding enough scraps in my stash to coordinate and make two matching NICU quilts. I found just enough of a matching fabric print for a thin border & corner blocks, and just enough leftover green “bee print” to make them…yay! (cause I’m not going out inbthe snow to buy more!)

I’m happy with the pieced top. It turned out to be 25×25 inches. All that’s left is to quilt it and make a second one just like it!

I’m entering this photo in the Project Quilting challenge before I do.

Simple, fairly quick, and I hope they’ll be a blessing snd encouragement to a family and their new little one in the NICU. I know I’ll be praying for the recipients of each one.

I hope this encourages you to dig in your stash and make a quilt for your favorite charity!

Until next time, HAPPY QUILTING❣️

Jane, Mulberry Patch Quilts

Add a Quilt Block to Your Sweatshirt

Add a Quilt Block to Your Sweatshirt

This week’s challenge for Project Quilting (Season 15.5) is “wearables”. You can turn clothing into something else or “quilt-ify” something you wear or make a clothing-themed item.

Here are the normal rules, and you have one week from start to finish to meet the challenge.

  • Every challenge piece must be a FINISHED project seen through from INCEPTION to COMPLETION during the challenge timeline.
  • Each piece must stand alone as DONE to count toward prizes.
  • Your project does not need to be a traditional quilt, but must meet at least one of these requirements: include patchwork, include appliqué, have 3 layers stitched together by hand or machine.

BUT for this challenge they changed one rule — your project must be wearable, or have been made from previously worn items, or have another connection to clothes, shoes and fashion accessories.

After the challenge is complete, they have a drawing for prizes generously donated by sponsors sometime during the week following on Facebook live.

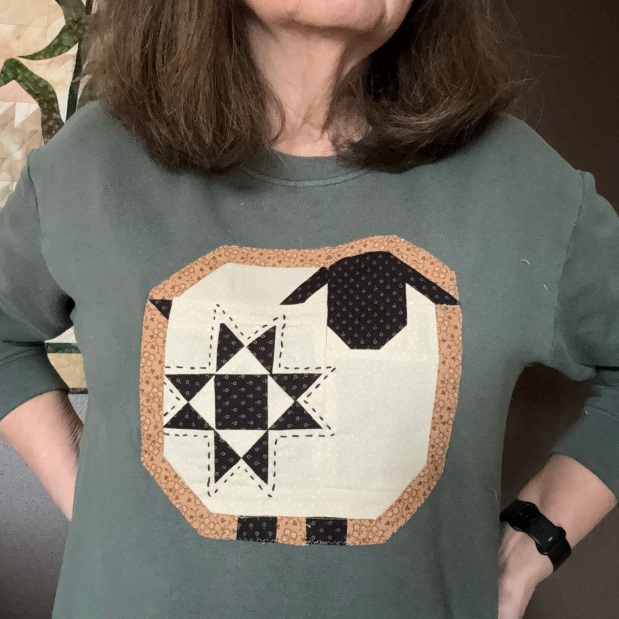
I usually buy a few cozy sweatshirts (at Costco) to wear around the house during winter and thought, why not make a quilt block and sew it to the front of one of them? So I made the sweetest little pieced lamb block that I’ve been dying to try and ironed the edges of the finished block under by 1/4 inch.

After finding the center of the sweatshirt, I tried it on and when I was happy with the placement, I pinned it to the shirt all around the block and sewed it to the sweatshirt with a narrow zig zag stitch

.

I carefully stitched around the edges, being sure not to catch any of the rest of the shirt in the stitching!

Then I machine quilted just inside the tan border.

I decided to leave his face blank, but still wanted to add some embellishment, so I got out my black pearl cotton and hand quilted around the star.

It was fun to do … a kind of slow-stitching. There wasn’t much to quilt so I took my time and really enjoyed hand stitching again.

I think it turned out pretty good. What do you think?

Here’s a closeup…. The block is from the quilt pattern “Wooly Stars” by Coriander Quilts that I sized down. I think it’s such a cute block.

It’s a fun way to take a garment you already know fits you comfortably and make it unique.

I hope you’ll give it a try! … wish me luck on the drawing … or better yet, get going and join in on one of the challenges yourself!

Until next time, HAPPY QUILTING,

Jane

Mulberry Patch Quilts

Fabric Tray for Project Quilting Challenge

Fabric Tray for Project Quilting Challenge

This week the Project Quilting 15.4 challenge is hour glass”

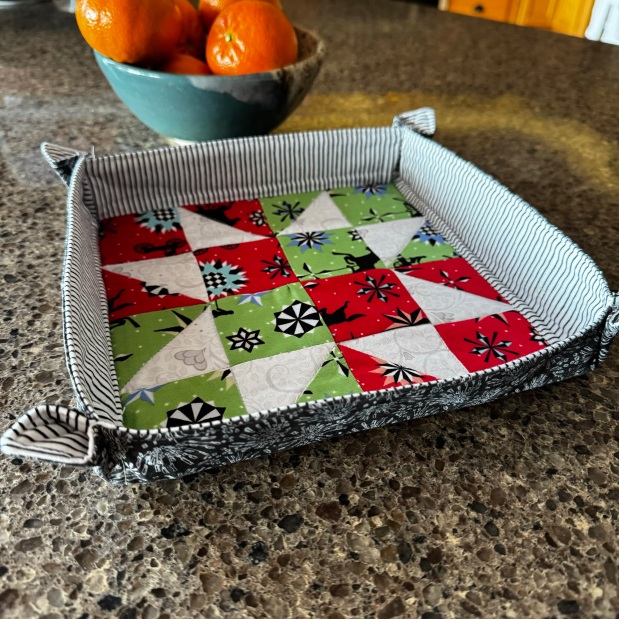
I knew just the block I wanted to use. Half square triangles pieced into a shimmering star. You can see the hour glass shape in the white star tips!

It was a very simple project and was cut, sewn, quilted & completely done in only an hour and a half.

After making 8 half square triangles, I added 8 squares to make 4 blocks measuring 4.5” (4” finished) each. Then I sewed the 4 blocks together forming the star (8.5”, 8”;finished). Next I simply added a 2.5” border (see above). Easy peasy.

I ironed fusible fleece to the finished top, and sewed it to a black print lining (same size) with right sides together (leaving an opening for turning), and turned it right side out.

I topped stitched the edges (closing the opening), then straight stitched all four sides between the border & the blocks all the way across (edge to edge) to help fold up the sided. I finished it up with some machine straight stitching in the ditch around the star.

All that was left to do was iron up each straight edge on the sewn border line & pinch the corner edges to make the sides of the tray, and then sew back and forth a few times at the top edges of the corners to hold them together.

I love the way it turned out. It’ll be great to hold jewelry or sewing supplies.

AND it can serve as a cozy for my 9×9” glass casserole dish! (Now that was not planned.). The tray/cozy turned out about 9” square with 1.75” sides.

I’m happy I got inspired by the challenge and got this posted for the contest early (this may be the first time in all these years that I actually got the project done the day after the challenge was posted!)

Why not try making a fabric tray using your favorite block? You can vary the size and depth to suit your needs. It’s a great, quick gift too.

If you’d rather buy one ready made, come see it in my Etsy store here.

Until next time, HAPPY QUILTING

Jane, Mulberry Patch Quilts

And a big shout out to Kim Lapacek (@persimondream) and her friend Trisha Frankland (@Quiltchicken) for putting on this challenge each year!!

“Inside Out” Quilted Heart Wall Hanging Mini

“Inside Out” Quilted Heart Wall Hanging Mini

When I saw the Challenge from Project Quilting for this week “Inside Out” the first thing I thought of was a rag quilt, or a quilt with raw seam edges showing on the right side. NOPE. (Everyone will be doing that.)

So next I looked up the phrase online. Besides the title of a new cartoon Disney movie, most posts were about how to “birth” a quilt by sewing the top & backing/batting right sides together & leaving a seam open to turn right side out to finish it instead if binding. NOPE.

Nothing else I saw or read inspired me… UNTIL I SAW the sweetest little mini quilt heart pattern called “INSIDE OUT”, TA-DA! …including a how-to video by Misty of Missouri Star Quilt Company.

I fell in love with it!

Not only will it work for the challenge because of the title, but it goes with Valentine’s Day (next week) and February Heart Month! Yay! So I started first thing Monday and had it all but the binding done by mid afternoon.

HERES HOW

After finding some rosy red/pink layer cakes left over from another project, I cut them down to 5” squares. If I had enough charms left over they’d work as well. I just happened to have these layer cakes left over with no purpose in mind. I added more 5” squares and five 3” squares in an off white yardage to create the center heart.

Cutting left over layer cakes into 5” squares
Variety of squares

Then I paired two 5” squares right side together and sewed 1/4” around the outside edges. Then cut them corner to corner twice to create 4 half square triangle blocks! (Hint: I think this is why it’s called “inside out”)

Here cutting corner to corner twice to make HST

Every HST was pressed & trimmed to 3” square.

I tried both the diagonal line on my Olfa 4-1/2 ruler & my new Bloc-Loc

I continued pairing, sewing, and cutting HST squares until I had enough, and watched Misty’s instructions in the video to place them on my design wall. .

Starts with four 3” tan squares, then two 3” tan squares below them

Once the center heart is formed, you just add HSTs to surround it.

All that was left to do was sew the squares together, add the batting & backing, quilt & bind. DONE in no time. And I had everything in my stash!

I echo quilted following the diagonal lines

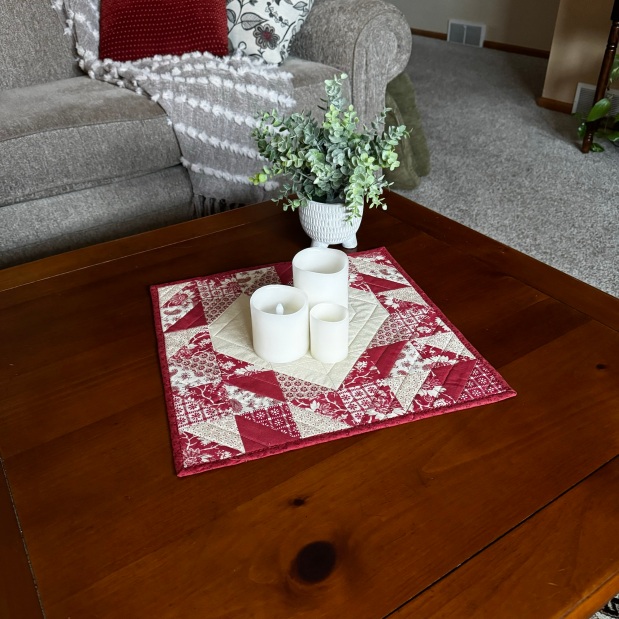
Here’s the finished mini quilt. I sewed hanging triangles to the top of the back to make it easy to slip a thin wooden dowel for hanging. I have Instructions on how to do this in this blog.

It can be used as a wall hanging or a table topper. It measures approximately 16 inches square.

I can imagine putting three together in a row for a cute table runner or long wall hanging.

Take a look at the video from Missouri Star Quilt Company to make a full size (with layer cakes) or the mini INSIDE OUT quilted wall hanging/table topper like I did. So easy and a great scrap-buster!

Until next time, HAPPY QUILTING!

Jane

Mulberry Patch Quilts

PS: A huge shout out to Kim Lapacek of Persimon Dreams and Trisha Frankland of Quilt Chicken for sponsoring Project QUILTING each season. Thank you!

Resizing my Ill-Fitting Quilted Jacket

A long time ago I had made a quilted jacket from a pattern I had used before. Funny, the other jacket fit perfectly and was so comfy. But for unknown reasons this time I was shocked to find this jacket was way too bulky for me in the shoulders and made me look and feel like a bear.

I didn’t like it at all, but I had put so much work into it I just couldn’t throw it away. Sadly I couldn’t figure out how or where to take it in to fix it.

So it stayed, unused, in my closet for a few years. I never took a photo with it on, but you can see in the photo above and below how the shoulder seams are unflattering and the bulk at the bottom.

I couldn’t figure out how or where to take in the side seams or sleeves to fix the problems. So it sat in my closet. I never wore it.

Since quilted jackets are coming back in style, I started to think about making another quilted jacket and using one of the newer patterns. I researched jacket patterns on Pinterest and found several I liked, and finally chose one called the Tamarack Jacket.

Then it dawned on me—what if I used this new pattern to completely recut and reconstruct the jacket in my closet instead of starting over from scratch?

I wish I had taken more photos to share with you as I got out my seam ripper and went to work unsewing all the seams in the jacket I would never wear.

Here (above) are the remnants of the knit ribbing and some of the extra fabric cut off after recutting the new pattern pieces.

Because the jacket was too big, I had plenty of room to use the new pattern pieces to recut them. The only place I had trouble was the length. Since the original pattern featured knit ribbing in the collar, cuffs, and bottom, I had to create more quilted fabric to add to it.

Luckily I had more of the coordinating batik fabric and was able to add lining & batting along with piecing strips together to make the sleeves the right length for the new pattern. But sadly, there wasn’t enough fabric left to lengthen the jacket so I chose not to add the pockets and make a shorter version.

You can see the bands of coordinating fabrics I used to lengthen the cuff of the sleeves in the photo above and below.

All that’s left to do is add a separating zipper that I’ll topstitch down the front and it’s done. And although it’s mot perfect, it has been transformed into a better fitting jacket that I will want to wear!

I did a little “cat walk” video on my instagram page, which I can’t replicate here, but if you’re interested, you can view it at this link:

https://www.instagram.com/reel/CvdGKjupLIY/?igsh=MWgyOGlhdTdyczJjZw==

So if, like me, you’ve made a garment that doesn’t fit and it’s sitting in your closet, never worn, I hope this post might encourage you to salvage it by un-sewing and recutting/resewing it with a new pattern.

Until next time, HAPPY QUILTING!

Jane, Mulberry Patch Quilts

Project Quilting Season 13.6 Flying Geese

Project Quilting Season 13.6 Flying Geese

So this is the last Project Quilting challenge (season 13)for 2022. As you know the challenge quilted project can be anything (from a quilted coaster to a full sized quilt) but has to be done (start to finish) during the challenge week. It’s amazing what quilters can accomplish.

I don’t have a lot of time this week, but I really wanted to make something simple so I don’t miss out on participating this week.

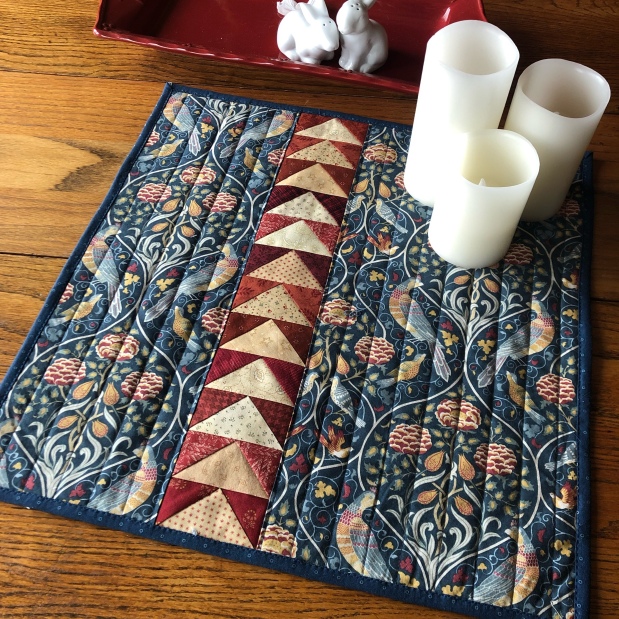
I used my Electric Quilt 8 (EQ8) computer program to quickly design a doll quilt/table topper with a strip of flying geese going slightly off center. The program let me print the blocks for foundation piecing (paper piecing).

I found some great fabrics in my stash, including one of my favorite fabrics—Morris & Company by Free Spirit. I think that dark blue print worked great as the background fabric.

So here’s my entry after quilting and binding. Isn’t it cute on the doll bed?

Or it can be used as a table-topper.

I’ve learned how to make sweet little labels that fit nicely on the back corner of my quilts.

What do you think?

I want to give a big shout out to Kim, @persimondreams, & Trish, @Quilt Chicken, for providing us with another fun season of Project Quilting! Thanks!!

Until next time, HAPPY QUILTING!

Jane, Mulberry Patch Quilts

@mulberrypatchquilts

Sunflowers for Ukraine PQ13 Entry

Sunflowers for Ukraine PQ13 Entry

Like many of you, I can’t stop thinking about and praying for the brave people of Ukraine as they are under attack. As Lella Boutique said so beautifully in her recent blog:

“Sunflowers are powerful and relentless in their pursuit of light … It seems so fitting that Ukraine’s national flower is a sunflower. Sunflowers have become a powerful symbol of the Ukrainian people; their heart, strength, and determination to fight for the good. It’s impossible not to be inspired by their spirit. We pray for these heroic people to overcome the evil at their door. We pray for the leaders of our nation and the world to know the right way to help.”

So for this week’s Project Quilting Season 13.5 challenge, I knew I had to incorporate sunflowers and the colors of the Ukrane flag into my piece. The PQ challenge is “Rhythm & Repetition”, so the rhythm is the heartbeat of those brave Ukrainians and the repetition will be the sunflower blocks themselves.

I found the most beautiful quilt pattern by Jen Daly Quilts shop on Etsy as an inspiration and adapted it into a small table runner and for cutting with my AccuquiltGo. Not only do I love the pattern and colors, but it’s a great “stash busting” project. And I know my Accuquilt dies will make it fast and the piecing easy.

From Etsy Shop: Jen Daly Quilts

Here’s a photo of all the fabrics I pulled from my stash of quilting fabrics in the browns, yellows, and blues that I’m looking for.

And here I’m cutting the squares and triangles on my Accuquilt.

It’s helpful to cut more pieces than I need and then “audition” them on my design wall. You can see that not all the fabrics made the final cut.

I love the way the gold and yellow petals seem to sparkle, and the depth created by the variation of the shades of blue.

The Accuquilt makes it easy to piece…because the corner “dog ears” are trimmed by the die, they easily fit together.

There was a lot of piecing to do…making me wonder if I’d get it done it in time. The PQ challenge entry has to be done from start to finish in one week, and I didn’t start this project until day 5! But I found I made a lot of progress by setting my timer and working on it in smaller chunks of a time over a couple of days, rather than in one sitting.

The finished piece (13 x 32”) can be used as a table runner OR a wallhanging.

I’ve sewn “hanging pockets” into two corners to slip a thin wooden dowel into for hanging on the wall.

If you’d like to contribute to the Ukrainian situation, I’d like to pass this information along that I received from good quilting friend (thanks Sally!). It’s smart to do some research on the organizations first. Here are two excellent websites to go to:

https://www.charitywatch.org/…/top-rated-charities…

https://www.charitynavigator.org

Like so many of my quilting friends, I’ve decided to sell this table runner in my Mulberry Patch Quilts Etsy Shop and donate the proceeds to help Ukraine refugees.

UPDATE: The runner has been sold (thanks to a generous friend in FL)…and every penny donated to a reputable charity (rated A-) that is airlifting much needed supplies to their partners in Ukraine & working with displaced children and families. Thank you so much !!

Until next time, HAPPY QUILTING!

Jane, Mulberry Patch Quilts

Silhouette Art quilt: Project Quilting 13.2

Silhouette Art quilt: Project Quilting 13.2

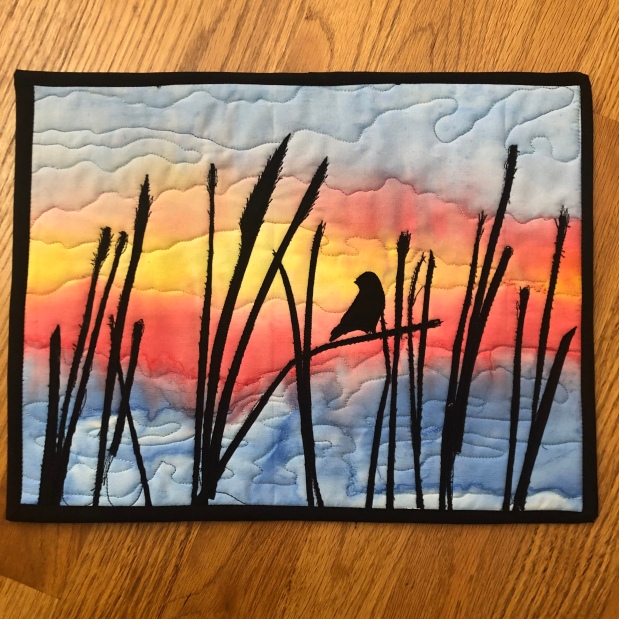
The challenge for this week’s Project Quilting Season 13.2 inspired me: “In Silhouette”. Participants have only a week to begin and finish a quilted item for the challenge, and it took me a few days just to come up with the idea.

But once I did get the idea, I was off and running or should I say off and sewing)! I found the perfect fabric for the background from my stash of hand dyed and painted fabric. It reminded me of a sunset.

I free motion quilted the background first using a variety of variegated threads. Next I fused Steam-a-Seam 2 onto my black fabric and cut out the shapes and fused them to the background.

Then the black shapes were quilted with black thread, and I thread sketched the blades a bit to give them the look of grass or cattails. Blowing in the breeze.

I finished it off with a simple black binding, adding folded corners on the top corners for hanging.

Done and ready to enter in this week’s challenge. And it’ll be for sale in my shop later today.

Until next time, HAPPY QUILTING!

Jane, Mulberry Patch Quilts

AccuquiltGo Sawtooth Star: Get Mileage Out of the Dies You Own

AccuquiltGo Sawtooth Star: Get Mileage Out of the Dies You Own

You’ll see in my recent posts that I’m obsessed with learning how much mileage I can get with my Accuquilt GO!Cutter and the dies I already own.

I love the simplicity of the Sawtooth Star block and so I decided to see if I could design some pieced items with it using the dies I have.

Although I don’t own the 8” Go!Cube, I have almost all the shapes (see those in bold print on the list below). The only one shape I was missing was for the “flying geese” part of the star: the #4 GO! Quarter Square Triangle — so I ordered it. Yay!

To make the SAWTOOTH STAR BLOCK, you need four die shapes: GO! Shapes 1, 2, 4, & 5 (I’ve listed all the shapes that come in the GO! Cube below, and highlighted in bold the four you need),

  1. GO! Square-4 1/2″ (4″ Finished) (55708) —GOT IT
  2. GO! Square-2 1/2″ (2″ Finished) (55709) —GOT IT
  3. GO! Half Square Triangle-4″ Finished Square (55710)
  4. GO! Quarter Square Triangle-4″ Finished Square (55711)ORDERED IT
  5. GO! Half Square Triangle-2″ Finished Square (55712) —GOT IT
  6. GO! Square on Point-3 1/4″ (2 3/4″ Finished) (55713)
  7. GO! Parallelogram 45°-2 3/4″ x 3 1/2″ Sides (2 1/16” x 2 13/16″ Finished) (55714)

Next I fired up EQ8 on my laptop and started designing. Here are just a few of the ideas.

A Square Table Topper with borders
Larger Table Topper with 9-patch centers
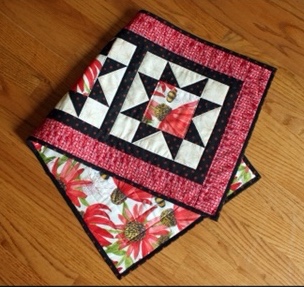
And a table runner with three stars.

I decided start with the table runner using some beautiful spring fabrics I had in my stash by Robin Pickens for Moda. I seem to love every fabric line she designs!

It’s so fast and easy to cut the pieces with my Accuquilt GO! The precut notches at the corners really help with accurate piecing.
Here are the cut pieces for the stars (I changed my mind on the background fabric)
The pre-cut notches really help with more accurate piecing!
Adding the second star point.
All I needed to add were the corner squares and center square, fussy cut from the coneflower print.

After making two more stars, I changed the original design a bit by surrounding each star with a black inner border and the whole runner with red outer border.

I think it looks good as a wall hanging too.

I adore her coneflowers, so I used more on the back of the runner—it’s reversible.

It was so much fun to make, I couldn’t stop there…so next I tried piecing a simple table topper with only one star surrounded with an inner and outer border for myself.

Somehow the points on stars never looked this good when I used a ruler & rotary cutter! I credit the accuracy of the Accuquilt, not my piecing.

That’s how easy it is to figure out how to get the most “mileage” out of dies you already own (or like me buy one more die) to create dozens of new blocks. I hope you’ll fire up your EQ8 software or get out your graph paper and give it a try!

If you like the table-runner, it’s now on sale in my Etsy shop. The table topper has a found a new home in my diningroom 😉.

I hope you’ll give the Sawtooth Star a try! Until next time, HAPPY QUILTING!

Jane, Mulberry Patch Quilts

Tuesday Tips: AccuquiltGo Chisel Die & Braid Strip

Tuesday Tips: AccuquiltGo Chisel Die & Braid Strip

Since I last talked about my new obsession with my AccuquiltGo cutter (see last post) I’ve been busy trying out the dies I already own to make as many different blocks as I can. It’s fun to take apart a block and find the die shapes to make them. While playing, I discovered a new use for my Chisel Die.

Well, I didn’t really discover it—lots of other quilters discovered this… But I discovered their discovery (thank you Pinterest). So of course I couldn’t wait to give it a try!

Did you know you can use the Accuquilt Chisel Die to sew a braided strip? I didn’t.

It’s so easy! And a great “scrapbuster”. Just cut out a bunch of chisels (remember you can cut 6 at a time). It’s a one way (directional) die, so be sure to cut half with you fabric right side up, and half with your fabric right side down. Then place them using the photo above as a guide.

Sew them together, starting at the top, lining up the 90 degree ends. Keep sewing on chisels in that same manner until they’re a little bit longer than what you need and cut straight across the bottom and top with your ruler & rotary cutter to trim off the ends.

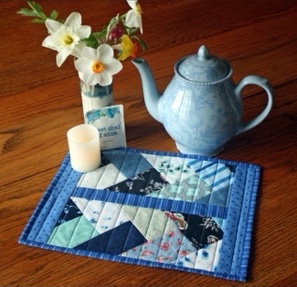
Voila! The braided strips are ready to use in your quilt. I made mine into a mug rug (snack mat). But wouldn’t they also make great borders? Or maybe a strip quilt? Or the side of a bag?

This one’s for sale in my Etsy Shop.

And it’s reversible.

Hope this little tutorial was helpful. Until next time…

HAPPY QUILTING!

Jane, Mulberry Patch Quilts