Newborn Charity Quilt

Newborn Charity Quilt

Mikayla’s Grace is a wonderful charity in my area of Wisconsin that supports families with a baby in the NICU (neonatal ICU) and those who experience the death of a child or pregnancy loss at hospitals in the Dane County area.

Crafters from all over make beautiful handmade baby items that they sew, knit or crochet and send to Mikayla’s Grace — from gowns, hats, and booties, to baby blankets and quilts. Several times a year volunteers meet to assemble these donations into care packages and deliver them to local hospitals to distribute.

Melissa recently sent out an email asking for several handmade items that are needed for their next assembly day this June, including a special need for larger “newborn-size” blankets and quilts (from 22 to 30 inches square).

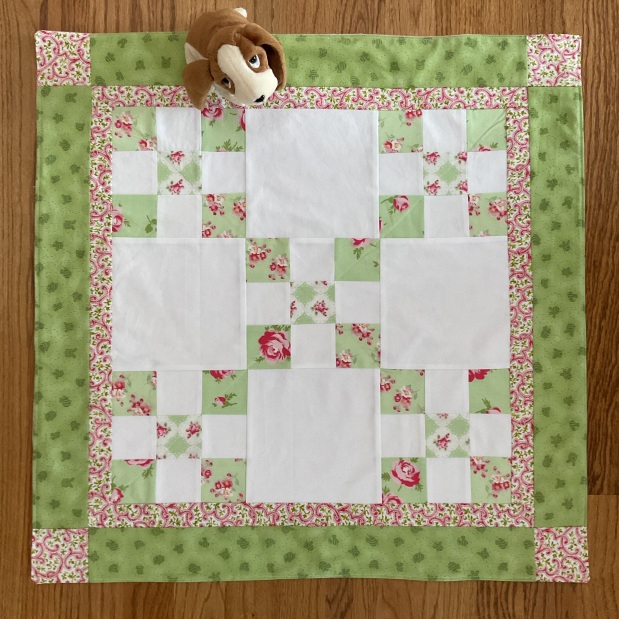
I’ve been thinking about devoting a few days to make some of these quilts to donate, and when I saw that this week’s Project Quilting Challenge was “Irish Chain” it was a perfect opportunity to join in on the challenge AND make the charity quilts. I have some pink cotton fabrics —charms, jelly rolls, layer cakes, and squares — left over from other projects. And found some pink flannel for the backing.

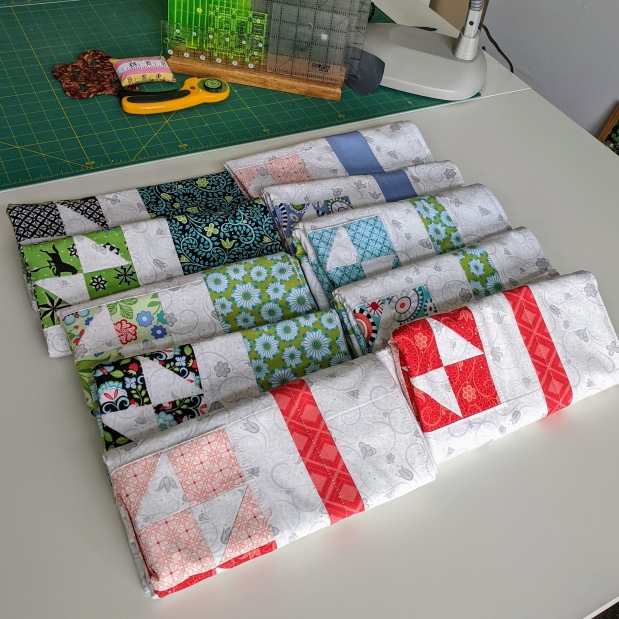
My first step was to pull fabrics from my stash that go together. For this little quilt, I found a few left-over layer cake squares with some other yardage.

Layer cakes aren’t ideal for strip quilting the sets for the single Irish chain, but I come from a frugal generation, and wanted to use up what I had. I was able to cut enough fabric to make the strip sets for two quilts. I drafted a quick little pattern on my Electric Quilt (EQ8) software to get an idea of how much background and border fabrics I needed and to make sure it ended up the right size.

The strips were cut 2-1/2” wide (the length of the layer cake) and sewn together in strip sets of three fabrics each (see photo). I pressed each seam towards the floral fabric.

Next, I sub-cut the strip sets 2-1/2” wide and then sewed them together into 9-patches (see photos).

You can see through my window that we’re having a snowstorm today, so it’s the perfect day to be in the sewing room!

The hardest part is finding enough scraps in my stash to coordinate and make two matching NICU quilts. I found just enough of a matching fabric print for a thin border & corner blocks, and just enough leftover green “bee print” to make them…yay! (cause I’m not going out inbthe snow to buy more!)

I’m happy with the pieced top. It turned out to be 25×25 inches. All that’s left is to quilt it and make a second one just like it!

I’m entering this photo in the Project Quilting challenge before I do.

Simple, fairly quick, and I hope they’ll be a blessing snd encouragement to a family and their new little one in the NICU. I know I’ll be praying for the recipients of each one.

I hope this encourages you to dig in your stash and make a quilt for your favorite charity!

Until next time, HAPPY QUILTING❣️

Jane, Mulberry Patch Quilts

“Inside Out” Quilted Heart Wall Hanging Mini

“Inside Out” Quilted Heart Wall Hanging Mini

When I saw the Challenge from Project Quilting for this week “Inside Out” the first thing I thought of was a rag quilt, or a quilt with raw seam edges showing on the right side. NOPE. (Everyone will be doing that.)

So next I looked up the phrase online. Besides the title of a new cartoon Disney movie, most posts were about how to “birth” a quilt by sewing the top & backing/batting right sides together & leaving a seam open to turn right side out to finish it instead if binding. NOPE.

Nothing else I saw or read inspired me… UNTIL I SAW the sweetest little mini quilt heart pattern called “INSIDE OUT”, TA-DA! …including a how-to video by Misty of Missouri Star Quilt Company.

I fell in love with it!

Not only will it work for the challenge because of the title, but it goes with Valentine’s Day (next week) and February Heart Month! Yay! So I started first thing Monday and had it all but the binding done by mid afternoon.

HERES HOW

After finding some rosy red/pink layer cakes left over from another project, I cut them down to 5” squares. If I had enough charms left over they’d work as well. I just happened to have these layer cakes left over with no purpose in mind. I added more 5” squares and five 3” squares in an off white yardage to create the center heart.

Cutting left over layer cakes into 5” squares
Variety of squares

Then I paired two 5” squares right side together and sewed 1/4” around the outside edges. Then cut them corner to corner twice to create 4 half square triangle blocks! (Hint: I think this is why it’s called “inside out”)

Here cutting corner to corner twice to make HST

Every HST was pressed & trimmed to 3” square.

I tried both the diagonal line on my Olfa 4-1/2 ruler & my new Bloc-Loc

I continued pairing, sewing, and cutting HST squares until I had enough, and watched Misty’s instructions in the video to place them on my design wall. .

Starts with four 3” tan squares, then two 3” tan squares below them

Once the center heart is formed, you just add HSTs to surround it.

All that was left to do was sew the squares together, add the batting & backing, quilt & bind. DONE in no time. And I had everything in my stash!

I echo quilted following the diagonal lines

Here’s the finished mini quilt. I sewed hanging triangles to the top of the back to make it easy to slip a thin wooden dowel for hanging. I have Instructions on how to do this in this blog.

It can be used as a wall hanging or a table topper. It measures approximately 16 inches square.

I can imagine putting three together in a row for a cute table runner or long wall hanging.

Take a look at the video from Missouri Star Quilt Company to make a full size (with layer cakes) or the mini INSIDE OUT quilted wall hanging/table topper like I did. So easy and a great scrap-buster!

Until next time, HAPPY QUILTING!

Jane

Mulberry Patch Quilts

PS: A huge shout out to Kim Lapacek of Persimon Dreams and Trisha Frankland of Quilt Chicken for sponsoring Project QUILTING each season. Thank you!

Combining Art Quilting Techniques

Combining Art Quilting Techniques

When you have an idea in mind for your art quilt, often combining techniques you’ve learned along the way and a little experimentation will help you reach your goal.

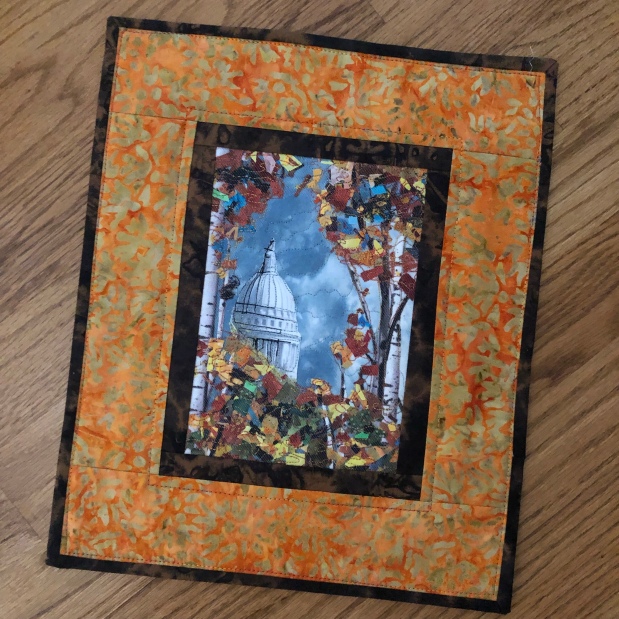
My goal for this small landscape art quilt was to recreate a scene of our Capitol shown in the distance through the autumn leaves. The fall season is my favorite, and so beautiful at the UW-Madison with the variety of trees and colors. Having worked in the heart of this beautiful campus for many years, I’ve had many opportunities to view it.

So how do I begin to reach this goal…where do I start? I cut a base of scrim and a thin wool batting about 8×10” and drew a 6×8” border, giving me a background with border parameters.

I knew I needed to begin with two important elements for the background … the Capitol and the perfect hand-dyed fabric for the sky. For the Capitol I used photo-transfer. And for the sky I auditioned several fabrics, until I narrowed it down to four. (Note: The “leaves” in the photos were left over from another project—just used temporarily to me help decide.

When I was experimenting with dying cotton fabric with Procion dye a few years ago, I made lots of fabrics that work nicely for sky and water. It’s great to have that stash on hand!

I liked the sky fabrics in the two bottom photos the most. I felt they had more depth and interest. So I made two. Why not? It’ll give me a chance to experiment more with my stitching and color choices for leaves & thread.

I found several colors of Aurifil and Sulky threads to “thread paint” texture and detail into the building and sky. Shades of grey blend nicely.

Now for the tress and autumn leaves. First I experimented by cutting individual leaves to fuse in larger chunks, but I didn’t like the look (sorry, I forgot to take a photo). So instead I opted to use the “confetti” technique by cutting small “confetti like” pieces of fabric and placing them directly on the background, covering it with tulle, pinning, and then stitching it down to keep in it place.

I rotary cut dozens of batik fabrics in fall colors and started planning out where the leaves would go. A tweezers helps with this process. …don’t sneeze!!

Once I was satisfied with the placement, I covered it with white tulle (to keep it lighter), pinned it together, and auditioned some of my Sulky and Aurifil threads to machine quilt it. Note the birch tree trunks added underneath.

The free-hand machine quilting not only keeps the little pieces of fabric together, but it adds texture and color.

I love the final look with the birch tree trunks under the stitched leaves. Now I need to remove (cut away) the excess tulle. And add a couple of borders, some backing, batting, and finally on the hanging triangles and binding.

Here’s a quick video of most of the final process:

Here’s a one minute video showing my process.

Whenever possible, I like to chose a fabric for the backing that’s interesting or fun. For one of them I found a fabric I’d experimented with marbleized on earlier, and for the other some fabric that gradated from green to brown. I like to sew folded triangles into the upper corners to make it easy to hang on the wall. (See the back of the quilt towards

the end of the video.)

Both art quilts are now in my Mulberry Patch Quilts Etsy Shop.

As always, I hope you enjoyed seeing the process. And that you’ll have fun creating your own favorite scene and experiment with different techniques along the way.

Happy Quilting!

Jane, Mulberry Patch Quilts

Project Quilting Season 13.6 Flying Geese

Project Quilting Season 13.6 Flying Geese

So this is the last Project Quilting challenge (season 13)for 2022. As you know the challenge quilted project can be anything (from a quilted coaster to a full sized quilt) but has to be done (start to finish) during the challenge week. It’s amazing what quilters can accomplish.

I don’t have a lot of time this week, but I really wanted to make something simple so I don’t miss out on participating this week.

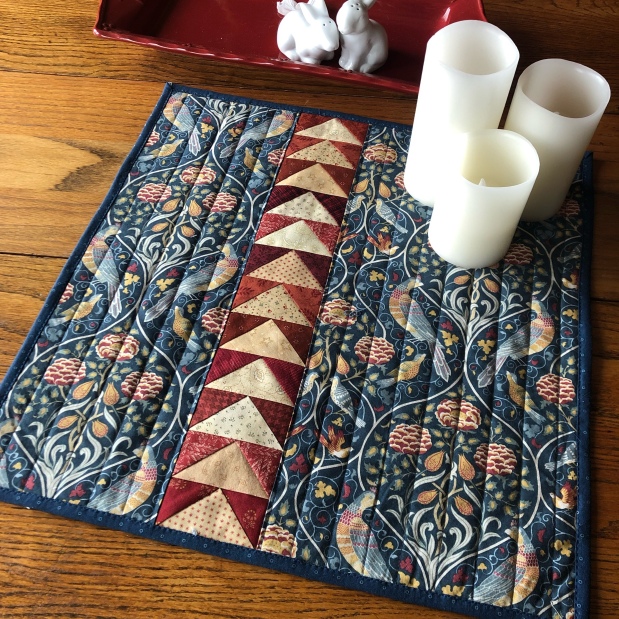
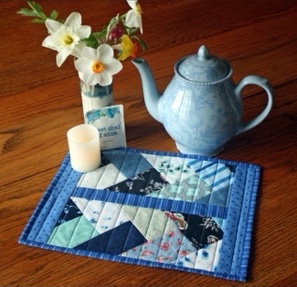
I used my Electric Quilt 8 (EQ8) computer program to quickly design a doll quilt/table topper with a strip of flying geese going slightly off center. The program let me print the blocks for foundation piecing (paper piecing).

I found some great fabrics in my stash, including one of my favorite fabrics—Morris & Company by Free Spirit. I think that dark blue print worked great as the background fabric.

So here’s my entry after quilting and binding. Isn’t it cute on the doll bed?

Or it can be used as a table-topper.

I’ve learned how to make sweet little labels that fit nicely on the back corner of my quilts.

What do you think?

I want to give a big shout out to Kim, @persimondreams, & Trish, @Quilt Chicken, for providing us with another fun season of Project Quilting! Thanks!!

Until next time, HAPPY QUILTING!

Jane, Mulberry Patch Quilts

@mulberrypatchquilts

Sunflowers for Ukraine PQ13 Entry

Sunflowers for Ukraine PQ13 Entry

Like many of you, I can’t stop thinking about and praying for the brave people of Ukraine as they are under attack. As Lella Boutique said so beautifully in her recent blog:

“Sunflowers are powerful and relentless in their pursuit of light … It seems so fitting that Ukraine’s national flower is a sunflower. Sunflowers have become a powerful symbol of the Ukrainian people; their heart, strength, and determination to fight for the good. It’s impossible not to be inspired by their spirit. We pray for these heroic people to overcome the evil at their door. We pray for the leaders of our nation and the world to know the right way to help.”

So for this week’s Project Quilting Season 13.5 challenge, I knew I had to incorporate sunflowers and the colors of the Ukrane flag into my piece. The PQ challenge is “Rhythm & Repetition”, so the rhythm is the heartbeat of those brave Ukrainians and the repetition will be the sunflower blocks themselves.

I found the most beautiful quilt pattern by Jen Daly Quilts shop on Etsy as an inspiration and adapted it into a small table runner and for cutting with my AccuquiltGo. Not only do I love the pattern and colors, but it’s a great “stash busting” project. And I know my Accuquilt dies will make it fast and the piecing easy.

From Etsy Shop: Jen Daly Quilts

Here’s a photo of all the fabrics I pulled from my stash of quilting fabrics in the browns, yellows, and blues that I’m looking for.

And here I’m cutting the squares and triangles on my Accuquilt.

It’s helpful to cut more pieces than I need and then “audition” them on my design wall. You can see that not all the fabrics made the final cut.

I love the way the gold and yellow petals seem to sparkle, and the depth created by the variation of the shades of blue.

The Accuquilt makes it easy to piece…because the corner “dog ears” are trimmed by the die, they easily fit together.

There was a lot of piecing to do…making me wonder if I’d get it done it in time. The PQ challenge entry has to be done from start to finish in one week, and I didn’t start this project until day 5! But I found I made a lot of progress by setting my timer and working on it in smaller chunks of a time over a couple of days, rather than in one sitting.

The finished piece (13 x 32”) can be used as a table runner OR a wallhanging.

I’ve sewn “hanging pockets” into two corners to slip a thin wooden dowel into for hanging on the wall.

If you’d like to contribute to the Ukrainian situation, I’d like to pass this information along that I received from good quilting friend (thanks Sally!). It’s smart to do some research on the organizations first. Here are two excellent websites to go to:

https://www.charitywatch.org/…/top-rated-charities…

https://www.charitynavigator.org

Like so many of my quilting friends, I’ve decided to sell this table runner in my Mulberry Patch Quilts Etsy Shop and donate the proceeds to help Ukraine refugees.

UPDATE: The runner has been sold (thanks to a generous friend in FL)…and every penny donated to a reputable charity (rated A-) that is airlifting much needed supplies to their partners in Ukraine & working with displaced children and families. Thank you so much !!

Until next time, HAPPY QUILTING!

Jane, Mulberry Patch Quilts

Tuesday Tips: AccuquiltGo Chisel Die & Braid Strip

Tuesday Tips: AccuquiltGo Chisel Die & Braid Strip

Since I last talked about my new obsession with my AccuquiltGo cutter (see last post) I’ve been busy trying out the dies I already own to make as many different blocks as I can. It’s fun to take apart a block and find the die shapes to make them. While playing, I discovered a new use for my Chisel Die.

Well, I didn’t really discover it—lots of other quilters discovered this… But I discovered their discovery (thank you Pinterest). So of course I couldn’t wait to give it a try!

Did you know you can use the Accuquilt Chisel Die to sew a braided strip? I didn’t.

It’s so easy! And a great “scrapbuster”. Just cut out a bunch of chisels (remember you can cut 6 at a time). It’s a one way (directional) die, so be sure to cut half with you fabric right side up, and half with your fabric right side down. Then place them using the photo above as a guide.

Sew them together, starting at the top, lining up the 90 degree ends. Keep sewing on chisels in that same manner until they’re a little bit longer than what you need and cut straight across the bottom and top with your ruler & rotary cutter to trim off the ends.

Voila! The braided strips are ready to use in your quilt. I made mine into a mug rug (snack mat). But wouldn’t they also make great borders? Or maybe a strip quilt? Or the side of a bag?

This one’s for sale in my Etsy Shop.

And it’s reversible.

Hope this little tutorial was helpful. Until next time…

HAPPY QUILTING!

Jane, Mulberry Patch Quilts

Dreaming of a Vacation Art Quilt: Project Quilting

Dreaming of a Vacation Art Quilt: Project Quilting

We’ve got mounds of snow outside, temps below zero, and covid all keeping us at home. So when Project Quilting announced it’s challenge theme of Virtual Vacation, I was on board! It was so nice to dream of a vacation while thinking about a quilt to make for the contest.

You’d think I’d be dreaming up a vacation to Florida, sunny Hawaii, or some other place warm. But I happened to see a photo on Pinterest of the Bayfield Wisconsin area in our beautiful northern Wisconsin winter, and it reminded me how much I miss our trips up to Lake Superior, and I wished we were there again. Of course I’d want to be warm and toasty inside a beautiful cozy log cabin with a roaring fire in the fireplace, a hot cup of coffee or cocoa, relaxing and looking at a gorgeous view (like this of Lake Superior) through a picture window (may as well dream big).

So I started digging into my stash to find just the right fabric for the snowy background, water, the islands, and trees…

I started with a rough sketch on paper the size I wanted. Then using my light box, I traced the basic shapes of the lake, hill, trees, and skyline in pencil. I got out my soft pastels and some fabric markers and my fusible web and powder.

I thought I might try my “Bo-Nash Fuse It” powder to help keep the fabrics in place. I sprinkled some powder between the fabrics and pressed to fuse them down. It’s the first time I’ve tried it, and I like it. It gives the fabric a lighter hand than the iron-on double sided fusible web and it keeps everything in place until I can stitch it down.

Does your studio get as messy as mine when you’re “in the zone” creating? I see some cleaning up in my future.

In the photo below, I’m adding the islands to the horizon, the water, and some birch trees. I used double sided fusible web on the trees, fusing it to the back of the tree fabric before cutting.

Now it’s time to use my soft pastels to shade and highlight to add some depth. Shading the trees, and under the trunks.

Oops, that pine tree needs redoing. And I think I’ll use a finer point marker for the additional twigs and branches. It’s a process…trial and error…to get it to where I like it.

Now the branches look better, and I like this pine tree better too. I think highlighting the upper water with a touch of white & pink helped and using a darker turquoise pastel helped to blend the two portions of water together.

I couldn’t resist making a mini art quilt using similar colors and scene. For the mini, I created the background on the batting/backing, and quilt that first.

And then I added the foreground and quilted that. Here I’m choosing different color thread for quilting the lake & snow.

12×15”

Quilting (free motion & walking foot) is done. Here are a few closeups…

And here’s how the little mini turned out (only 5 x 7 inches)…

5×7 inch mini

And here’s couple more photos (below) of the larger version again…

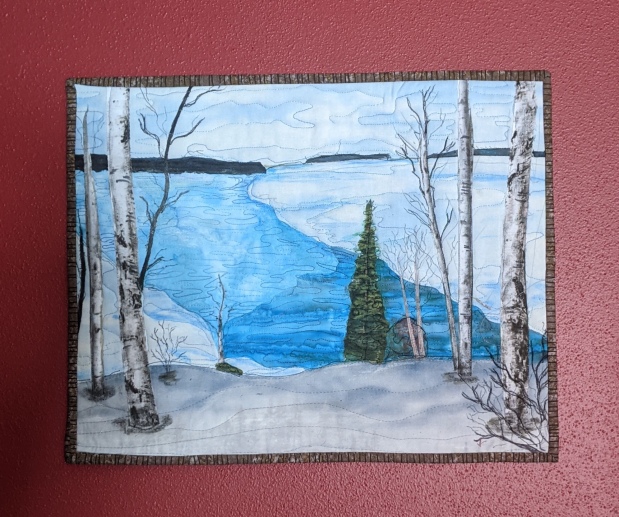
12×15” Landscape on red wall
12×15”

Since they were both done start to finish within the challenge dates, either one qualifies for the Project Quilting challenge. I think I’ll enter the larger one. Wish me luck!

And they’ll both be listed for sale in my Etsy shop soon.

Until next time, HAPPY QUILTING!

Jane

Mulberry Patch Quilts

How to Bind Your Quilted Wall Hanging with 1-1/2” Single Fold Binding

How to Bind Your Quilted Wall Hanging with 1-1/2” Single Fold Binding

Normally I bind my quilts (baby quilts, lap quilts, bed quilts) using double folded straight-of-grain binding cut between 2-1/4 to 2-1/2 inches wide, folded in half (wrong sides together) and sewn on the quilt. For more info on that process, go to my blog post: How to Bind a Quilt—The Secret to Perfect Corners. Double fold is great for projects that will take need to stand up to a lot of wear and tear.

But I’ve found that single fold binding is perfect for most of my smaller projects, like wall hangings, table toppers, etc. I think it has a better look…not as thick and bulky, but nice and crisp. Plus you save on fabric. Here’s how to do it.

Cut 1-1/2 inch strips straight-of-grain

Whether I’m making double fold or single fold binding, I always cut on the straight of grain (from selvedge to selvedge). The only exception to this rule are projects that have curved edges…something with rounded corners, scallops, or completely round. That’s the only time I bother to cut on the bias. For most of my art quilts, wall hangings, or runners (which all have straight edges) cutting 1-1/2 inch strips on the straight-of-grain is fine.

First, figure out how many strips to cut. Take the measurement of the parameter of your project by adding up the length of the sides, top, and bottom and cut the number of 1-1/2 inch wide strips you need to equal that number plus a few extra inches. It never hurts to have too much.

Sew the strips ends right sides together at a 90 degree angle and sew from one corner (where they meet) to the other corner (I’m pointing to it with my tweezers).

Trim the seams to about 1/4 inch and press each open.

Starting in the center of one side of the project and leaving a long tail (about 6 inches or more) start sewing one side of the binding to the right side of the project. When you’re 1/4 inch from the corner, stop with the needle down, pivot, and sew off the corner edge at a 45 degree angle.

Take it out from under the presser foot and turn to the next unsewn edge. Flip the binding up so it’s parallel to this next edge.

When I get junk mail, I save those laminated cards they often send. They’re perfect for this technique. Any thin plastic card or index card will work. This technique will help you get the feel for how to get perfect mitered corners on your binding. Just place the card across top raw edge of the quilt/binding (top) and bring the binding down across the top of the card and flush with the raw edge of the next edge to sew.

Bring the binding over the card, flush with edge of next portion & pin

I put a pin just below the card to keep it in place and then slip the card out.

Then continue sewing from the edge to the next corner and repeat the process until you come to where you started. Stop sewing several inches from the beginning and take it to your cutting table.

You’ll have a “tail” on each end and several inches (about 8-10”) between where you started & stopped sewing in the middle of one side.

To join these two tail ends, trim the right side tail of your binding so it ends half way between the beginning & the end of your sewing.

Lay that trimmed binding piece over the end you just trimmed.

Place your left tail over the right & fold it back until it’s in line with the right edge of that extra piece of binding and cut it at that fold. Perfect! (The ends of the binding tails will overlap by the width of that extra binding, which in this case is 1-1/2 inches, but this trick works with any size binding and NO MATH or special tools needed! So I always do it. Yay.

To make it really nice, use your ruler & a fabric marker to draw a 45 degree line as a guide to sew on.

Then overlap the binding ends as shown above & sew right sides together on that drawn line.

Double-check to be sure it’s sewn the right way (ask me how I know), and then trim the seam to 1/4 inch and press open. Line up the raw edges and finish sewing the binding to the quilt.

Tada! All sewn. All that’s left it to fold it to the back & hand sew.

First iron the binding out from the right side, all the way around.

Turn the quilt over and from the back turn the raw edge of the binding in half so it meets the raw edge of the quilt (at the corners too)…

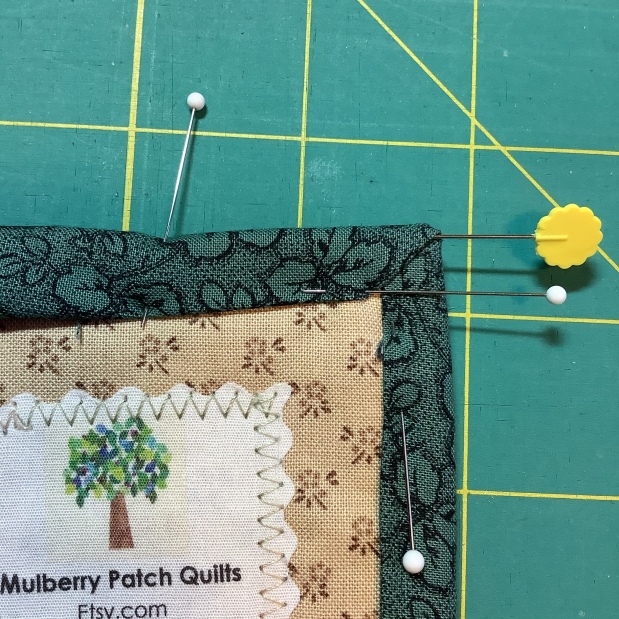
Then fold in again, bringing the folded edge over so it covers the stitching and pin. Stop at the corner, pinning as close as you can to a 1/4” from the edge.

To make a crisp mitered corner lay a pin or stiletto across the corner edge of the binding just to hold it in place (see photo) …

…while folding the next edge & pin. See how nicely the corner miters? Continue folding/pinning around the quilt.

Then sew the folded/pinned edge to the back by hand.

Don’t the corners look great? …From the back…

…as well as the front!

Double Star Barn Quilted Wall Hanging/Table Topper

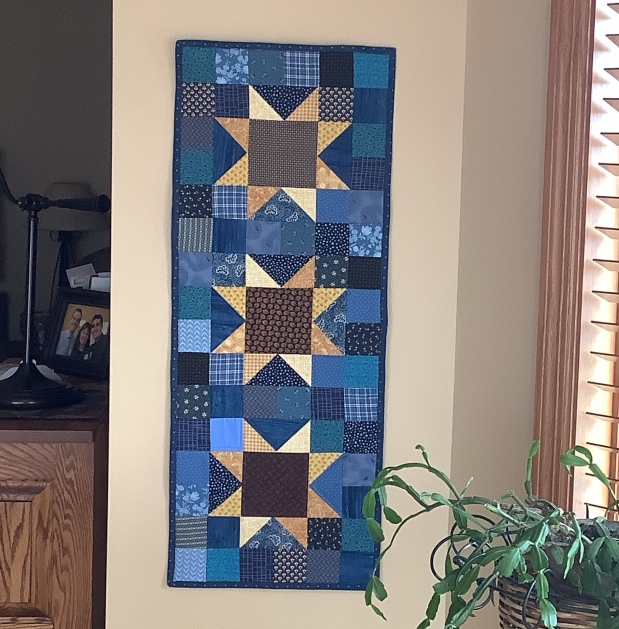
All Done! I’m in the process of creating a pdf pattern for my newest quilted wall hanging/table topper called “Double Star Barn”. I’m thrilled to be able to share it with you in my Etsy Shop and it should be available in just a day or two, so be sure to check Mulberry Patch Quilts if you’re interested.

Would you like to learn how to add “triangle corners” to easily hang your quilt? Check our my blog How to use Corner Triangles to Hang a Quilted Wall Hanging.

I hope these tips and tricks were helpful for your next project. And that the photos helped the explanation.

Until next time, HAPPY QUILTING,

Jane

Mulberry Patch Quilts

Charity Quilts from Leftover Blocks

Charity Quilts from Leftover Blocks

Every year I like to make little quilts or knit tiny hats for Mikayla’s Grace. So when they put out an urgent request for specific needs, I signed up to fill the need for 10 medium size baby quilts to support families with small infants in the NICU (Neonatal ICU).

I had some leftover quilt blocks that worked perfectly for the center of each quilt. The “Fantasy Folk Art” fabrics by Contempo (Bernatex) are so beautiful, and I had enough coordinating fabric for the extra borders..

It’s a snap to figure out the math using EQ8 (Electric Quilt)…make a one-block layout and add borders until you reach the desired size. So easy.

Each center square finished about 8 inches, so by adding a 2 inch (2-1/2″ cut) white border around it, and then a 4 inch (4-1/2″ cut) border from a coordinating print, they turned out just the right size…about 20 inches square.

For some I made the second smaller border of a coordinating print and added a third white border, slightly larger than the first one.

Each baby quilt was finished with a soft cotton flannel backing, attached by sewing the edges right sides together and leaving an opening large enough to turn it right side out. I hand-stitched the opening closed.

A simple “stitch in the ditch” with my walking food and Aurifil cotton thread near each border was all the quilting necessary.

My hope is that these quilts will encourage and comfort those families going through the emotional stress and heartache of having their tiny baby in the NICU.

Do you have any extra blocks from your projects? Why not consider using them in a baby quilt for Mikayla’s Grace, or for a charity close to your heart?

Until next time, HAPPY QUILTING!

Jane

Mulberry Patch Quilts

Project Quilting…Advent Calendar

Project Quilting…Advent Calendar

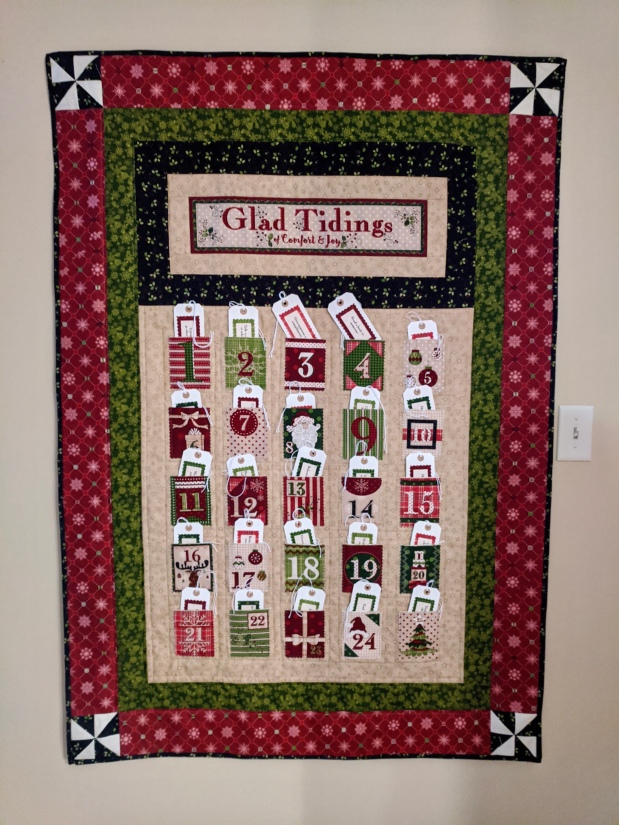
When I found out the theme of this week’s Project Quilting challenge: NOTABLY NUMERIC, absolutely nothing came to mind. Then I remembered a kit I bought at the Madison Quilt Expo a couple years ago. It’s for an advent calendar wallhanging designed by Leanne & Kaytlyn Anderson of Whole Country Caboodle.

Everything I need is in the box (except for the batting & backing).

I loved this fabric and pattern, but every year around Christmas I never seemed to get around to it. Well, now’s my chance! …even if the holidays have come and gone, I don’t mind. At least it’ll be done before NEXT Christmas. Yay!

The only problem…can I get it cut, stitched, quilted & bound (beginning to end) by the PQ deadline, in only one week? We’ll see.

It comes with this pre-printed panel (see above) to make the cute numbered pockets. And inside each pocket is a tag. The idea is to take out a tag each day in December and do a kind act that’s written on it… Don’t you love that idea?

Here the labels are… all fused & ready to put in the pockets. Or you could make up your own labels with your own ideas written on them to put in the pockets.

It’s so much fun sewing on all the cute little pockets.

Here’s the layout. After making the pockets & topstitching them to the center of the quilt, she has you surround it with borders of her cute fabrics. It has a Glad Tidings banner at the top, and pieced pinwheels at the corners.

I did simple straight stitch quilting with my walking foot so I can get it done in time to upload for the challenge. But I can always go back and embellish more later if I want. But I don’t think it needs much.

All done.

And Beagle approved!

I love the concept of doing an act of kindness each day.

I was so happy to get to actually meet the designer, Leanne Anderson, at the Quilt Expo in Madison. Her fabrics (Henry Glass & Co) and patterns are all so cute. She’s an amazing artist. She looks great (that’s her on the right). I, on the other hand, look a bit exhausted by all the shopping at the Quilt Expo…lol.

So I’m done in time to enter it in Project Quilting. There’s no voting this year, but if you’d like, follow the link above, you can see what everyone created for the first week’s challenge: Notably Numeric.

Until next time, Happy Quilting!

Jane

Mulberry Patch Quilts