Newborn Charity Quilt

Newborn Charity Quilt

Mikayla’s Grace is a wonderful charity in my area of Wisconsin that supports families with a baby in the NICU (neonatal ICU) and those who experience the death of a child or pregnancy loss at hospitals in the Dane County area.

Crafters from all over make beautiful handmade baby items that they sew, knit or crochet and send to Mikayla’s Grace — from gowns, hats, and booties, to baby blankets and quilts. Several times a year volunteers meet to assemble these donations into care packages and deliver them to local hospitals to distribute.

Melissa recently sent out an email asking for several handmade items that are needed for their next assembly day this June, including a special need for larger “newborn-size” blankets and quilts (from 22 to 30 inches square).

I’ve been thinking about devoting a few days to make some of these quilts to donate, and when I saw that this week’s Project Quilting Challenge was “Irish Chain” it was a perfect opportunity to join in on the challenge AND make the charity quilts. I have some pink cotton fabrics —charms, jelly rolls, layer cakes, and squares — left over from other projects. And found some pink flannel for the backing.
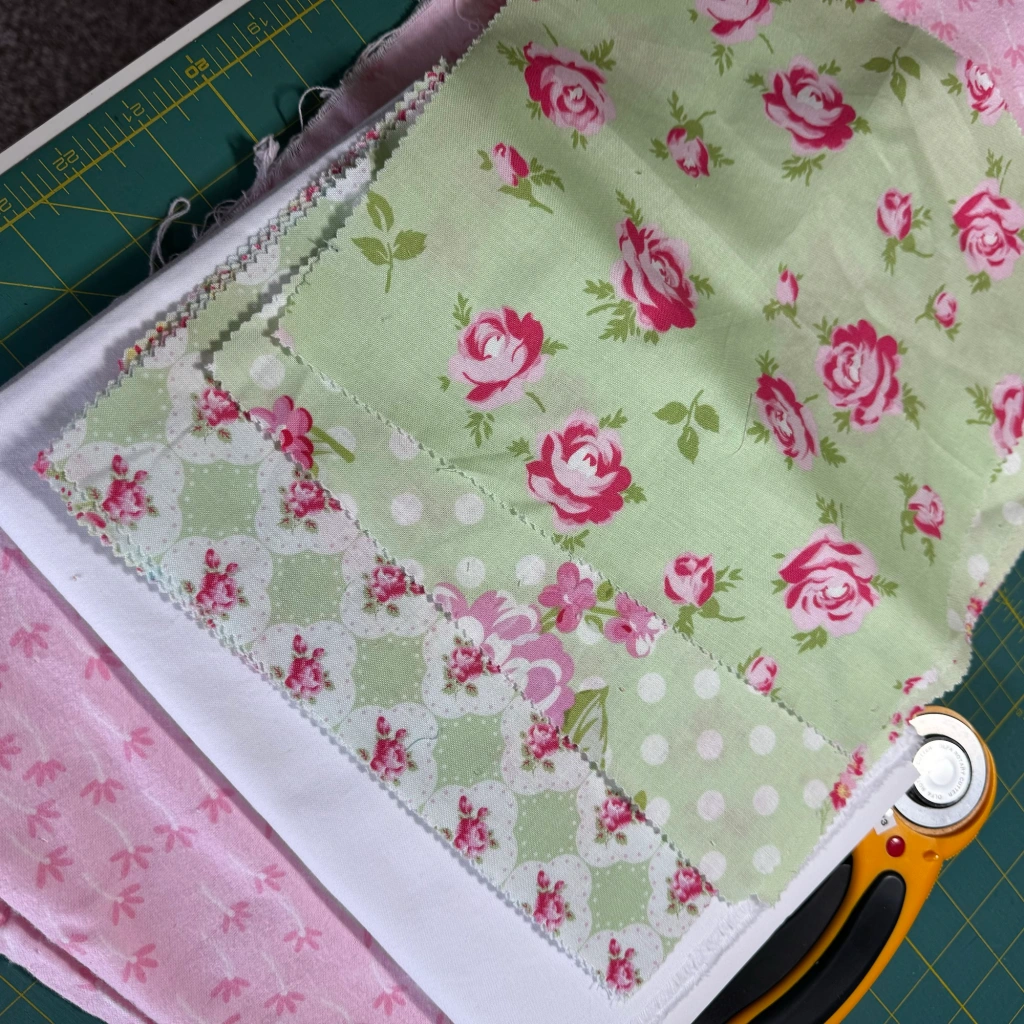
My first step was to pull fabrics from my stash that go together. For this little quilt, I found a few left-over layer cake squares with some other yardage.

Layer cakes aren’t ideal for strip quilting the sets for the single Irish chain, but I come from a frugal generation, and wanted to use up what I had. I was able to cut enough fabric to make the strip sets for two quilts. I drafted a quick little pattern on my Electric Quilt (EQ8) software to get an idea of how much background and border fabrics I needed and to make sure it ended up the right size.

The strips were cut 2-1/2” wide (the length of the layer cake) and sewn together in strip sets of three fabrics each (see photo). I pressed each seam towards the floral fabric.
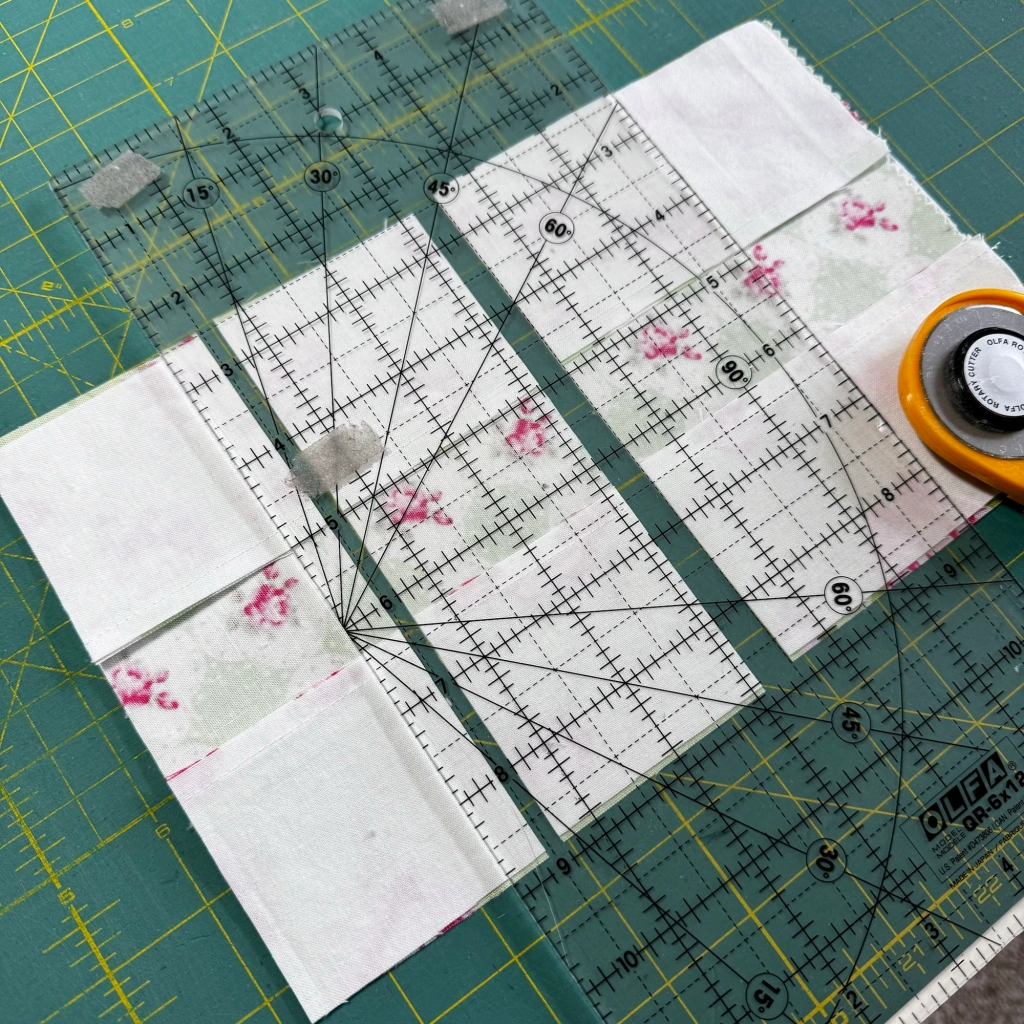
Next, I sub-cut the strip sets 2-1/2” wide and then sewed them together into 9-patches (see photos).

You can see through my window that we’re having a snowstorm today, so it’s the perfect day to be in the sewing room!

The hardest part is finding enough scraps in my stash to coordinate and make two matching NICU quilts. I found just enough of a matching fabric print for a thin border & corner blocks, and just enough leftover green “bee print” to make them…yay! (cause I’m not going out inbthe snow to buy more!)

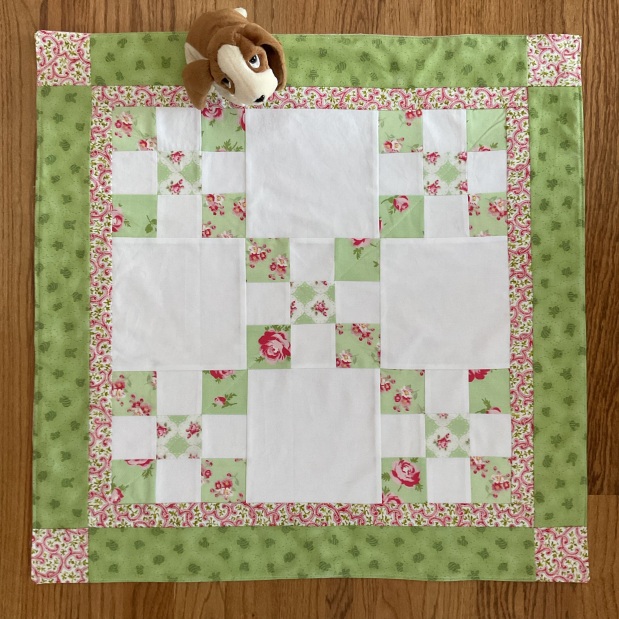
I’m happy with the pieced top. It turned out to be 25×25 inches. All that’s left is to quilt it and make a second one just like it!

I’m entering this photo in the Project Quilting challenge before I do.
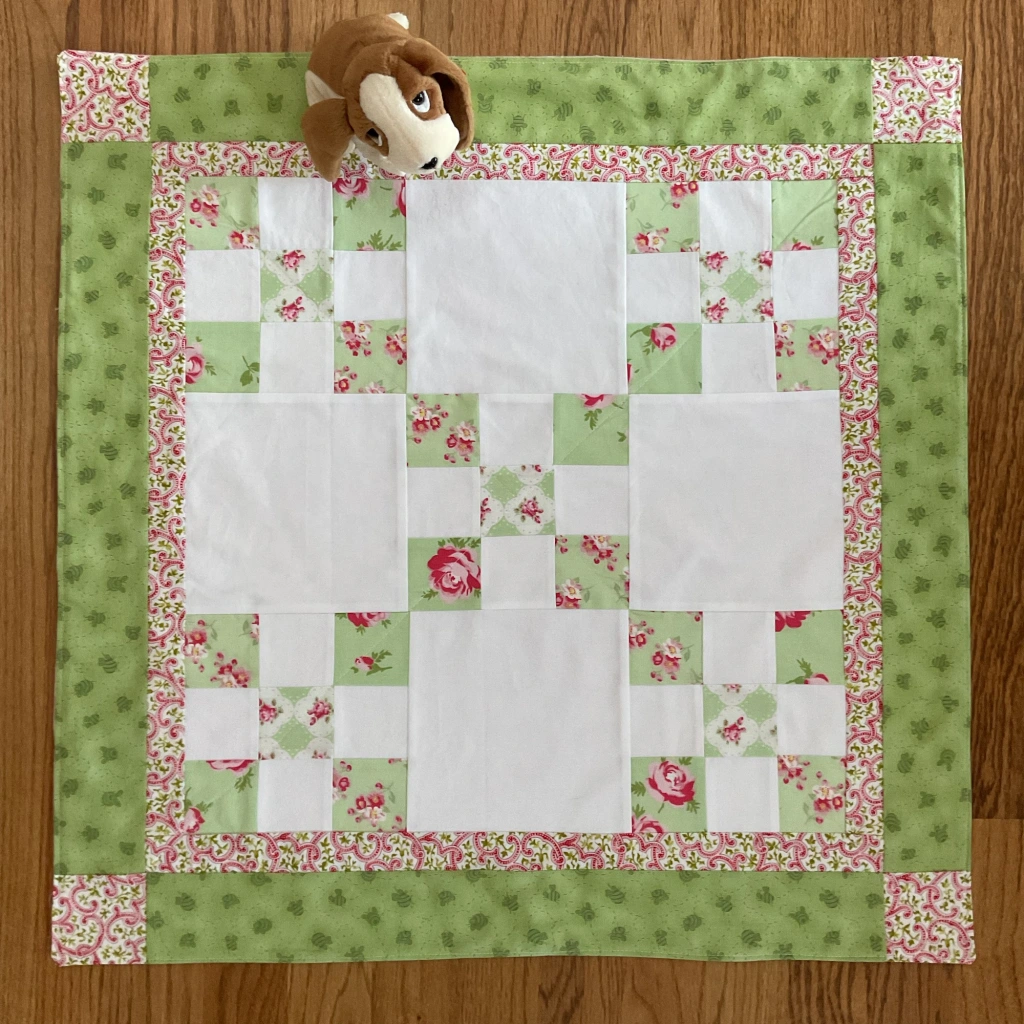
Simple, fairly quick, and I hope they’ll be a blessing snd encouragement to a family and their new little one in the NICU. I know I’ll be praying for the recipients of each one.

I hope this encourages you to dig in your stash and make a quilt for your favorite charity!

Until next time, HAPPY QUILTING❣️

Jane, Mulberry Patch Quilts

Add a Quilt Block to Your Sweatshirt

Add a Quilt Block to Your Sweatshirt

This week’s challenge for Project Quilting (Season 15.5) is “wearables”. You can turn clothing into something else or “quilt-ify” something you wear or make a clothing-themed item.

Here are the normal rules, and you have one week from start to finish to meet the challenge.

  • Every challenge piece must be a FINISHED project seen through from INCEPTION to COMPLETION during the challenge timeline.
  • Each piece must stand alone as DONE to count toward prizes.
  • Your project does not need to be a traditional quilt, but must meet at least one of these requirements: include patchwork, include appliqué, have 3 layers stitched together by hand or machine.

BUT for this challenge they changed one rule — your project must be wearable, or have been made from previously worn items, or have another connection to clothes, shoes and fashion accessories.

After the challenge is complete, they have a drawing for prizes generously donated by sponsors sometime during the week following on Facebook live.

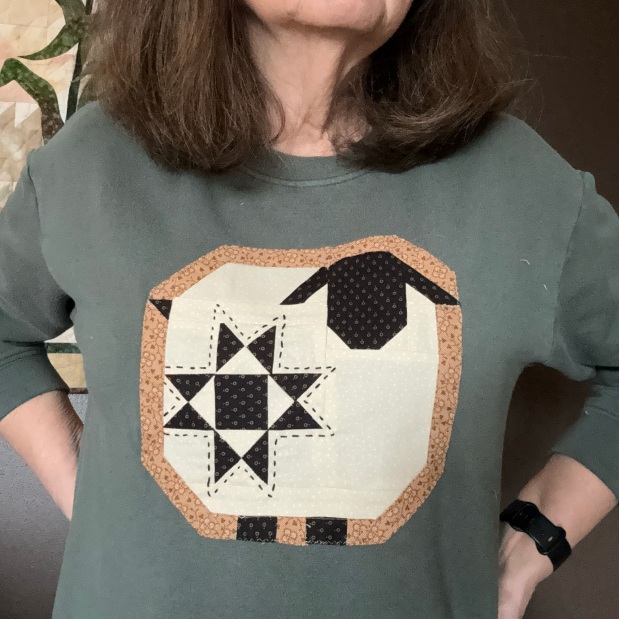
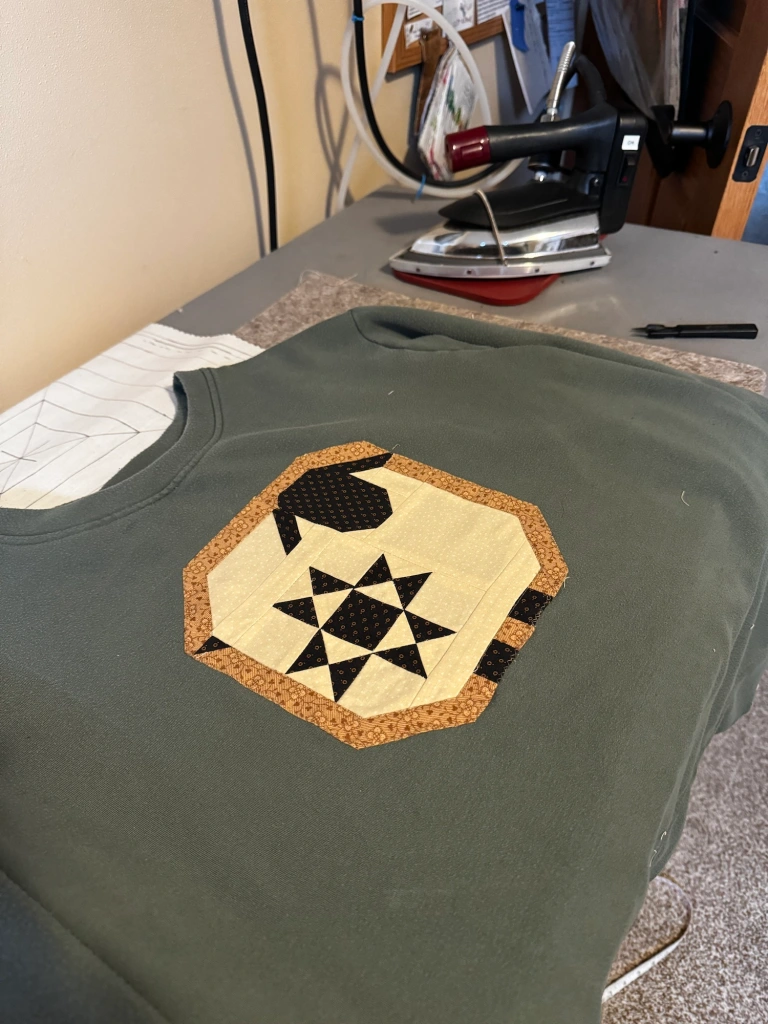
I usually buy a few cozy sweatshirts (at Costco) to wear around the house during winter and thought, why not make a quilt block and sew it to the front of one of them? So I made the sweetest little pieced lamb block that I’ve been dying to try and ironed the edges of the finished block under by 1/4 inch.

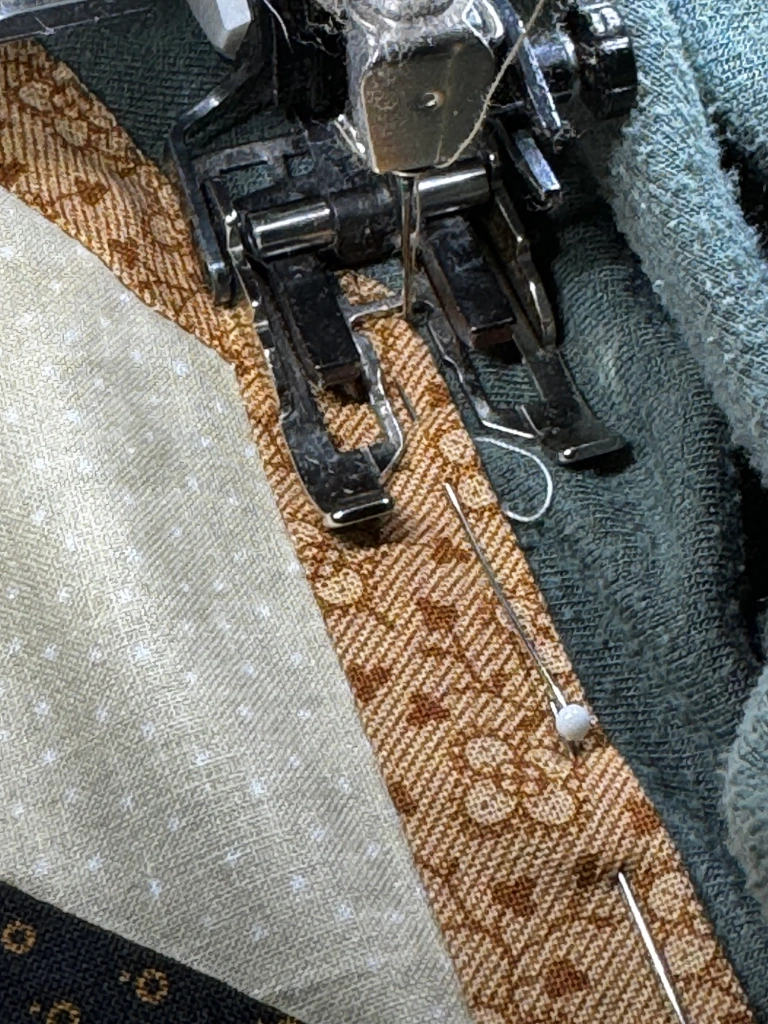
After finding the center of the sweatshirt, I tried it on and when I was happy with the placement, I pinned it to the shirt all around the block and sewed it to the sweatshirt with a narrow zig zag stitch

.

I carefully stitched around the edges, being sure not to catch any of the rest of the shirt in the stitching!

Then I machine quilted just inside the tan border.

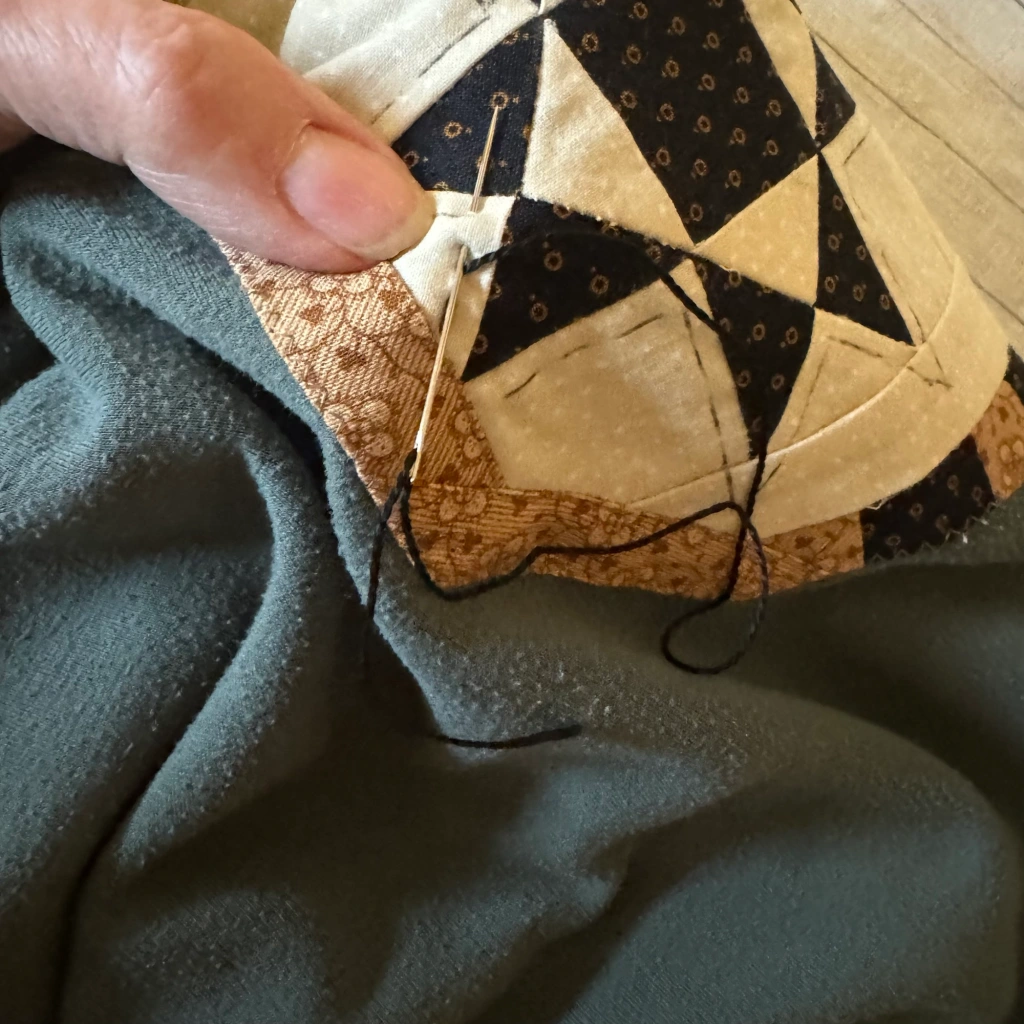
I decided to leave his face blank, but still wanted to add some embellishment, so I got out my black pearl cotton and hand quilted around the star.

It was fun to do … a kind of slow-stitching. There wasn’t much to quilt so I took my time and really enjoyed hand stitching again.

I think it turned out pretty good. What do you think?

Here’s a closeup…. The block is from the quilt pattern “Wooly Stars” by Coriander Quilts that I sized down. I think it’s such a cute block.

It’s a fun way to take a garment you already know fits you comfortably and make it unique.

I hope you’ll give it a try! … wish me luck on the drawing … or better yet, get going and join in on one of the challenges yourself!

Until next time, HAPPY QUILTING,

Jane

Mulberry Patch Quilts

Fabric Tray for Project Quilting Challenge

Fabric Tray for Project Quilting Challenge

This week the Project Quilting 15.4 challenge is hour glass”

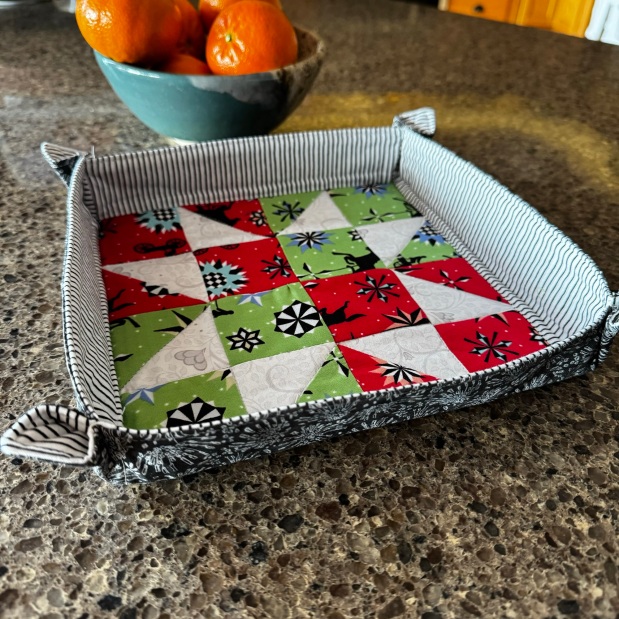
I knew just the block I wanted to use. Half square triangles pieced into a shimmering star. You can see the hour glass shape in the white star tips!

It was a very simple project and was cut, sewn, quilted & completely done in only an hour and a half.

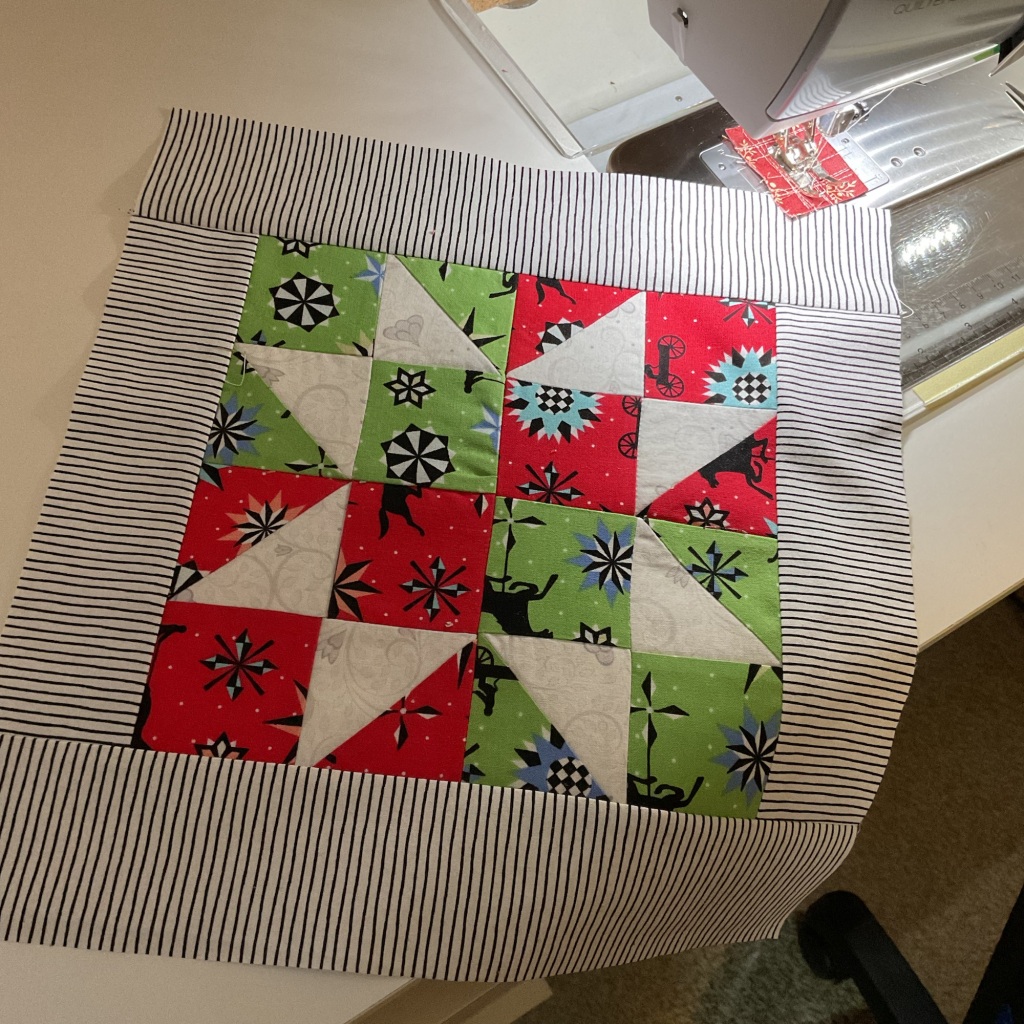
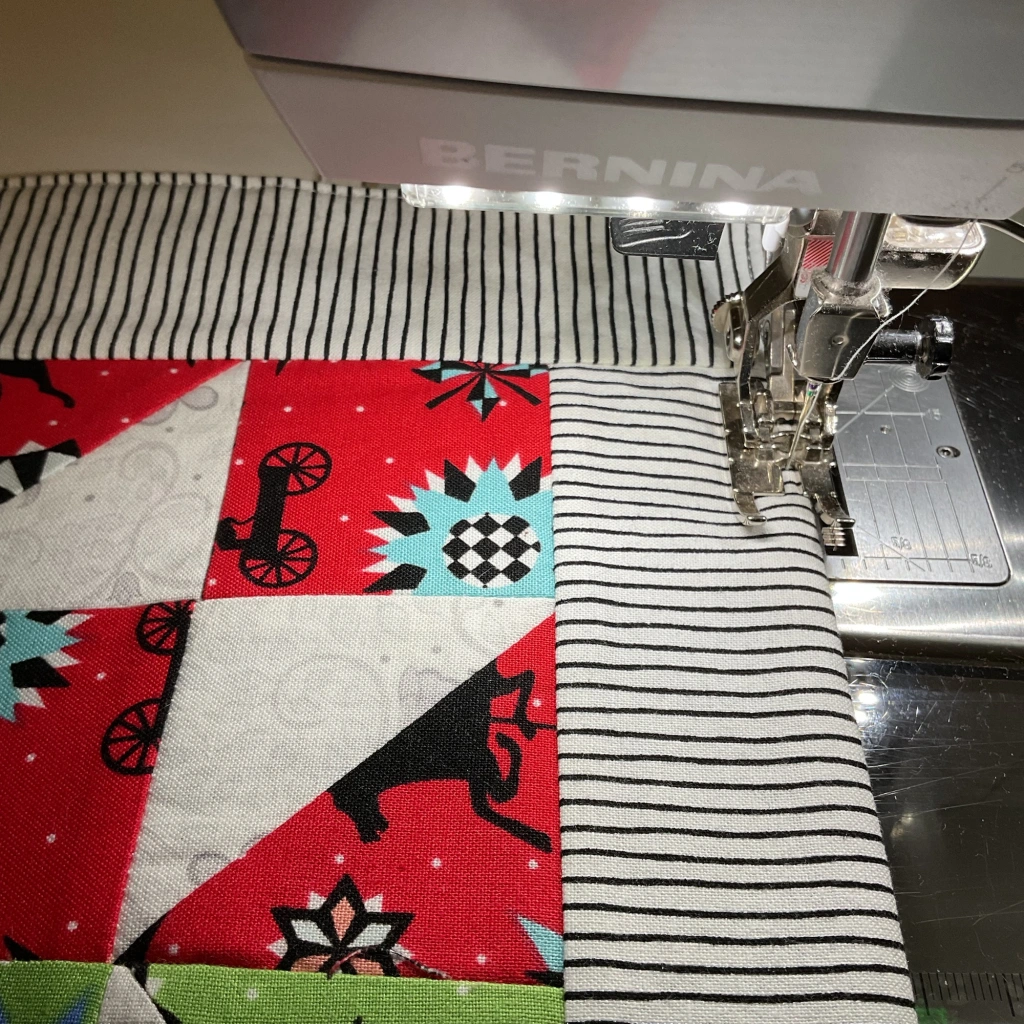
After making 8 half square triangles, I added 8 squares to make 4 blocks measuring 4.5” (4” finished) each. Then I sewed the 4 blocks together forming the star (8.5”, 8”;finished). Next I simply added a 2.5” border (see above). Easy peasy.

I ironed fusible fleece to the finished top, and sewed it to a black print lining (same size) with right sides together (leaving an opening for turning), and turned it right side out.

I topped stitched the edges (closing the opening), then straight stitched all four sides between the border & the blocks all the way across (edge to edge) to help fold up the sided. I finished it up with some machine straight stitching in the ditch around the star.

All that was left to do was iron up each straight edge on the sewn border line & pinch the corner edges to make the sides of the tray, and then sew back and forth a few times at the top edges of the corners to hold them together.

I love the way it turned out. It’ll be great to hold jewelry or sewing supplies.

AND it can serve as a cozy for my 9×9” glass casserole dish! (Now that was not planned.). The tray/cozy turned out about 9” square with 1.75” sides.

I’m happy I got inspired by the challenge and got this posted for the contest early (this may be the first time in all these years that I actually got the project done the day after the challenge was posted!)

Why not try making a fabric tray using your favorite block? You can vary the size and depth to suit your needs. It’s a great, quick gift too.

If you’d rather buy one ready made, come see it in my Etsy store here.

Until next time, HAPPY QUILTING

Jane, Mulberry Patch Quilts

And a big shout out to Kim Lapacek (@persimondream) and her friend Trisha Frankland (@Quiltchicken) for putting on this challenge each year!!

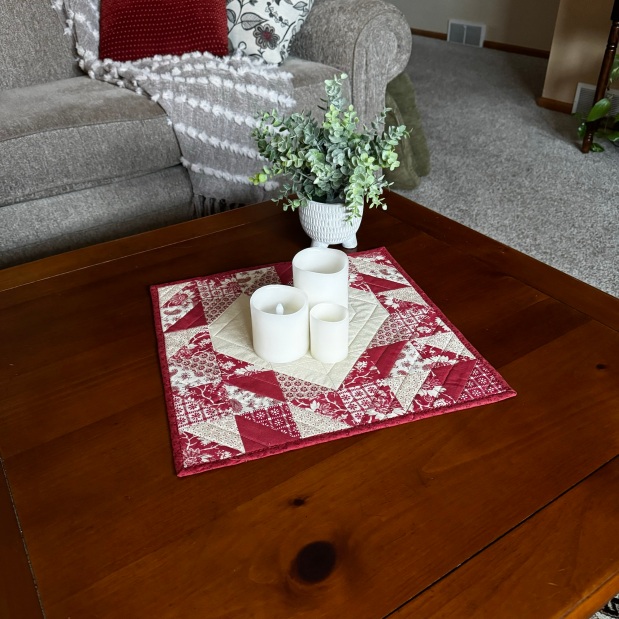
“Inside Out” Quilted Heart Wall Hanging Mini

“Inside Out” Quilted Heart Wall Hanging Mini

When I saw the Challenge from Project Quilting for this week “Inside Out” the first thing I thought of was a rag quilt, or a quilt with raw seam edges showing on the right side. NOPE. (Everyone will be doing that.)

So next I looked up the phrase online. Besides the title of a new cartoon Disney movie, most posts were about how to “birth” a quilt by sewing the top & backing/batting right sides together & leaving a seam open to turn right side out to finish it instead if binding. NOPE.

Nothing else I saw or read inspired me… UNTIL I SAW the sweetest little mini quilt heart pattern called “INSIDE OUT”, TA-DA! …including a how-to video by Misty of Missouri Star Quilt Company.

I fell in love with it!

Not only will it work for the challenge because of the title, but it goes with Valentine’s Day (next week) and February Heart Month! Yay! So I started first thing Monday and had it all but the binding done by mid afternoon.

HERES HOW

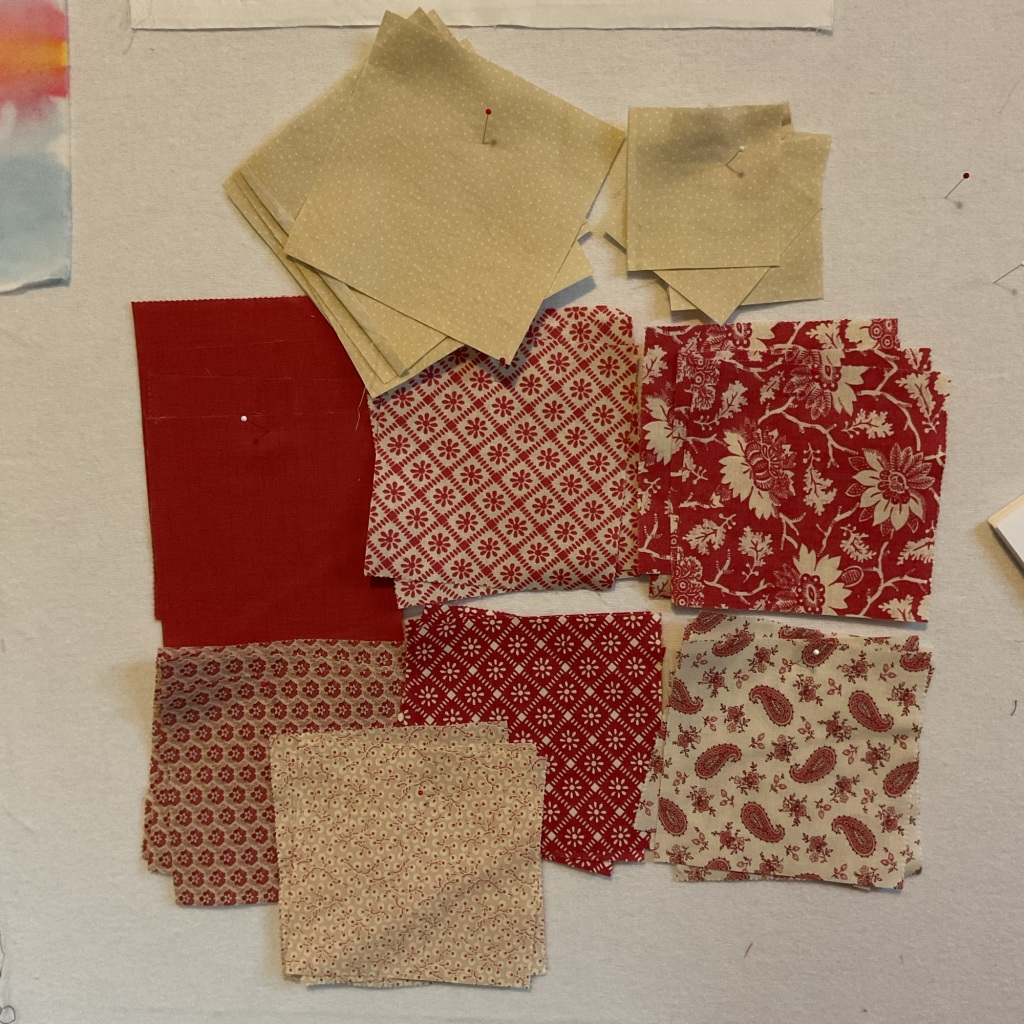
After finding some rosy red/pink layer cakes left over from another project, I cut them down to 5” squares. If I had enough charms left over they’d work as well. I just happened to have these layer cakes left over with no purpose in mind. I added more 5” squares and five 3” squares in an off white yardage to create the center heart.

Cutting left over layer cakes into 5” squares
Variety of squares

Then I paired two 5” squares right side together and sewed 1/4” around the outside edges. Then cut them corner to corner twice to create 4 half square triangle blocks! (Hint: I think this is why it’s called “inside out”)

Here cutting corner to corner twice to make HST

Every HST was pressed & trimmed to 3” square.

I tried both the diagonal line on my Olfa 4-1/2 ruler & my new Bloc-Loc

I continued pairing, sewing, and cutting HST squares until I had enough, and watched Misty’s instructions in the video to place them on my design wall. .

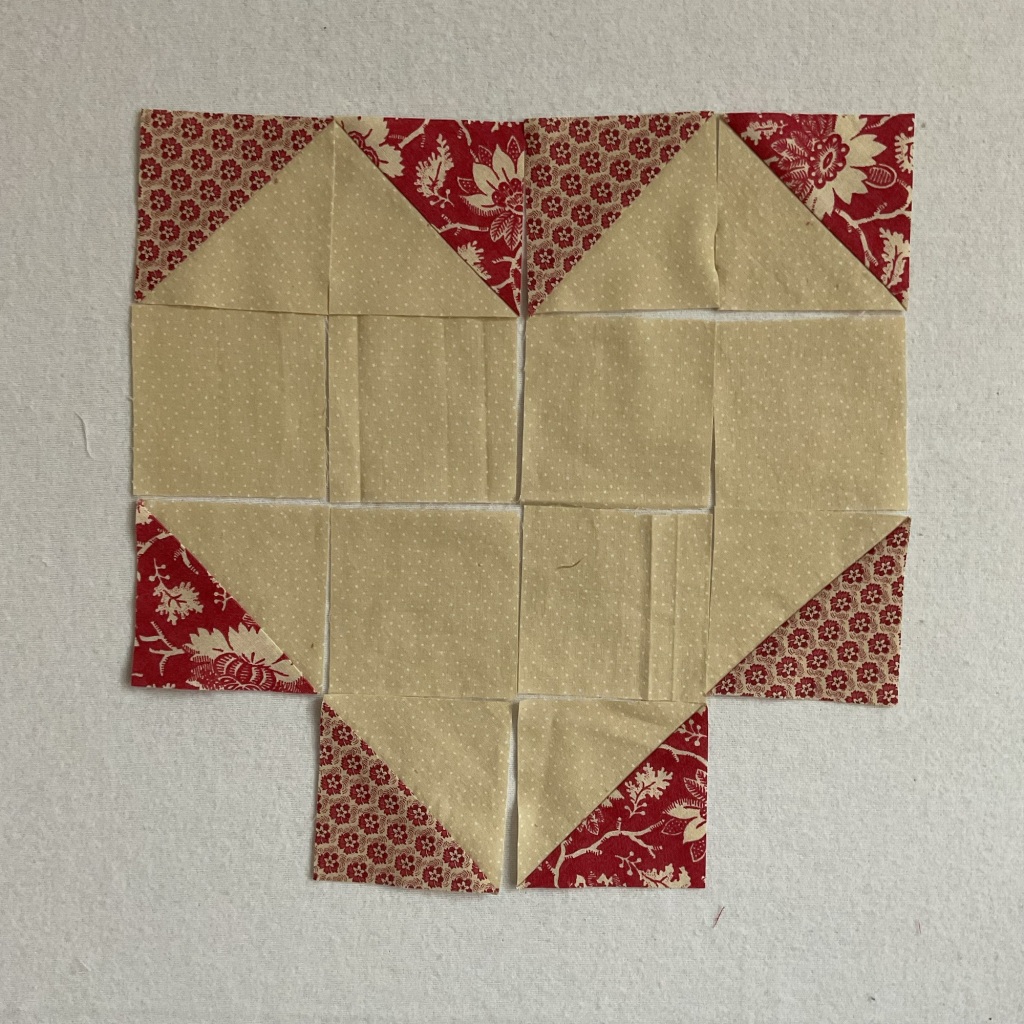
Starts with four 3” tan squares, then two 3” tan squares below them

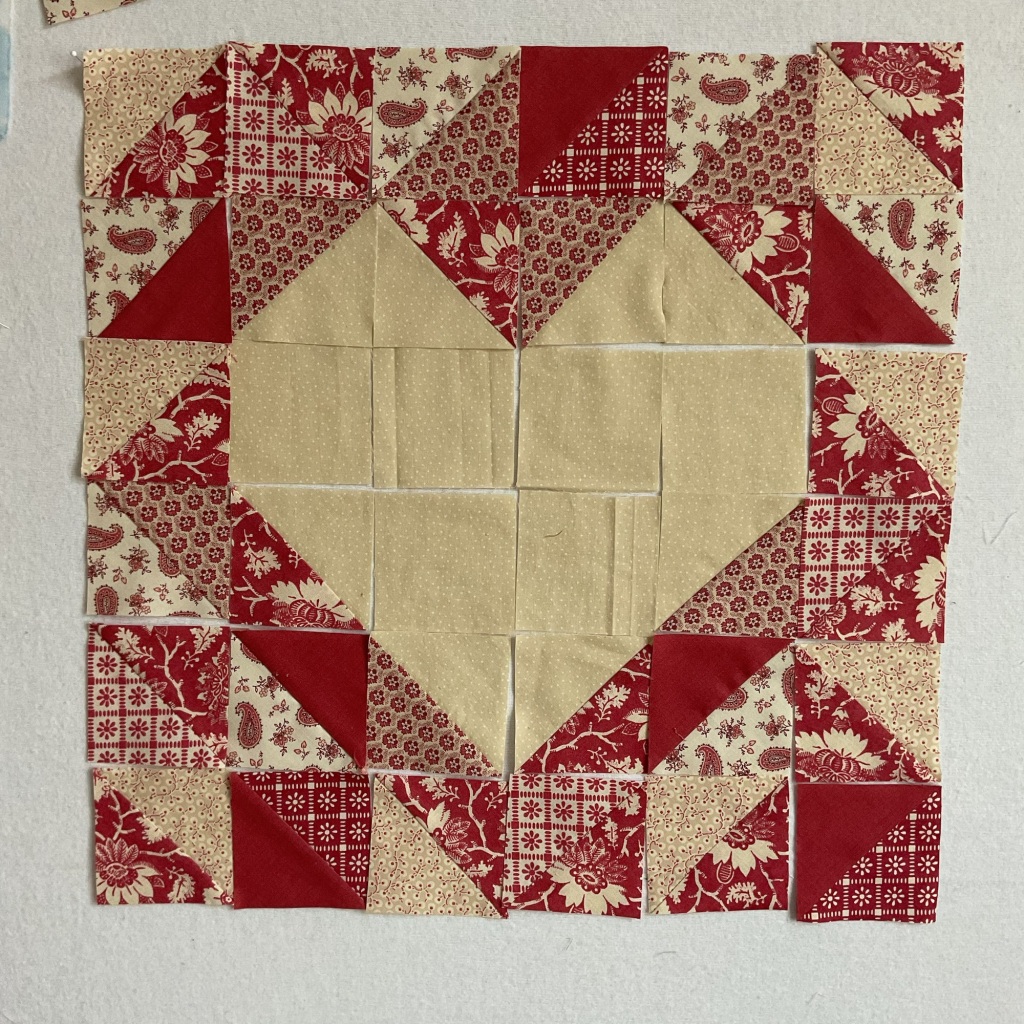
Once the center heart is formed, you just add HSTs to surround it.

All that was left to do was sew the squares together, add the batting & backing, quilt & bind. DONE in no time. And I had everything in my stash!

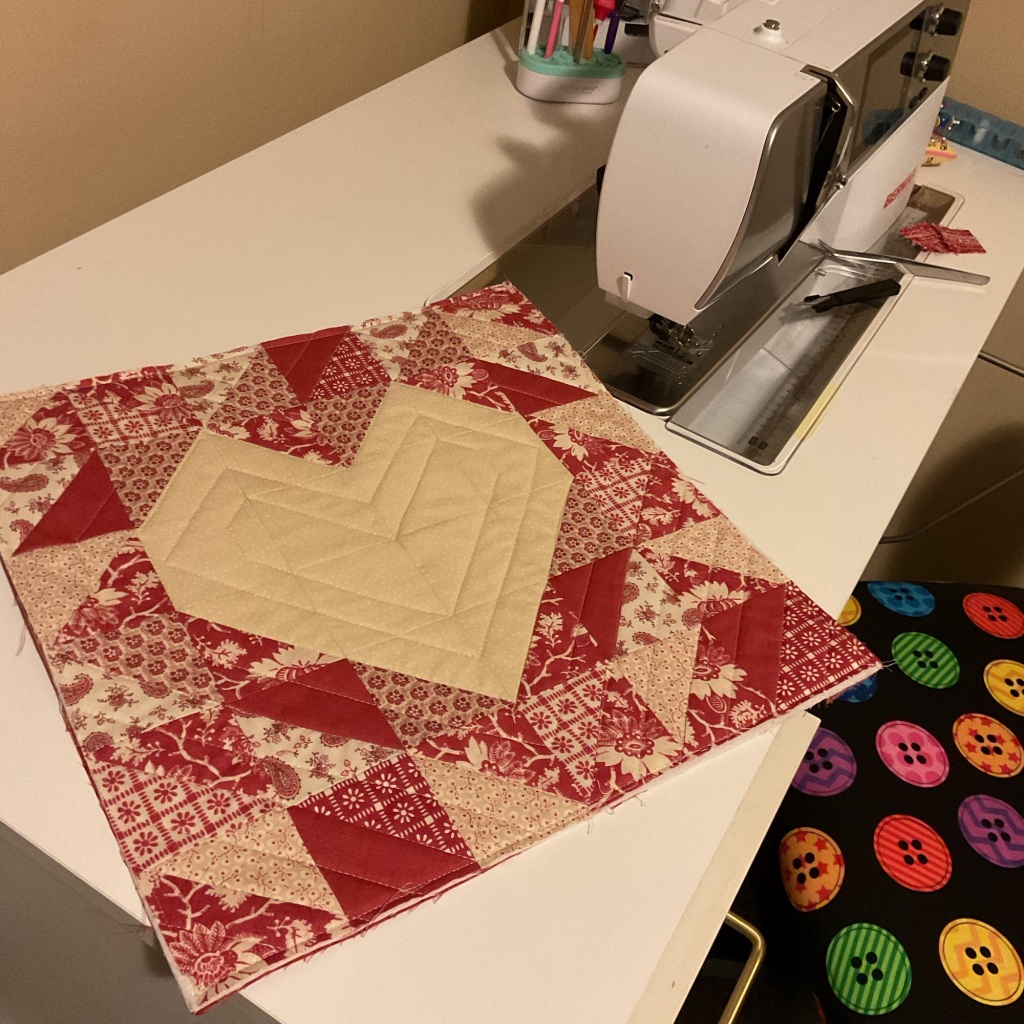
I echo quilted following the diagonal lines

Here’s the finished mini quilt. I sewed hanging triangles to the top of the back to make it easy to slip a thin wooden dowel for hanging. I have Instructions on how to do this in this blog.

It can be used as a wall hanging or a table topper. It measures approximately 16 inches square.

I can imagine putting three together in a row for a cute table runner or long wall hanging.

Take a look at the video from Missouri Star Quilt Company to make a full size (with layer cakes) or the mini INSIDE OUT quilted wall hanging/table topper like I did. So easy and a great scrap-buster!

Until next time, HAPPY QUILTING!

Jane

Mulberry Patch Quilts

PS: A huge shout out to Kim Lapacek of Persimon Dreams and Trisha Frankland of Quilt Chicken for sponsoring Project QUILTING each season. Thank you!

Resist Painted Wallhanging for #ProjectQuilting Season 15.2

Resist Painted Wallhanging for #ProjectQuilting Season 15.2

I try to participate in Project Quilting every year. It’s a great excuse to try a new technique and play.

This week’s challenge is “Sky Color (not blue). We’re supposed to create a quilted item within one week start to finish.

I decided to try a resist technique I saw demonstrated by Quilter Julie B. Booth on Quilting Arts TV (Episode 1703 “You can’t resist this”). She demonstrated how to use ordinary liquid dishwashing soap as a resist on fabric.

Here’s a youtube Quilting Arts TV preview… see it on the end:

Intro to the episode featuring her technique

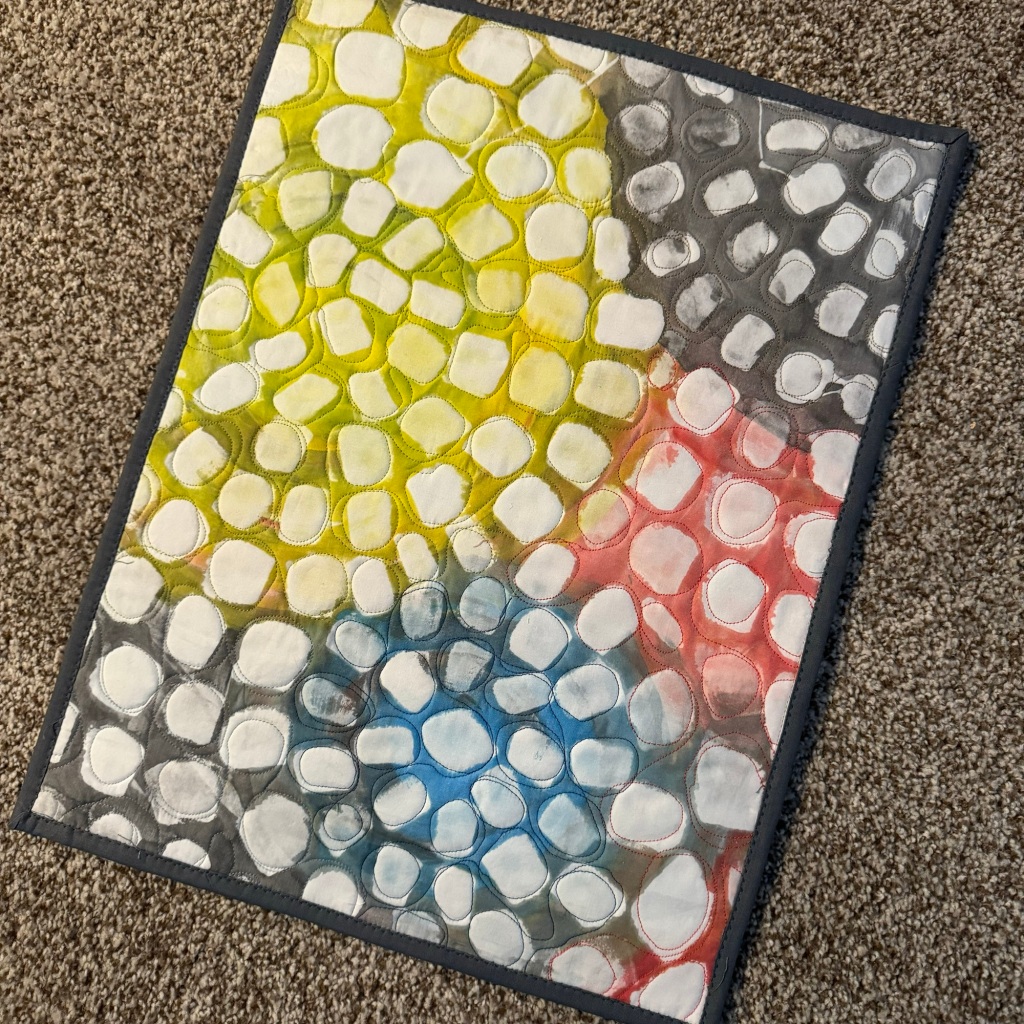
Since she sells her instructions online, I won’t go into detal here. But I painted the gel-like liquid on my white cotton fabric, let it dry, and then painted over it with blue, red, yelliw, grey, paint, After washing and ironing it, this is what I ended up with:

After resist & painting on white cotton fabric

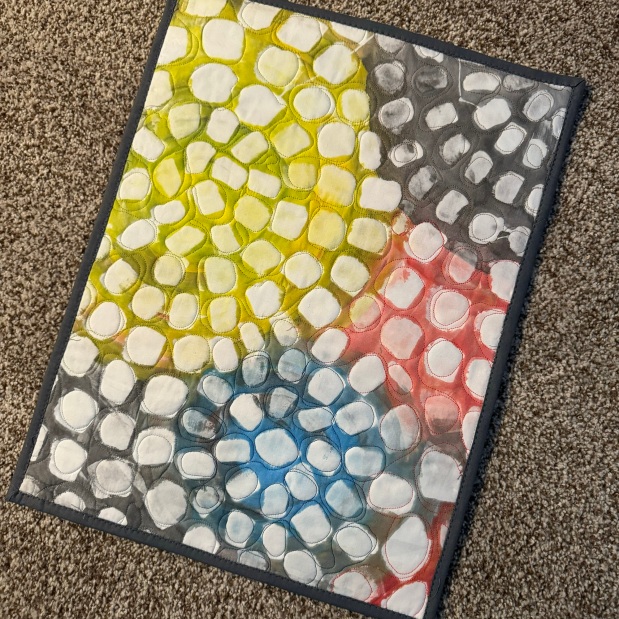
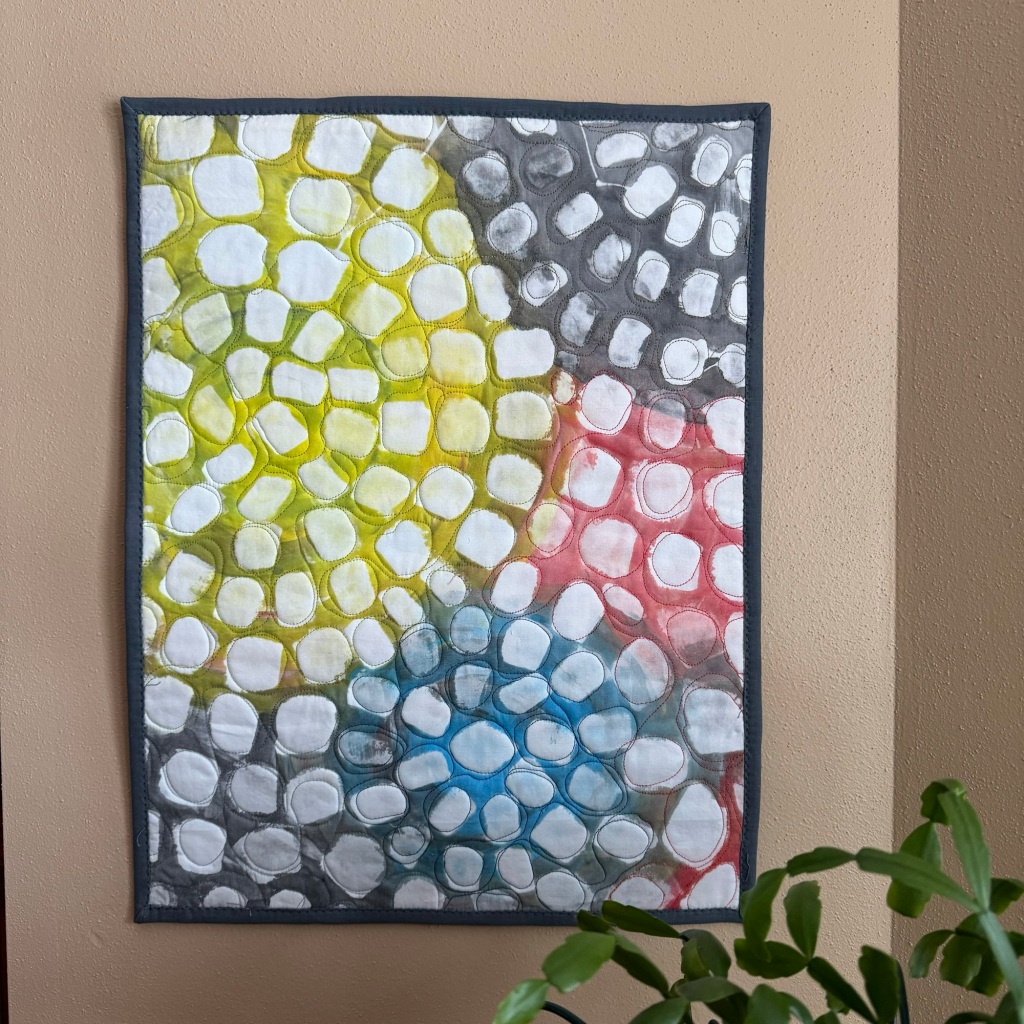
I’m thrilled that it turned out for this week’s challenge, looking somewhat like a mosaic sunset, with just a little blue. Perfect.

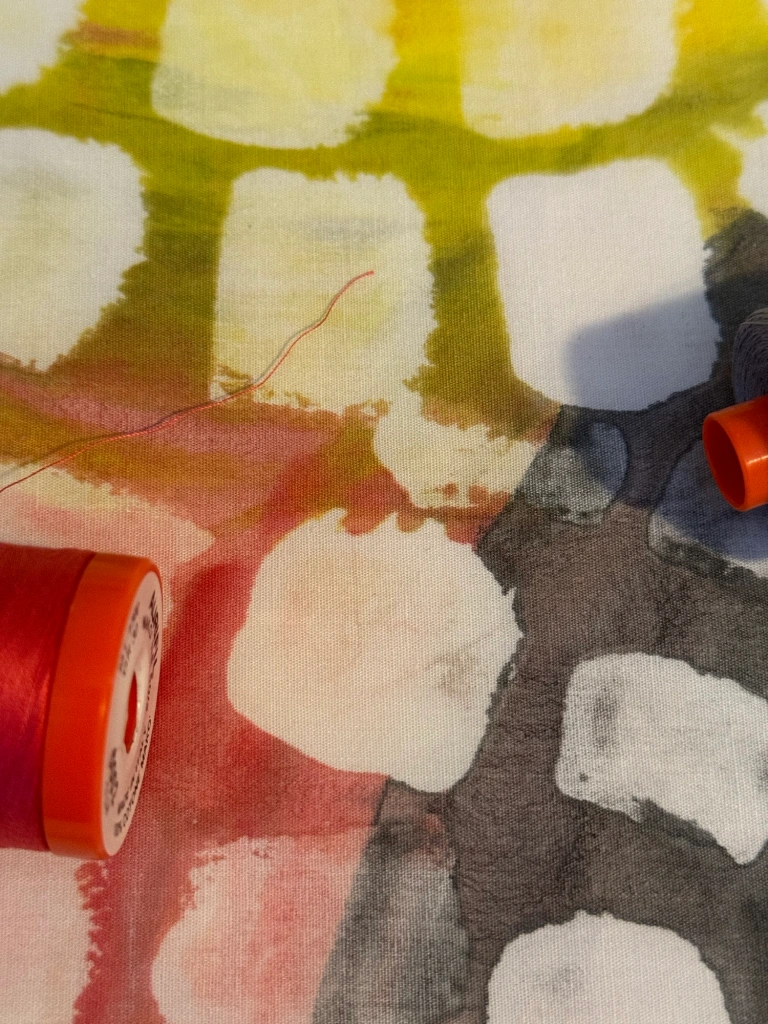
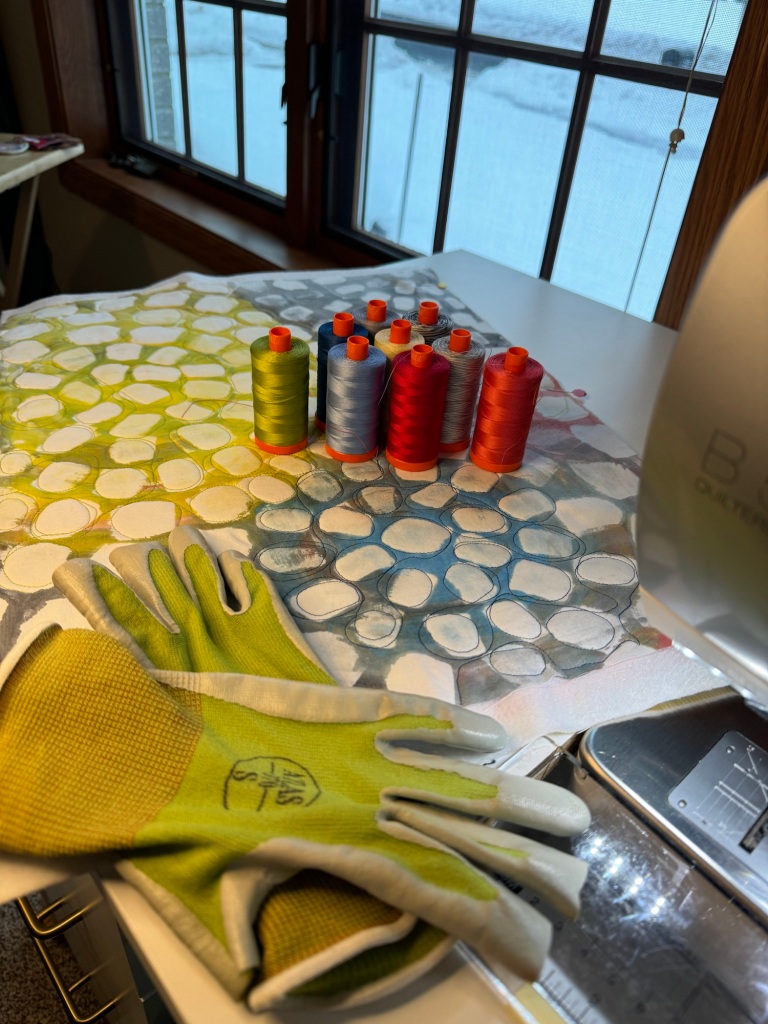
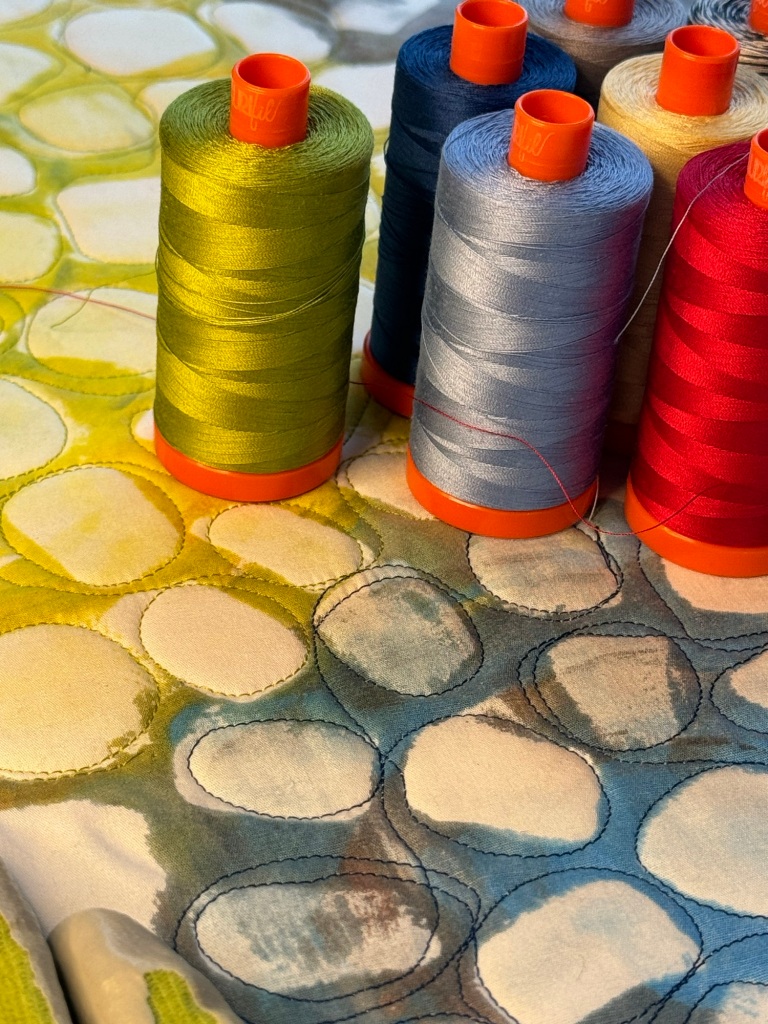
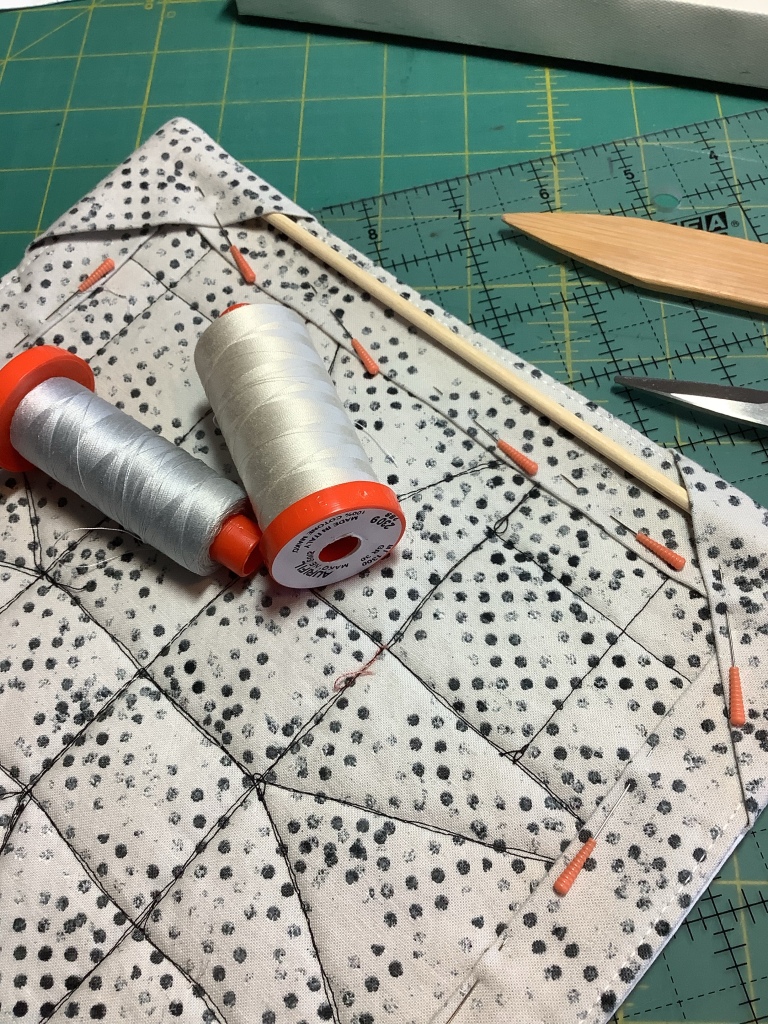
It needed some machine free-hand quilting, so I got our every Aurifil thread I had in similar colors and set up my Bernina.

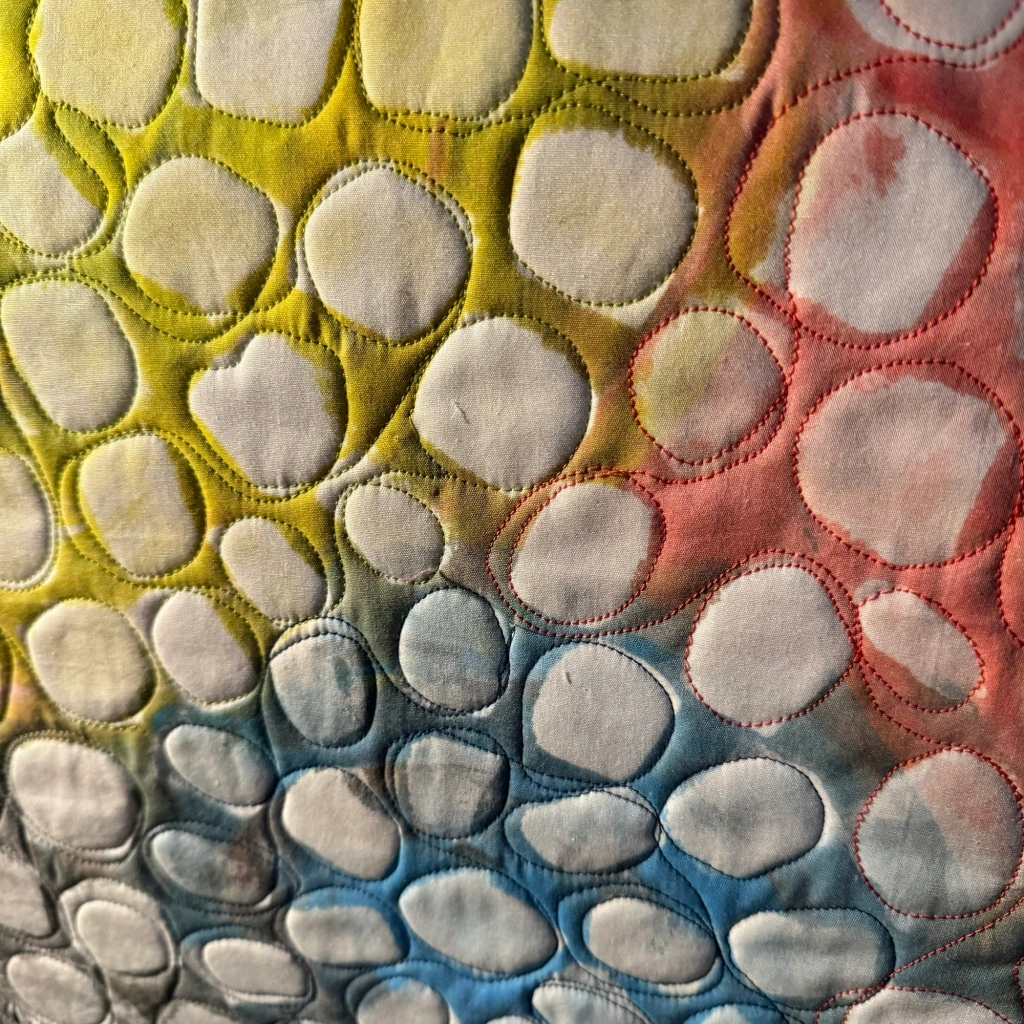
I love to crank up the music and “get in the zone” and just let the fabric tell me how to quilt it.

Here’s a close-up…

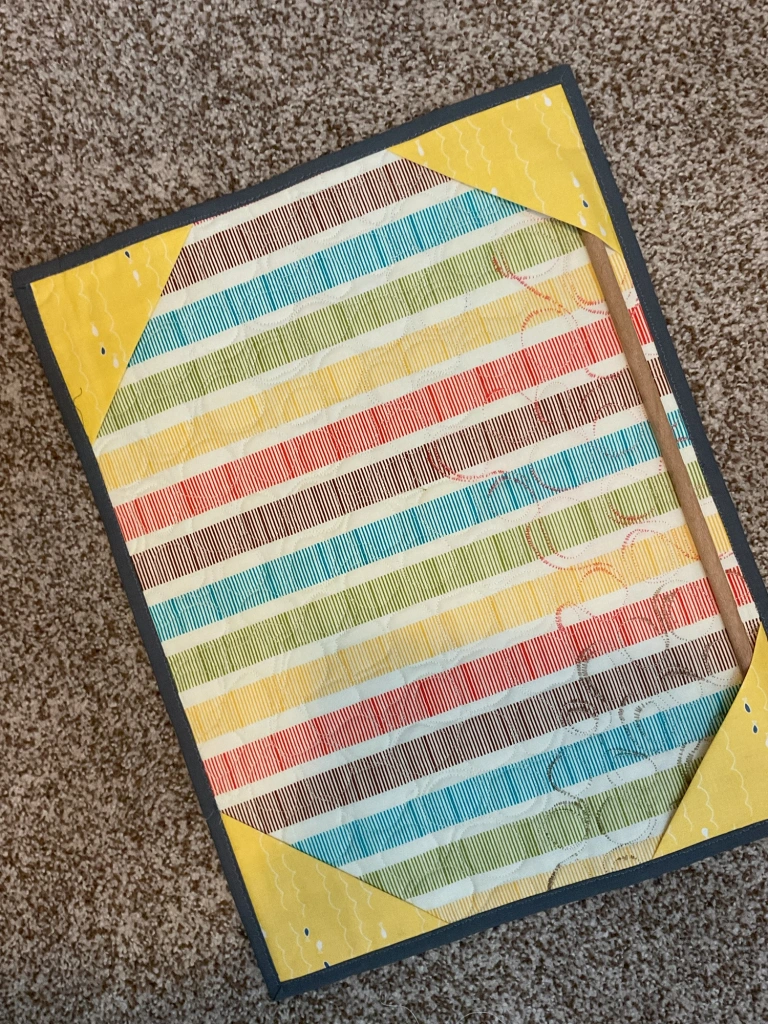
I added triangle corners to all four corners of the back, so by slipping each end of a wooden dowel cut to size into 2 of them you can hang it up on the wall in any direction.

Hanging triangle on all four corners of the back.

So here’s the finished wall hanging…

I choose to hang it vertically.

And

It turned out approximately 14 x 18-1/2”

It was a fun experiment I’d like to try again. To see all the quilted items for this week’s challenge, go to the Project Quilting Season 15.2 website and scroll to the bottom.

Until next time, Happy Quilting!

Jane, Mulberry Patch Quilts

Resizing my Ill-Fitting Quilted Jacket

A long time ago I had made a quilted jacket from a pattern I had used before. Funny, the other jacket fit perfectly and was so comfy. But for unknown reasons this time I was shocked to find this jacket was way too bulky for me in the shoulders and made me look and feel like a bear.

I didn’t like it at all, but I had put so much work into it I just couldn’t throw it away. Sadly I couldn’t figure out how or where to take it in to fix it.

So it stayed, unused, in my closet for a few years. I never took a photo with it on, but you can see in the photo above and below how the shoulder seams are unflattering and the bulk at the bottom.

I couldn’t figure out how or where to take in the side seams or sleeves to fix the problems. So it sat in my closet. I never wore it.

Since quilted jackets are coming back in style, I started to think about making another quilted jacket and using one of the newer patterns. I researched jacket patterns on Pinterest and found several I liked, and finally chose one called the Tamarack Jacket.

Then it dawned on me—what if I used this new pattern to completely recut and reconstruct the jacket in my closet instead of starting over from scratch?

I wish I had taken more photos to share with you as I got out my seam ripper and went to work unsewing all the seams in the jacket I would never wear.

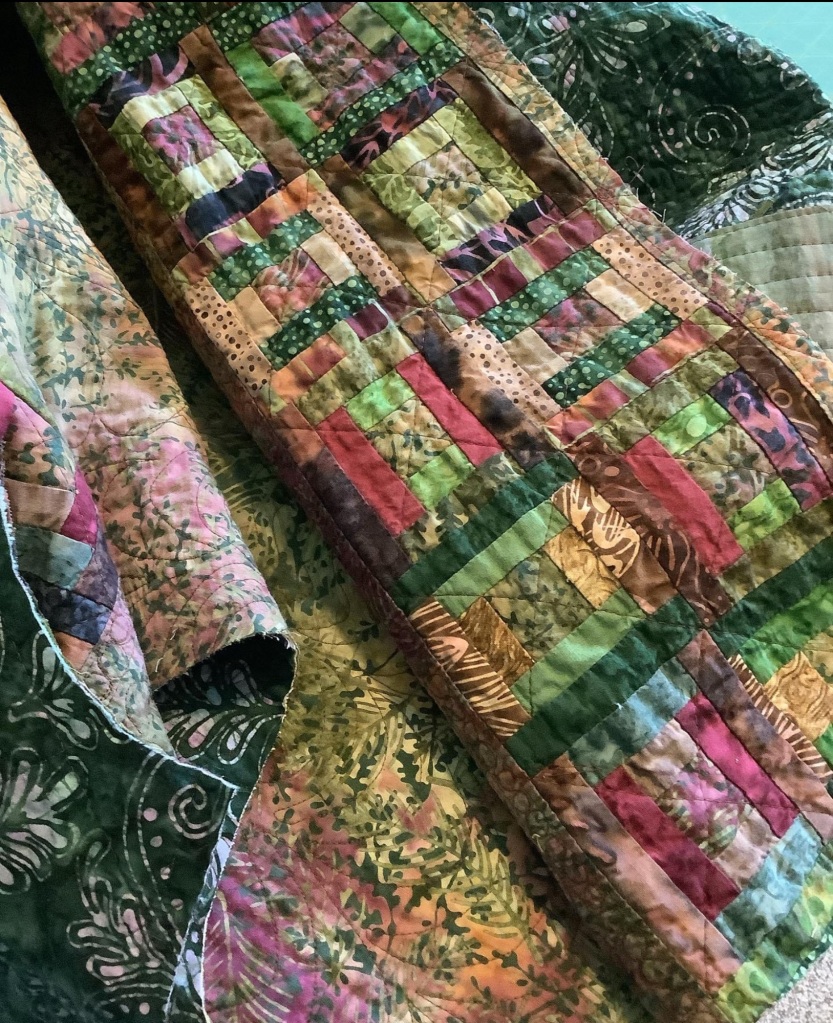
Here (above) are the remnants of the knit ribbing and some of the extra fabric cut off after recutting the new pattern pieces.

Because the jacket was too big, I had plenty of room to use the new pattern pieces to recut them. The only place I had trouble was the length. Since the original pattern featured knit ribbing in the collar, cuffs, and bottom, I had to create more quilted fabric to add to it.

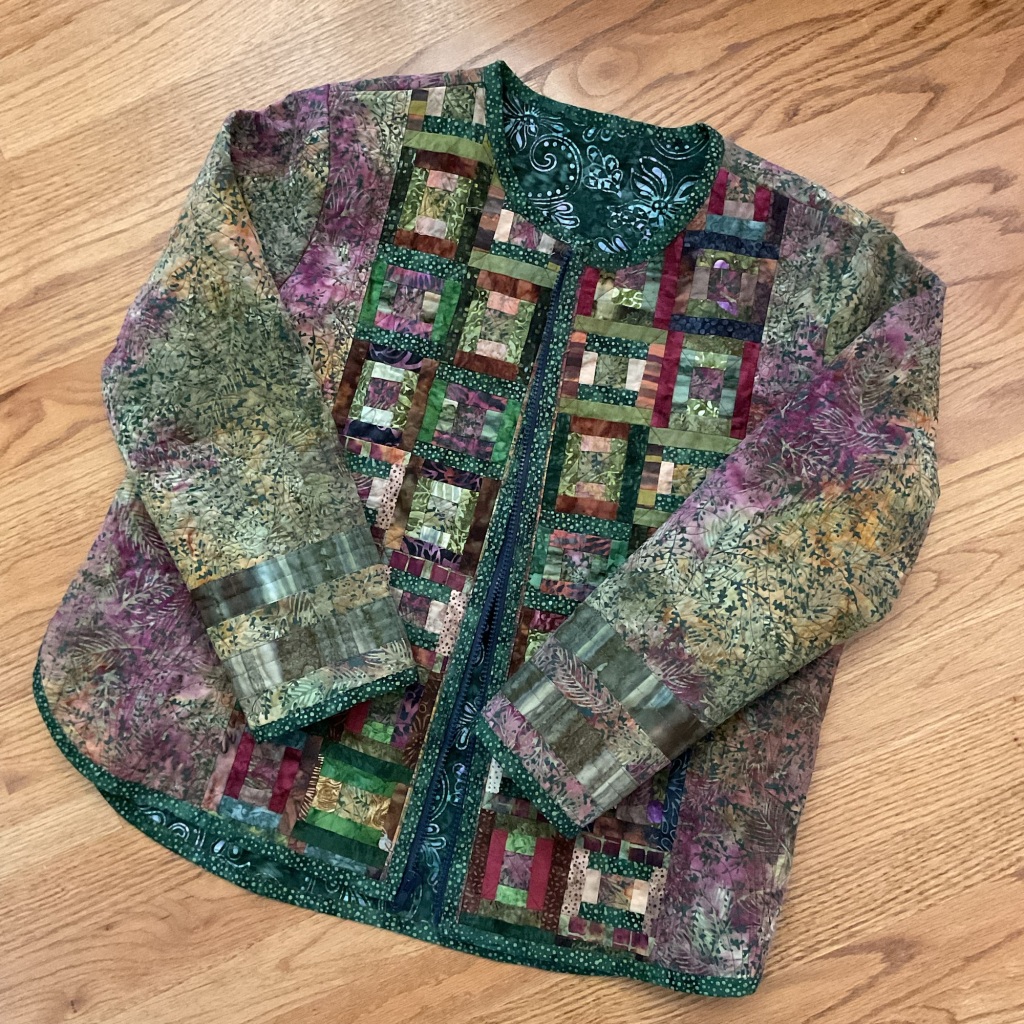
Luckily I had more of the coordinating batik fabric and was able to add lining & batting along with piecing strips together to make the sleeves the right length for the new pattern. But sadly, there wasn’t enough fabric left to lengthen the jacket so I chose not to add the pockets and make a shorter version.

You can see the bands of coordinating fabrics I used to lengthen the cuff of the sleeves in the photo above and below.

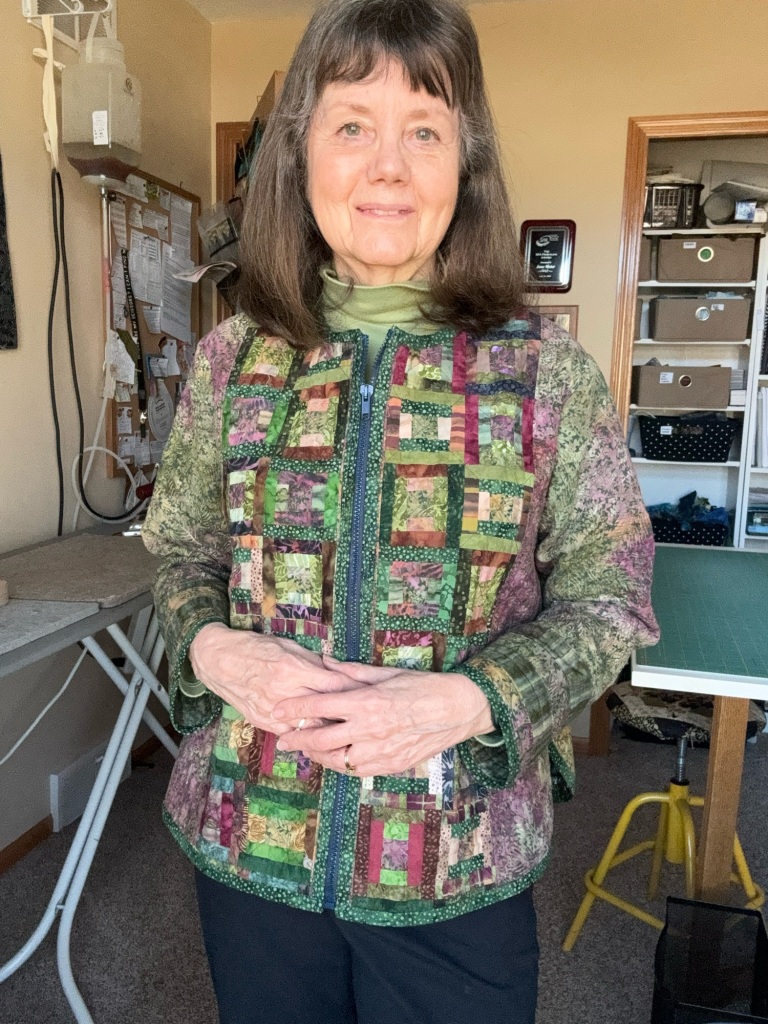
All that’s left to do is add a separating zipper that I’ll topstitch down the front and it’s done. And although it’s mot perfect, it has been transformed into a better fitting jacket that I will want to wear!

I did a little “cat walk” video on my instagram page, which I can’t replicate here, but if you’re interested, you can view it at this link:

https://www.instagram.com/reel/CvdGKjupLIY/?igsh=MWgyOGlhdTdyczJjZw==

So if, like me, you’ve made a garment that doesn’t fit and it’s sitting in your closet, never worn, I hope this post might encourage you to salvage it by un-sewing and recutting/resewing it with a new pattern.

Until next time, HAPPY QUILTING!

Jane, Mulberry Patch Quilts

My Project Quilting 14.6 Entry:  Conquer Your Fear (of failure) with art quilts

My Project Quilting 14.6 Entry: Conquer Your Fear (of failure) with art quilts

This week Project Quilting Season 14 (2023) has as their very last challenge: Conquer Your Fear

They say in their post, “if you only do what’s safe and comfy, you’ll stagnate and grow soft.” I agree. You need to push your boundaries from time to time … and get out of your comfort zone.

As you probably know, the challenge is to make a quilted object (any size) from start to finish in one week using the challenge title as your inspiration. And post a photo at their website before the deadline.

So, after pondering all the fears that I might want to conquer, I thought about my journey with quilting and how I’ve grown from simple (and safe) traditional quilts, to more advanced techniques, and then pushed myself a little further out of my comfort zone to create original art quilts. I promised myself that this year I’d try to create more art quilts. But there’s a “fear” involved in making an art quilt. And that nagging little fear makes me procrastinate. A new technique, a new design. The fear is … that I can make a mistake! I can fail!

So for my “fear conquering” challenge, I’m trying a new technique on a new art mini-quilt. It involves quilting FIRST and then coloring the fabric after. Let’s see how.

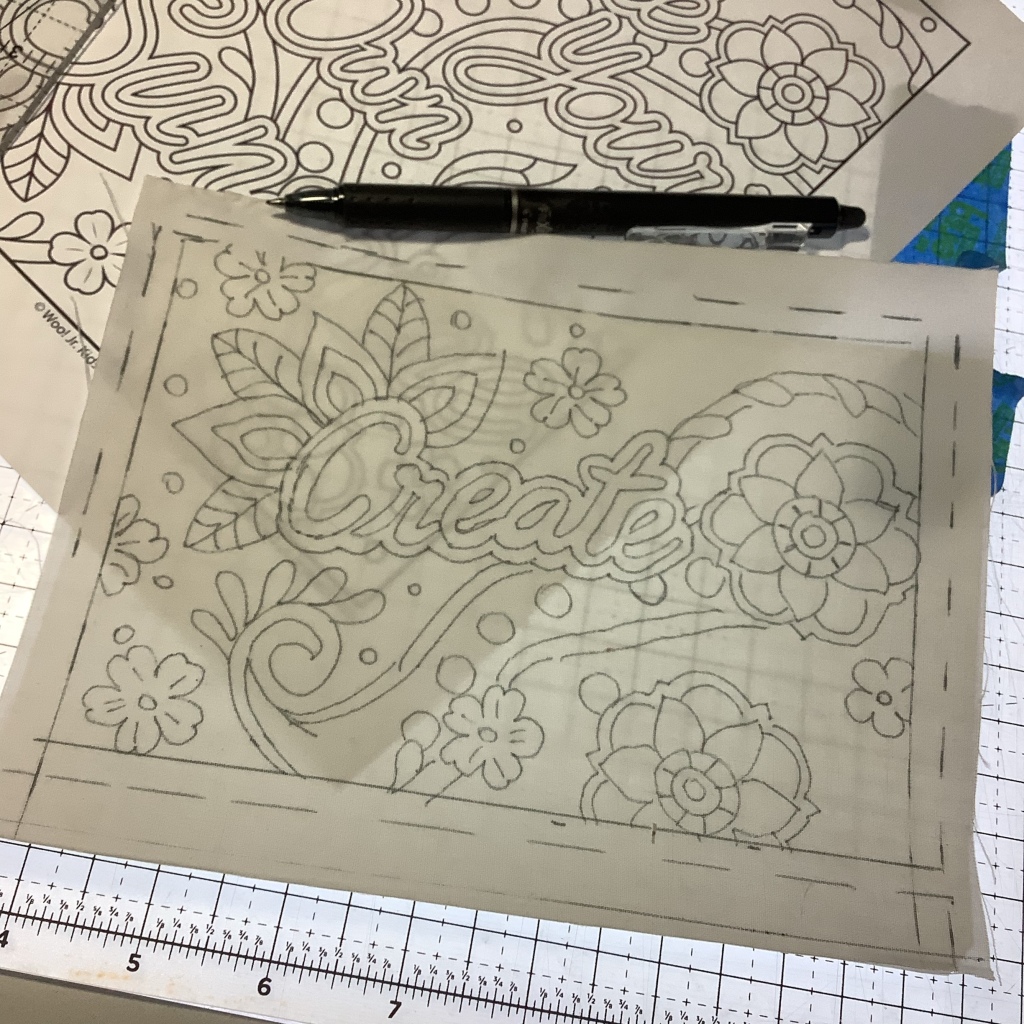
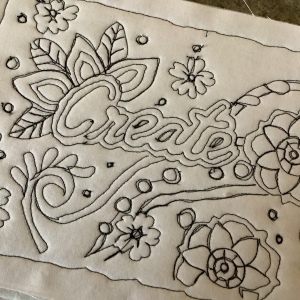
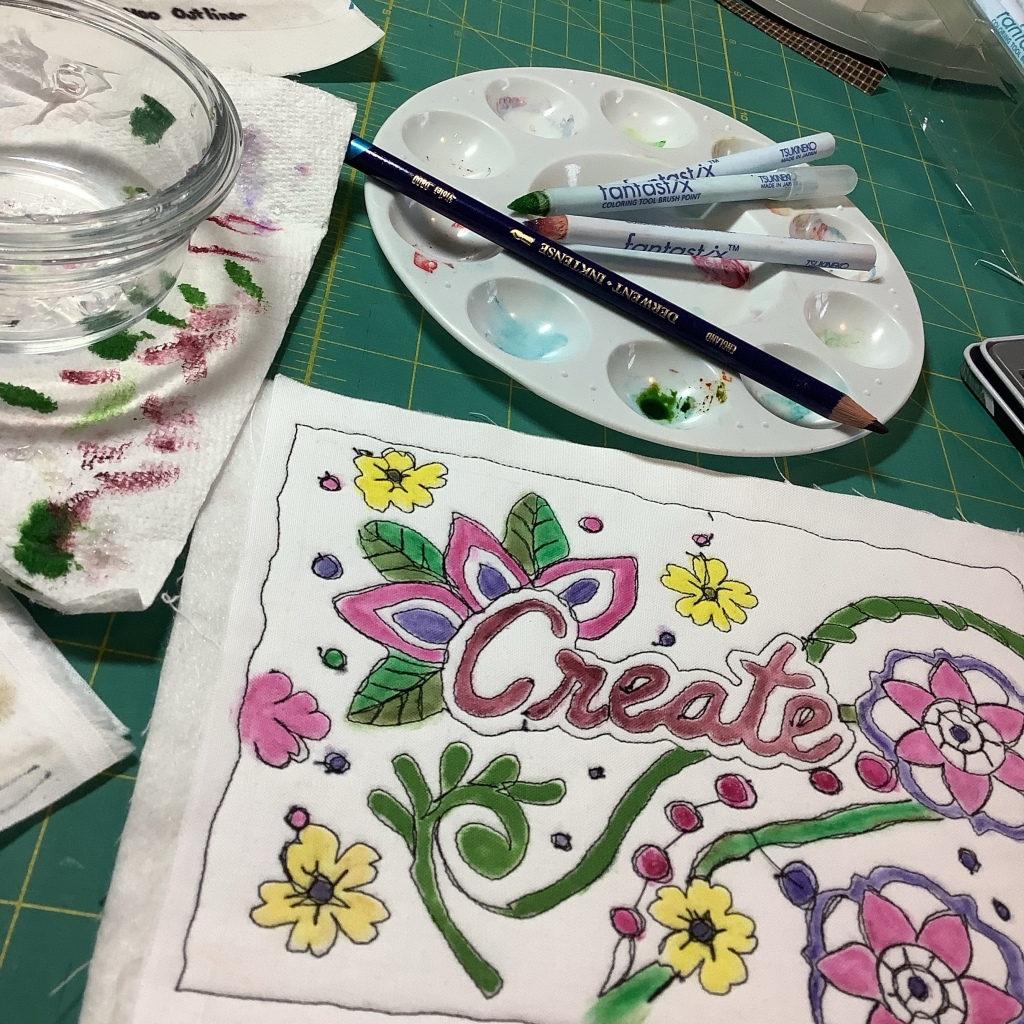
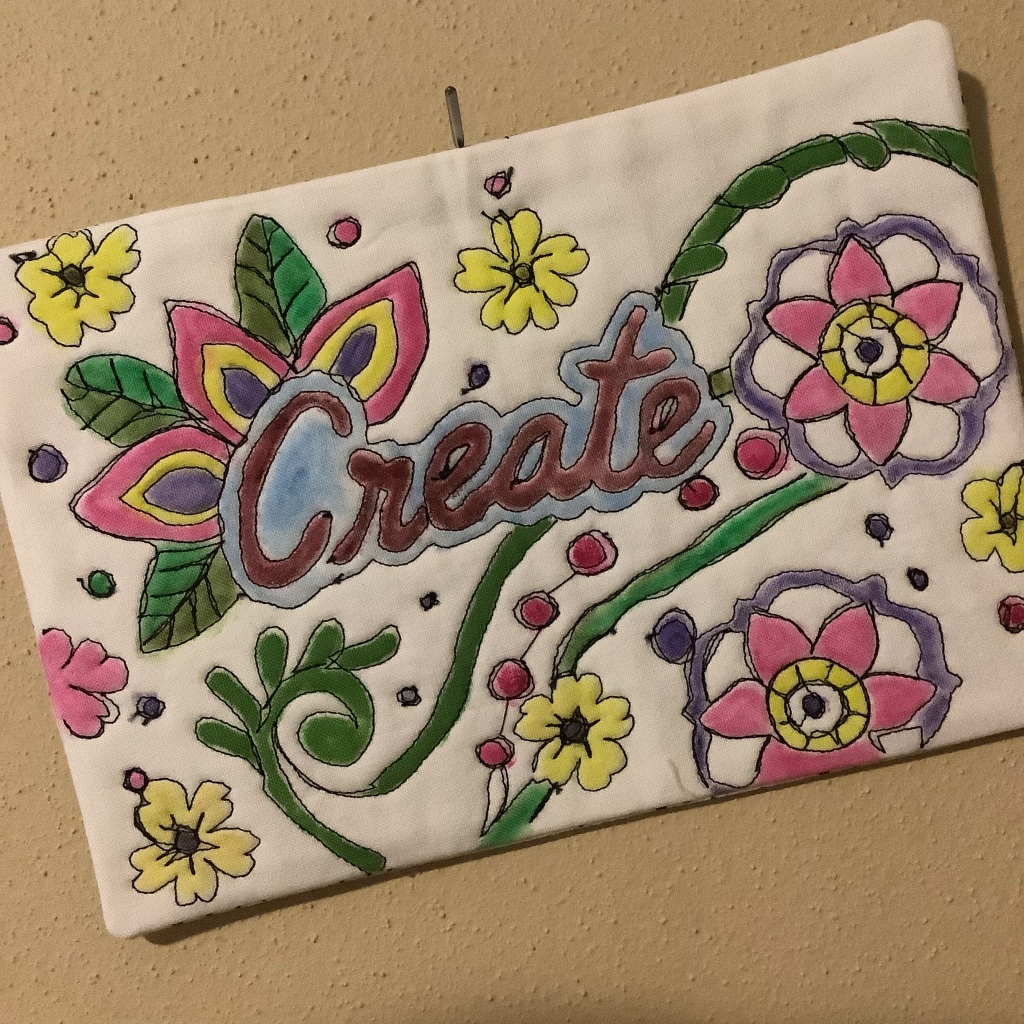
The first step is to trace (or draw) a design onto PTD cotton fabric that I ironed onto freezer paper. The freezer paper stabilizes the fabric ti make it easier to draw on. I used a pen that disappears with heat (Frixion). I thought a coloring-book like design might be fun to stitch and color…and the word “create” will help to remind me to have fun and to play while I’m doing it…without fear!

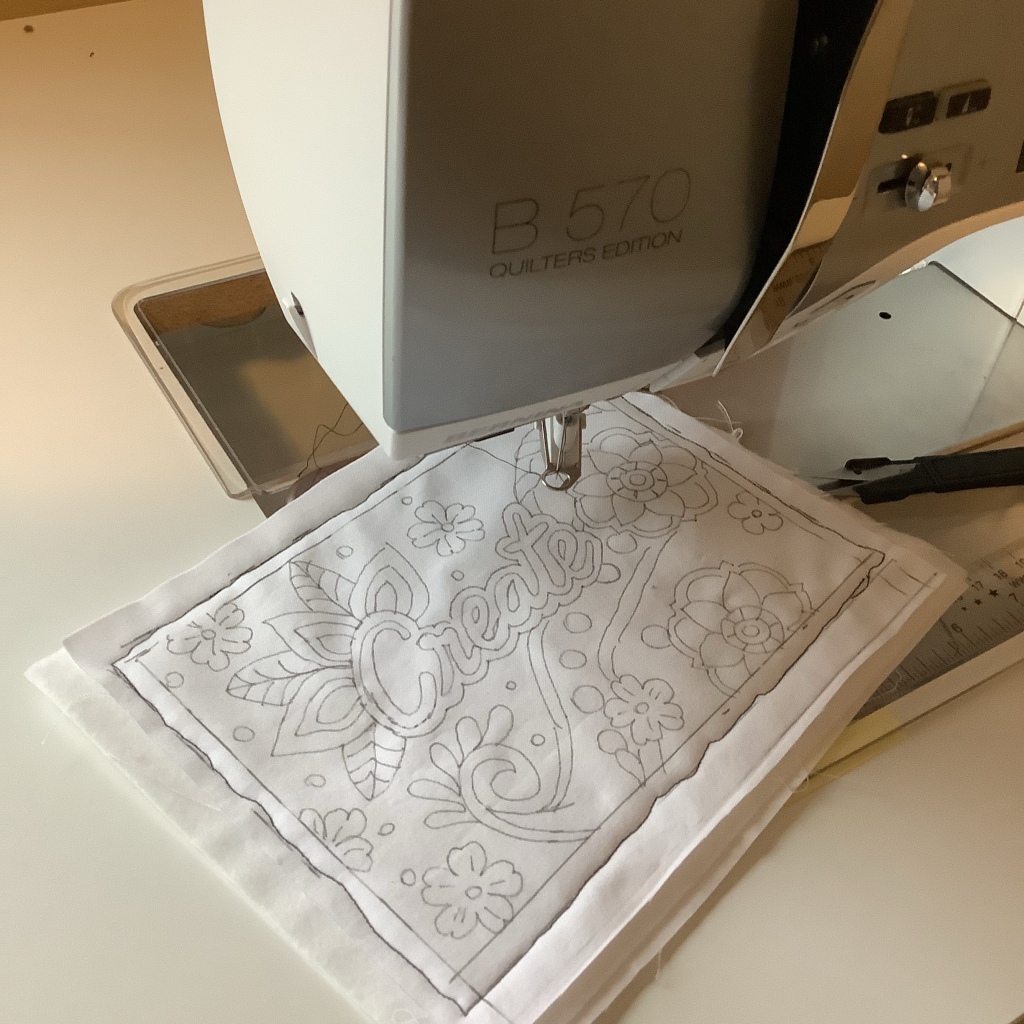
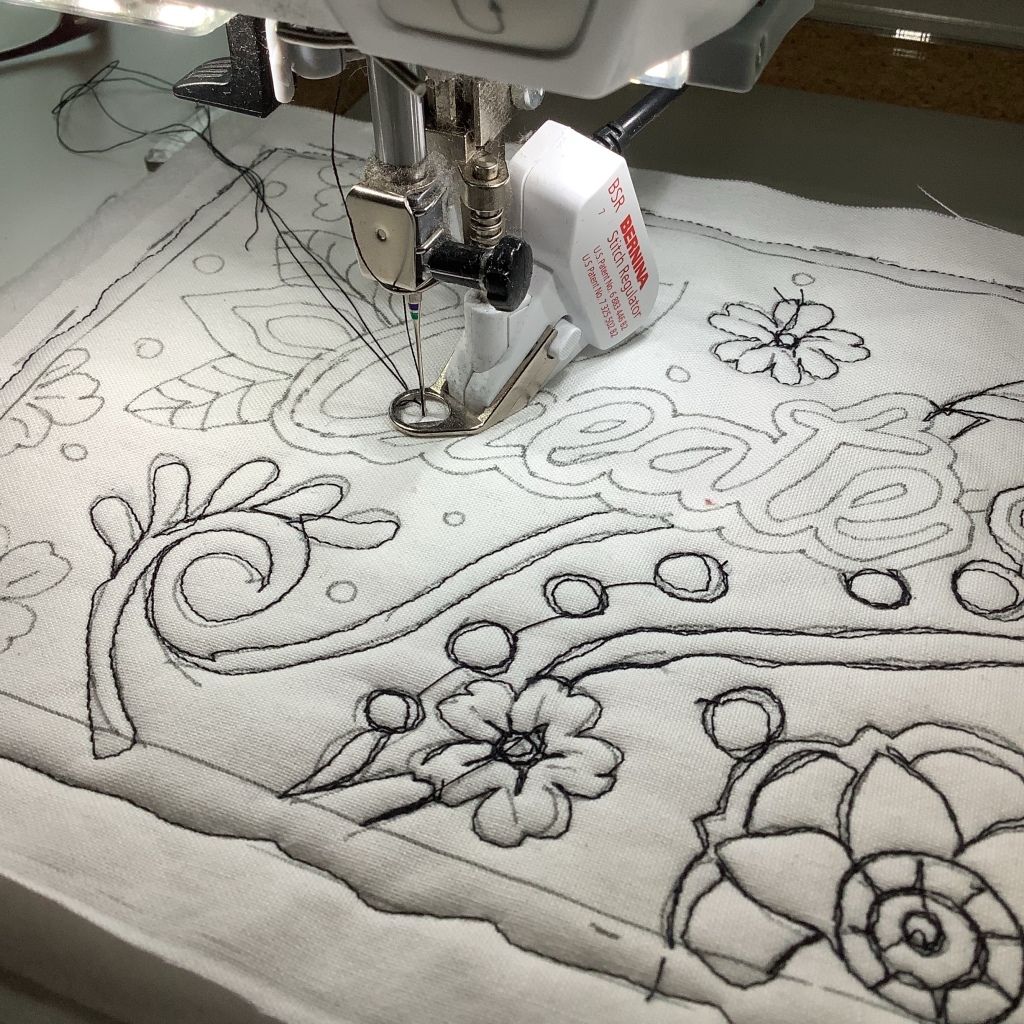
After adding batting & backing, I began free motion quilting over the drawn lines with black thread on my Bernina and my BSR foot. It’s ok to “draw” outside the lines, it’s ok to go over the lines several times … with no fear.

… Did you know that “do not fear” is found 365 times in the Bible?

Before ironing…
And after ironing…notice the drawn lines have disappeared.

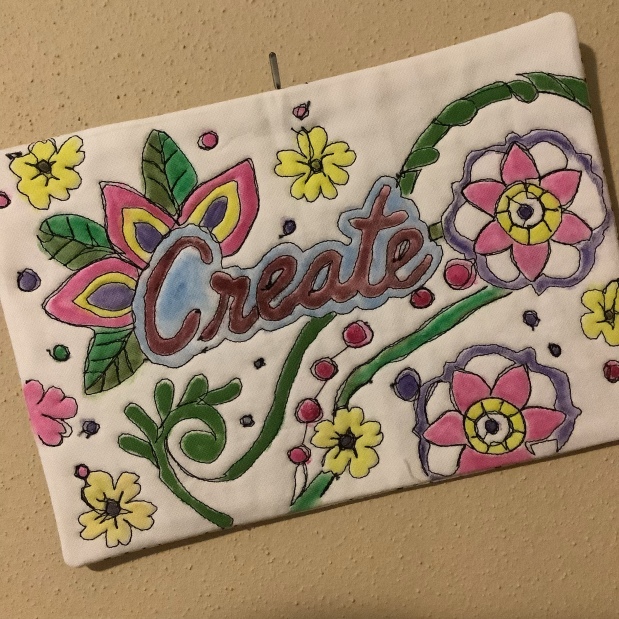
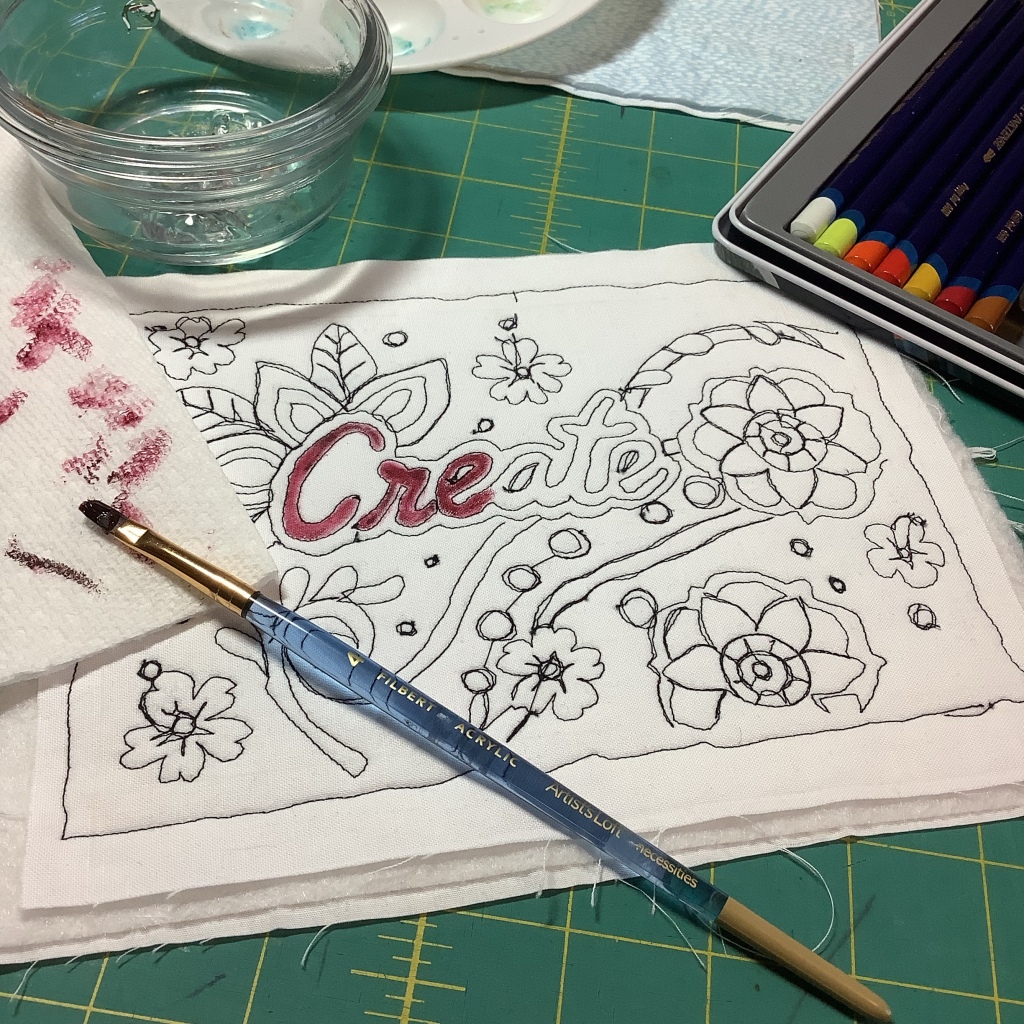
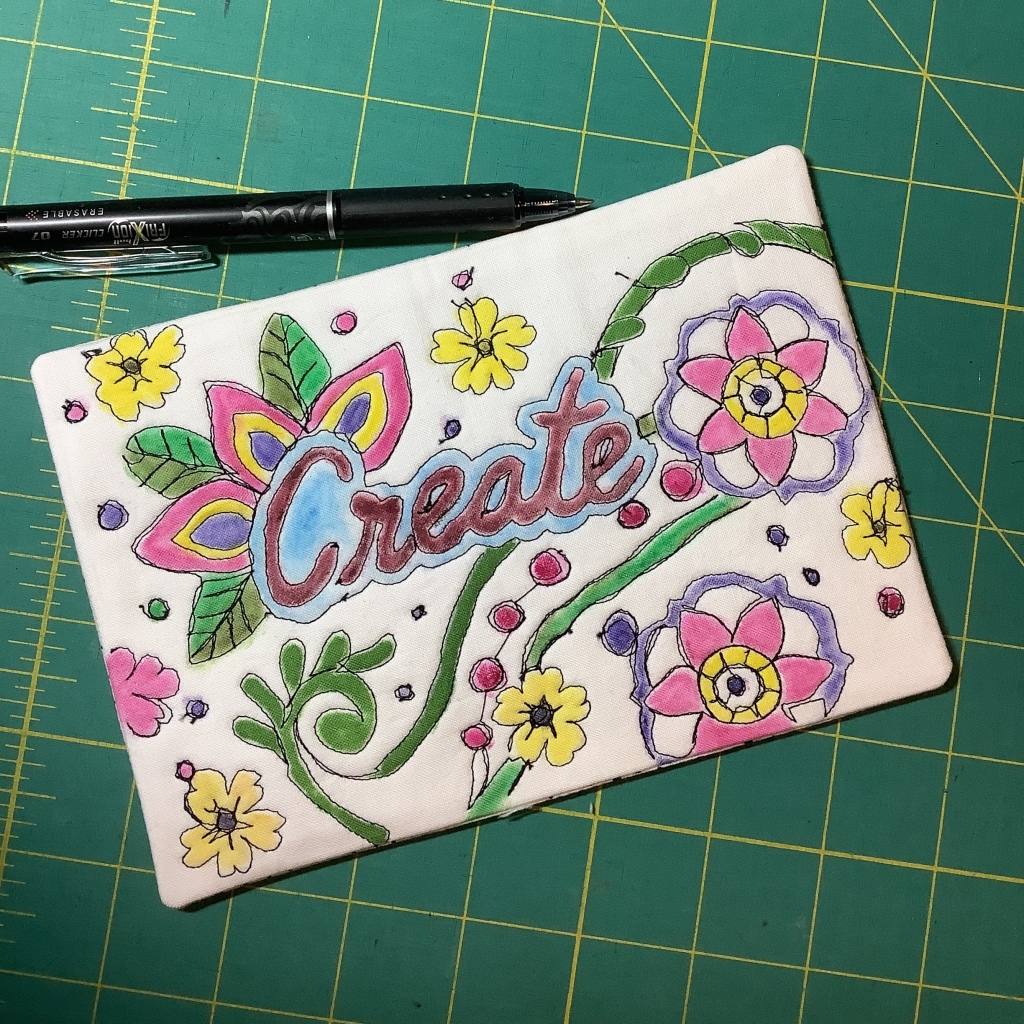
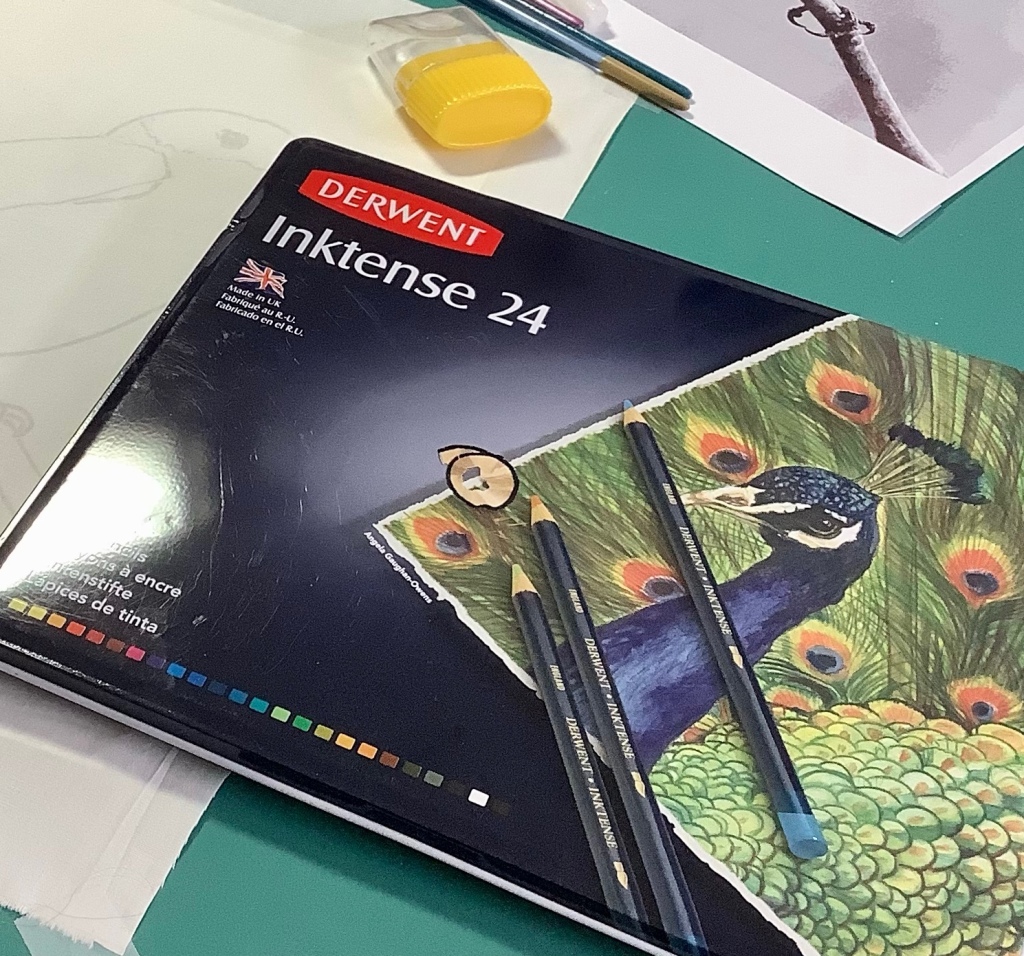
Then I got out my Inktense color pencils and aloe vera, and began “coloring”.

All that’s left to do is a pillowcase backing that I just saw featured on Quilting Arts TV today. Sew the backing right sides together to the front all the way around. Then trim corners, cut a small X in the backing fabric, and turn right side out and press. Ta-da!

And done!

No worries…I can cover the slits in the backing with the quilt label!

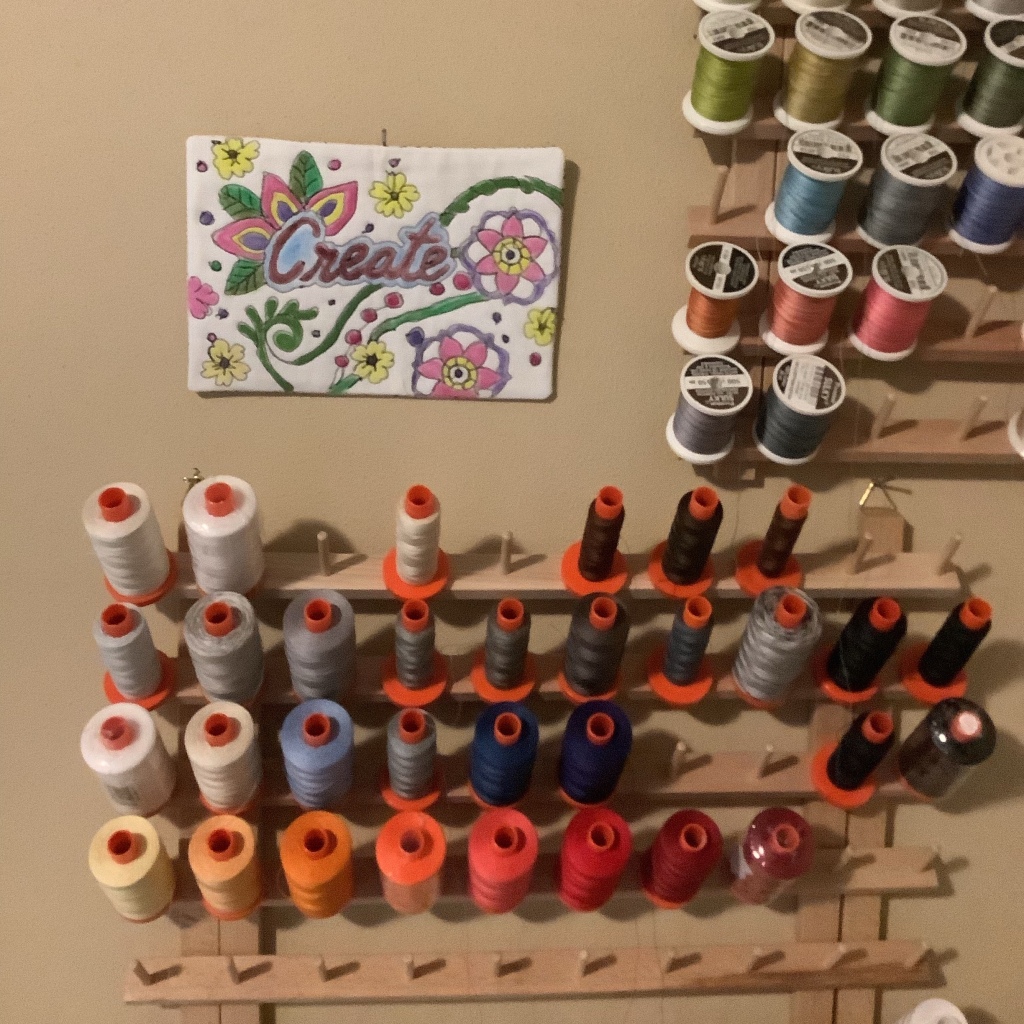
So here’s my mini art quilt, all done and hanging right above my sewing machine, amongst my beautiful threads, to remind me to create …have fun …don’t forget to play, and conquer my fear!

Until next time, Happy Quilting!

Jane

Mulberry Patch Quilts

Experimenting with Inktense on Fabric for Project Quilting 14.3

Experimenting with Inktense on Fabric for Project Quilting 14.3

The Project Quilting challenge for this week (Season 14, #3) is “54/40 or Fight”. It’s the name for a traditional quilt block. If you’re interested to find out more about the block, it’s history, or the Project Quilting challenge, click here: Project Quilting

The challenge has to be done from beginning to end in one week. I was thinking about using the 54/40 or fight block as the center of a square table topper, making pieces wonky to make it more modern. But my heart wasn’t in it. Nothing seemed to come together.

I had just gotten out my set of Derwent Inktense pencils to play with a few days ago, so I was inspired by them on another project. Then the light went on in my brain — Why not paint the block on plain fabric using the colored pencils? Yes!!

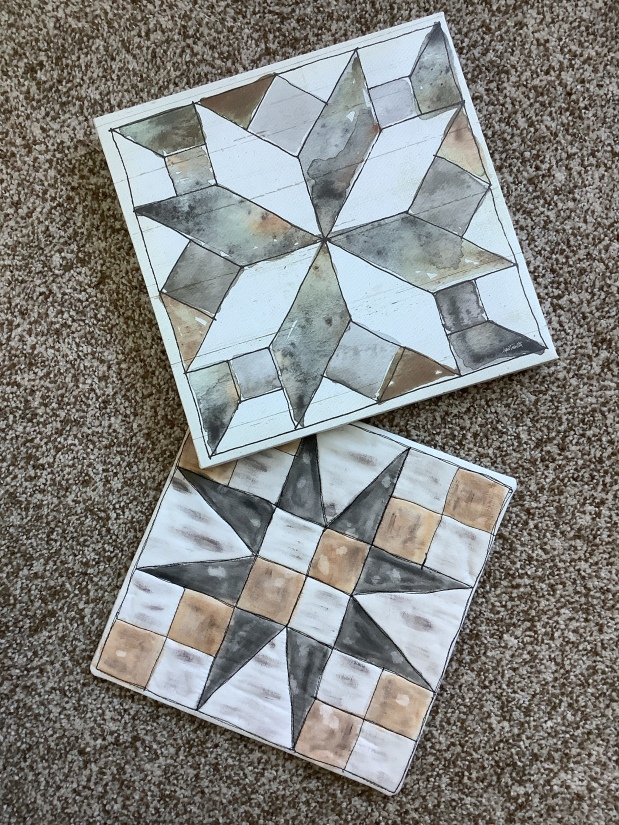
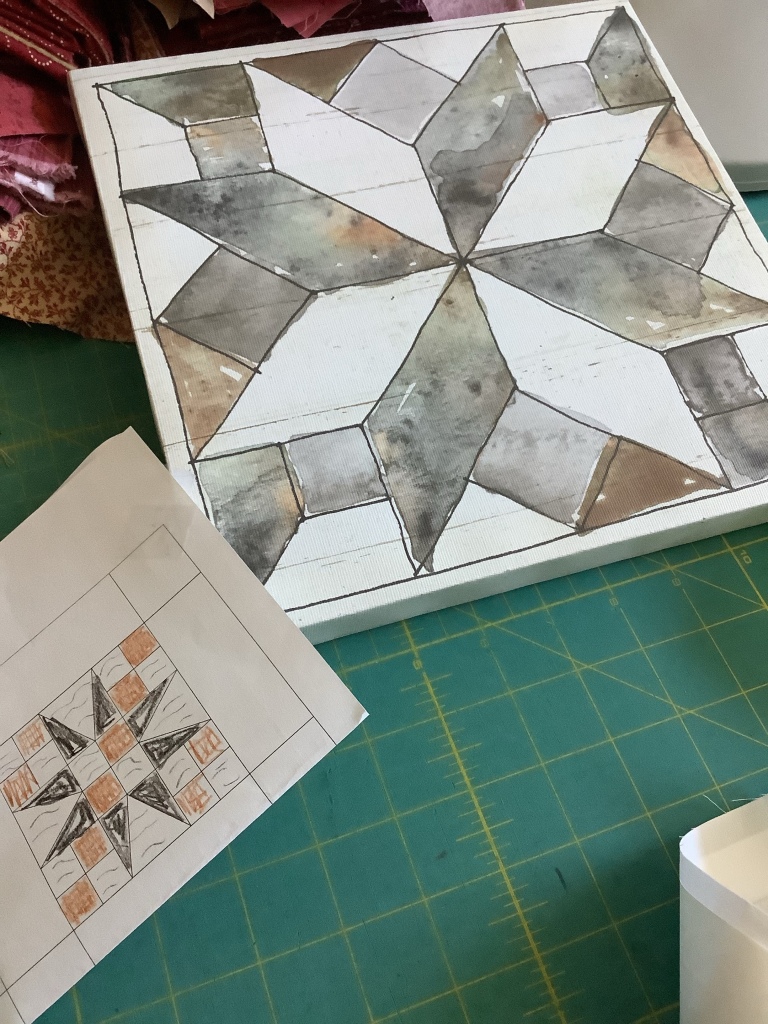
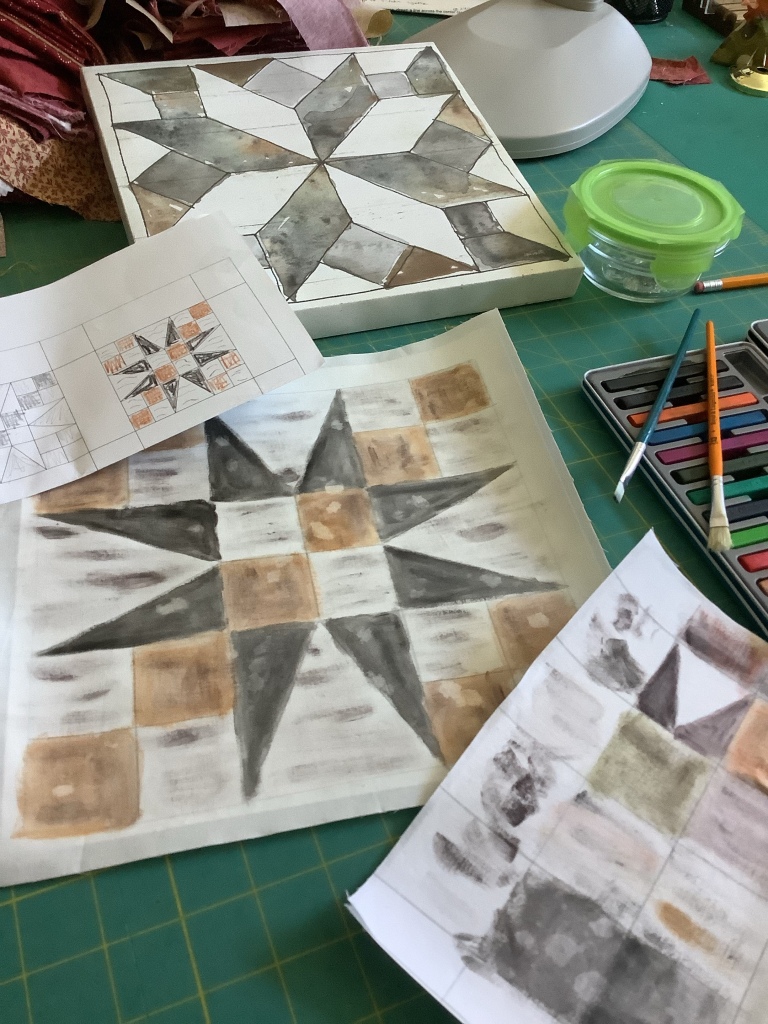
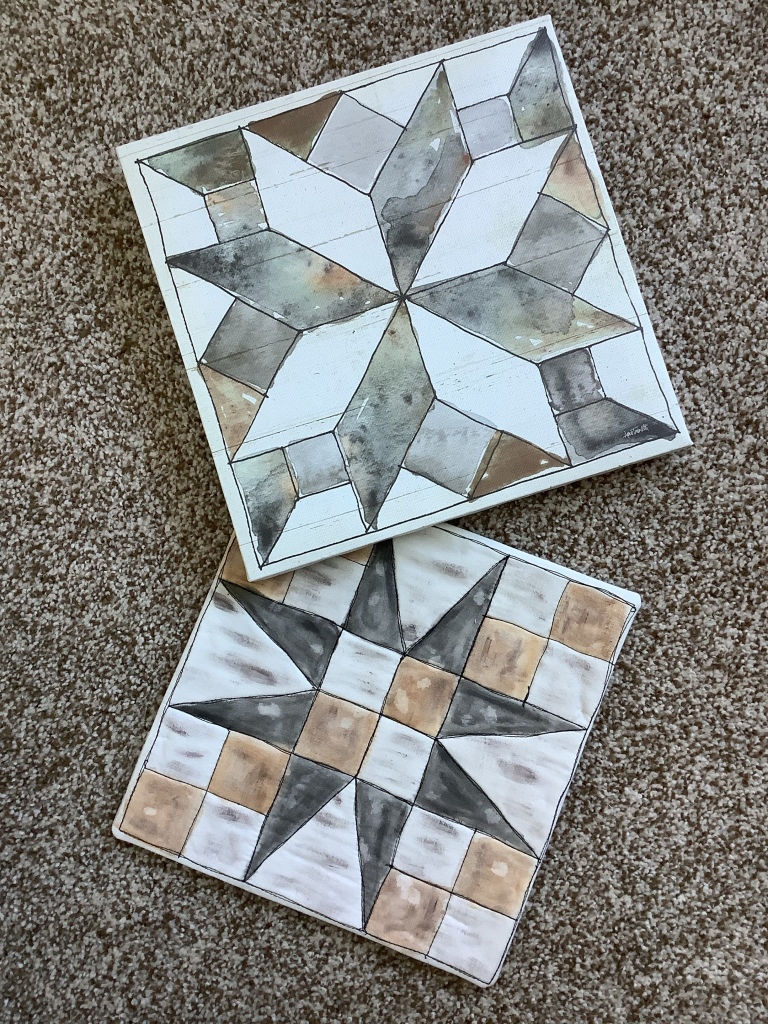
I was inspired by a design printed on canvas that I had picked up on sale somewhere few years ago. I’ve always loved the hand-drawn and watercolor look of it. And it has a barn quilt “distressed” vibe that appeals to me. Especially in the unusual muted earthy colors. Could I recreate something like that on fabric with my pencils and then quilt in those black seam lines? I was inspired enough to give it a try. Here’s a photo of the printed block on canvas.

A photo of the original printed block & my sketch of the “54/40 or fight” block

I experimented with the pencils and aloe vera, some water, and several brushes to try to get a similar distressed look on my fabric. My test sheet of samples and ideas are in the photo below, as well as the first stages of my painted block (bottom).

Sample sheet of ideas (lower right) & painted block on PTD cotton fabric ironed to freezer paper (center).

I kept tweaking my painted block with bits of added color in browns and grey to black until I was happy with the outcome. I even sprinkled water in a few areas, then blotted the ink to make it look even more distressed.

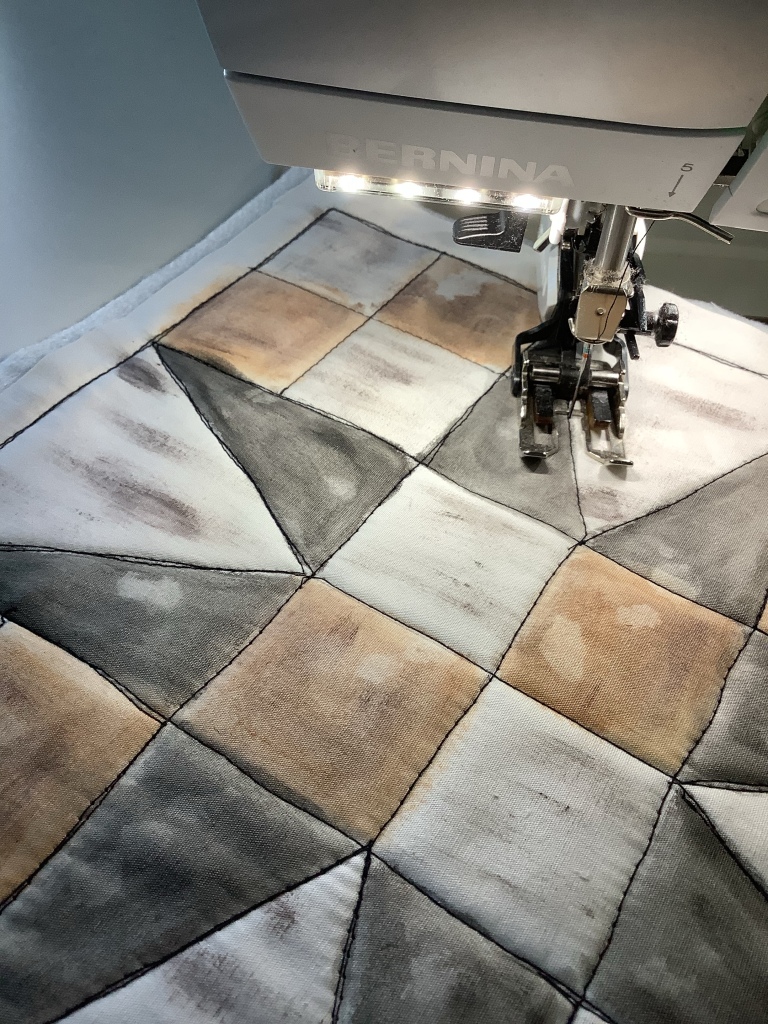
Uneven (purposely wonky) lines to echo a hand-drawn look

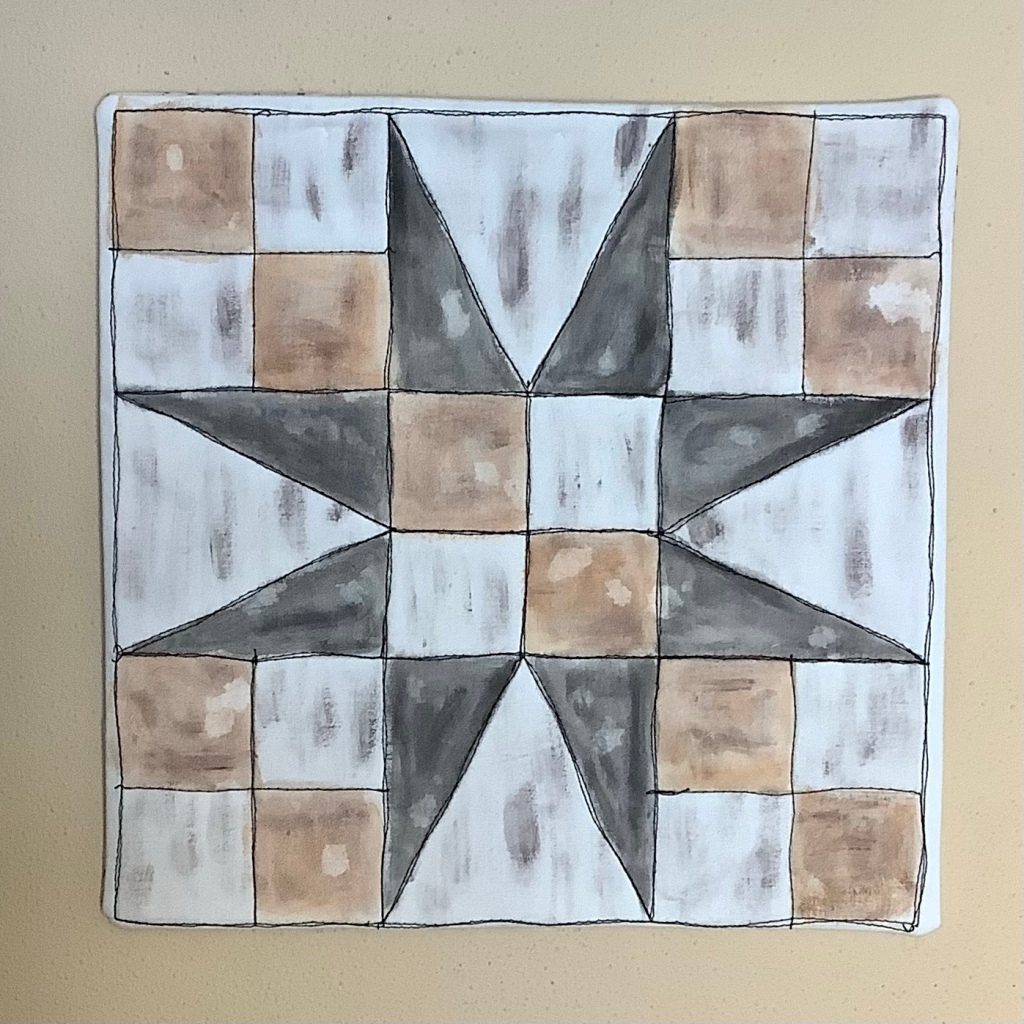
I added Pellon fusible fleece and a batik backing fabric and quilted along what would have been the seam-lines if it would have been sewn together. I purposely tried not to make the quilting perfectly straight to help give it a “hand drawn” look, like someone drew the lines a few times with ink on watercolor. .

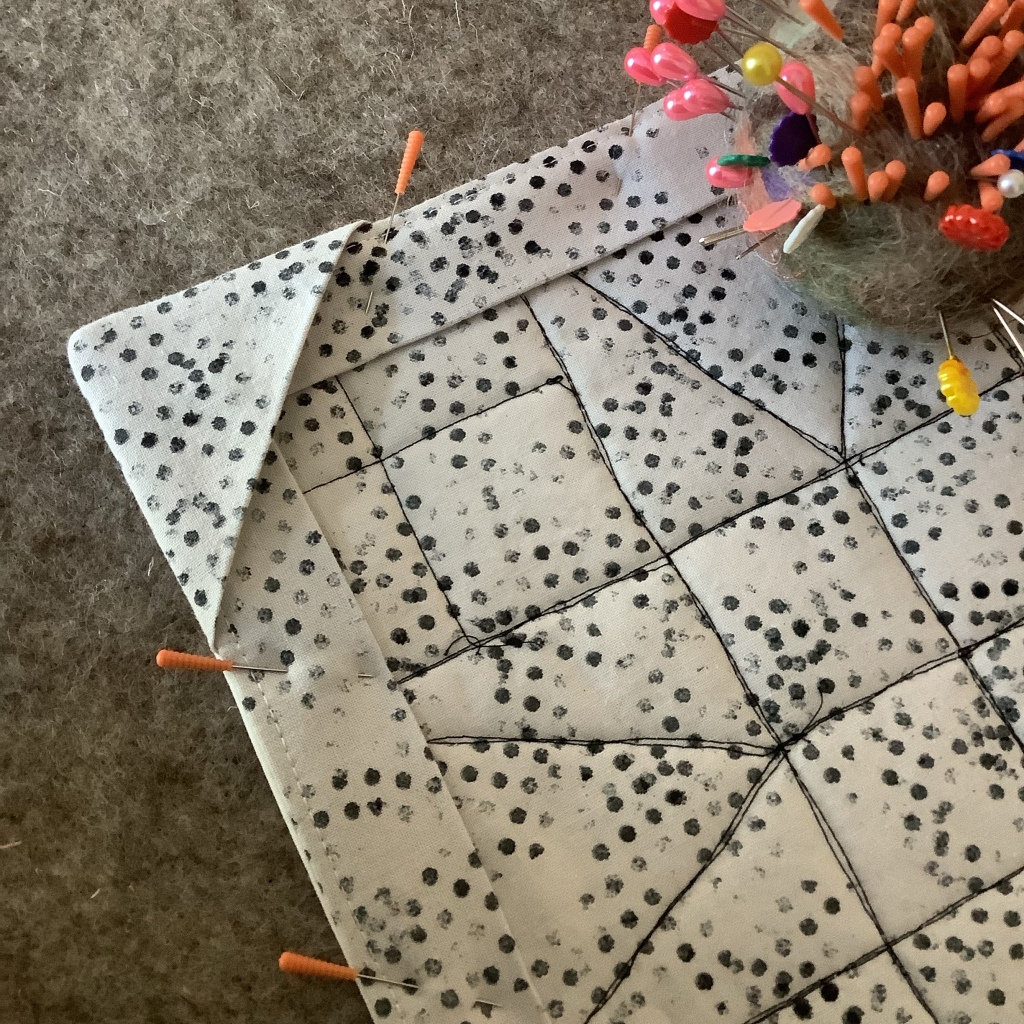
The only thing left to do was to bind it. I used an art quilt technique of sewing folded triangles to the front of each corner, adding strips folded lengthwise to each side (cut just a half inch or so short of each corner). And then (after stay-stitching) I folded them all to the back and hand stitched them down.

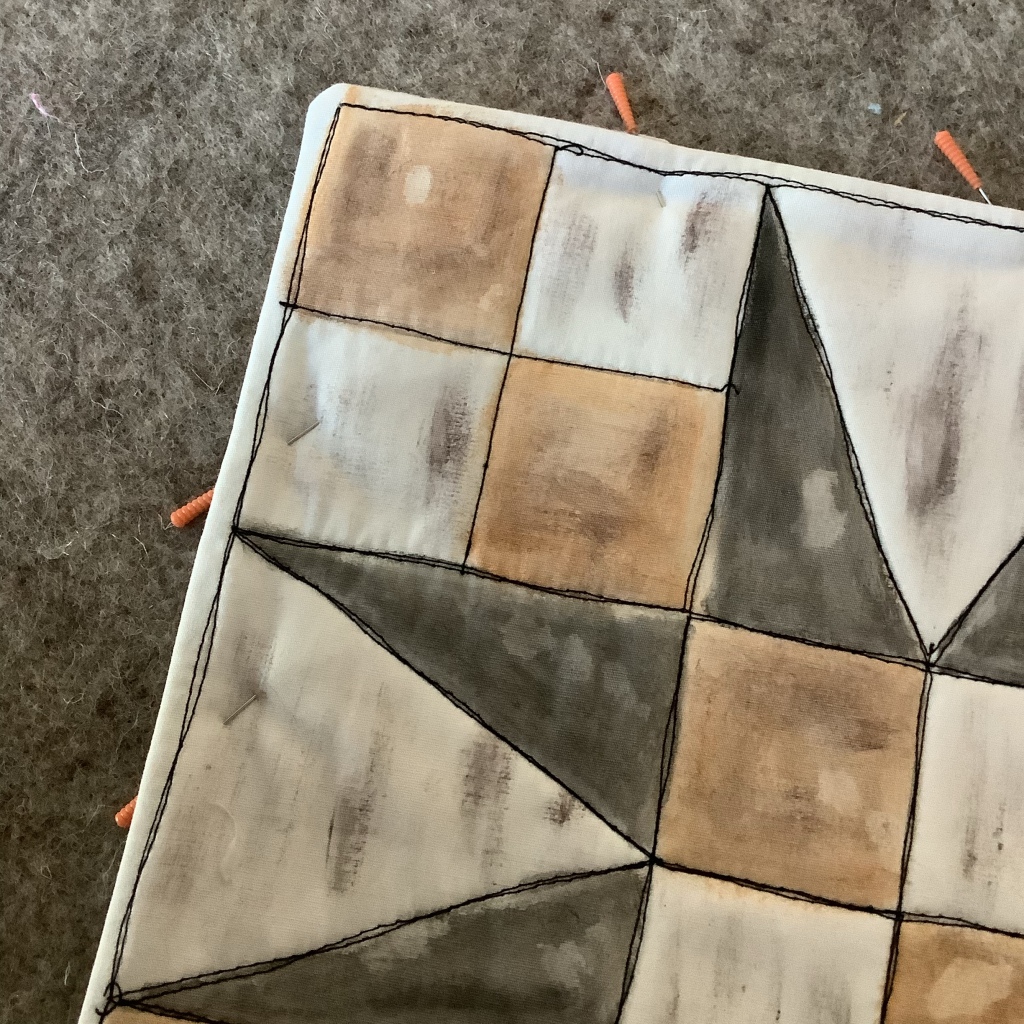
I liked the clean edge that mimicked the look of the print on canvas.

Before hand sewing it all down, I added a thin wooden dowel intwo of the corner triangles so it’ll be easy to hang on the wall.

And here it is! All finished in plenty of time to enter in the contest. Wish me luck!

How does it compare with the original inspiration piece? Might not be perfect, but for a first try I’m satisfied.

Derwent Inktense pencils are easy to use, experiment with, and I’m sure I’ll be “playing” and experimenting again soon! Give them a try.

Until next time, Happy Quilting! Jane

Mulberry Patch Quilts

Painting on Fabric with Inktense Pencils

So I haven’t painted or drawn on fabric for quite awhile now. And with the snow falling outside, I declare an official “Snow Day” … a day to relax, stay cozy indoors, and “play”.

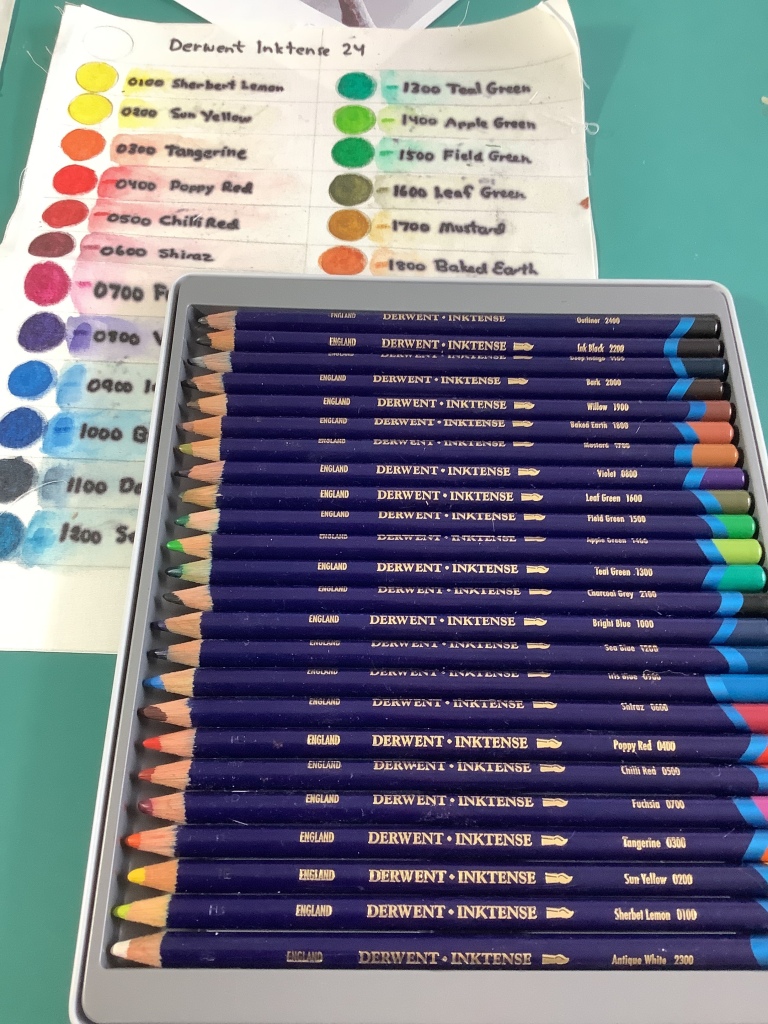
I’ve got my Derwent Inktense 24 box of pencils, a few stiff brushes, some plain white fabric (PTD prepared for dying), freezer paper, and water/aloe vera gel/textile medium and I’m ready to play.

For those of you not familiar with these color pencils, once they’re activated with liquid and dry they become permanent. Unlike watercolor or regular color pencils, these pencils have actual ink in them that bonds with the fabric when wet. You can use water (which will give more of a watercolor effect but will bleed more) or a textile medium or aloe vera gel (which are thicker and give you more control). Let’s give it a go!

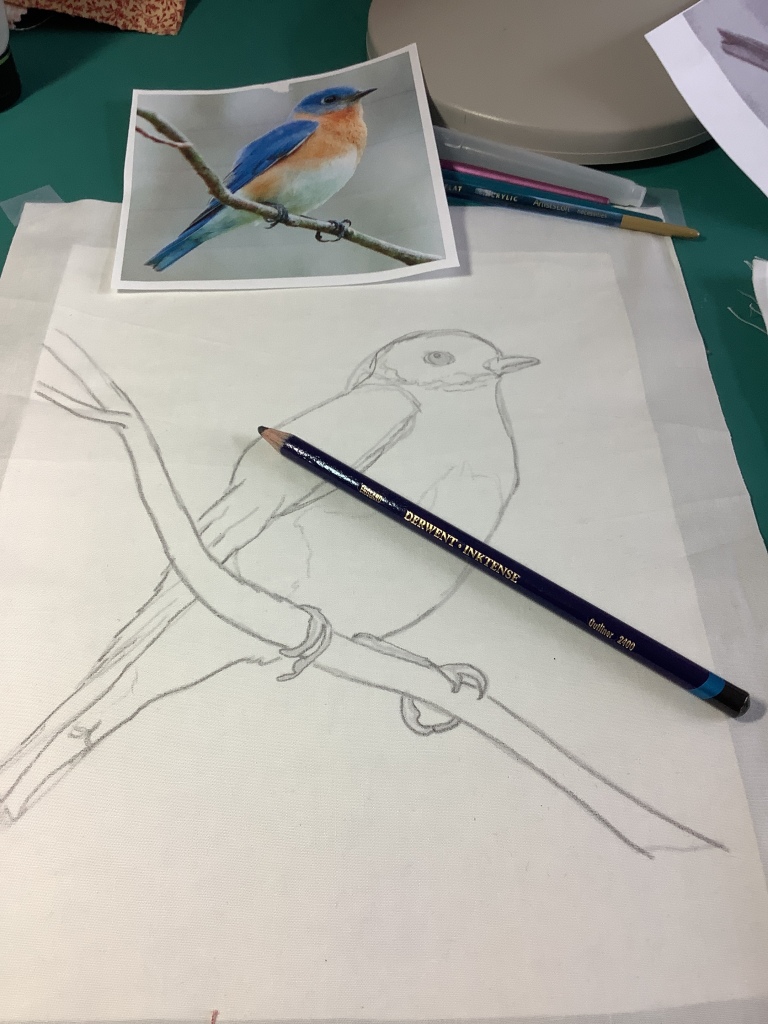
After tracing a photo on the shiny side of a piece of freezer paper, I ironed it to my fabric. I chose 100% cotton “prepared for dying” white fabric because I had it on hand, but I think any cotton muslin with a tight weave will work.

There are a plethora of how-to videos on YouTube, and I watched quite a few of them. Just search on “Inktense on fabric” if you’re interested.

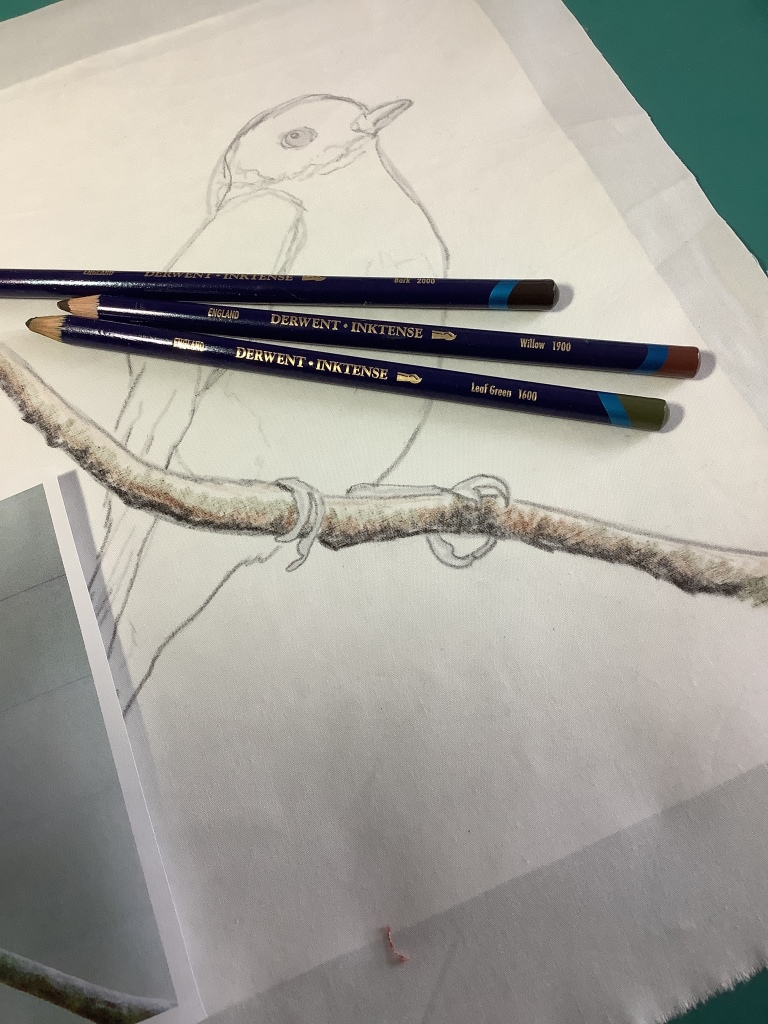
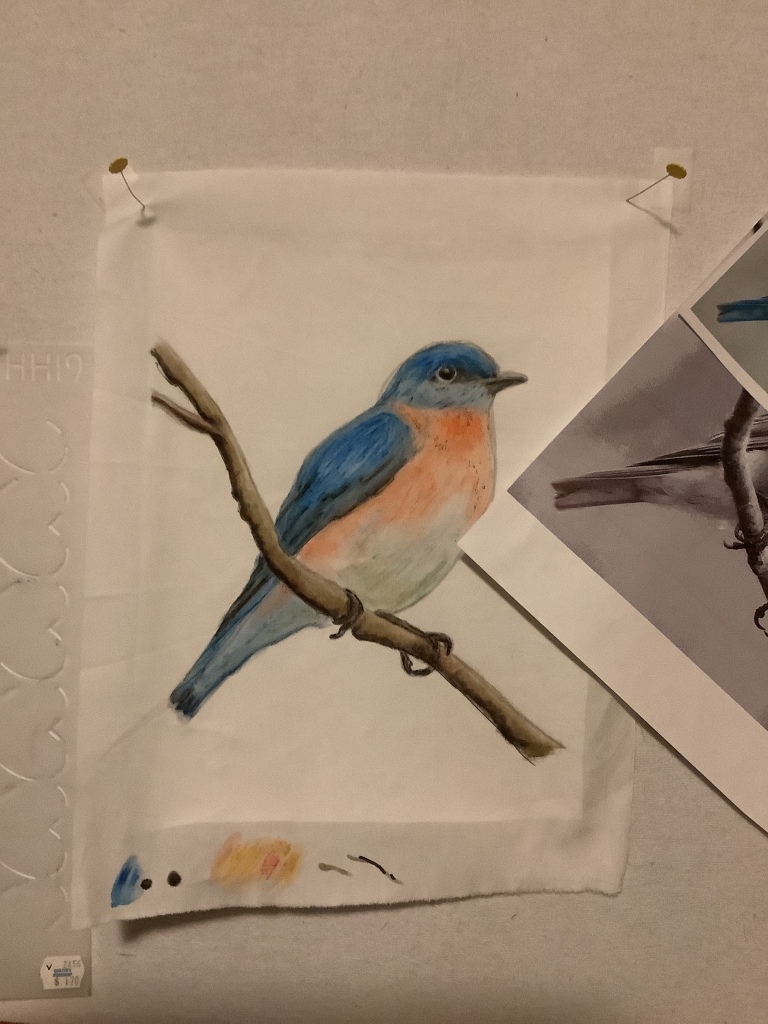
In my pack of 24 pencils there’s one labeled “outliner”. I’m using that one to sketch in the details of the bluebird.

I’m going to draw on the dry fabric and then use the aloe vera on a stiff brush to blend and make the color pop. My sample sheet might be helpful in choosing the colors.

When I first got my pencils, I made a sample sheet on fabric of all the colors.

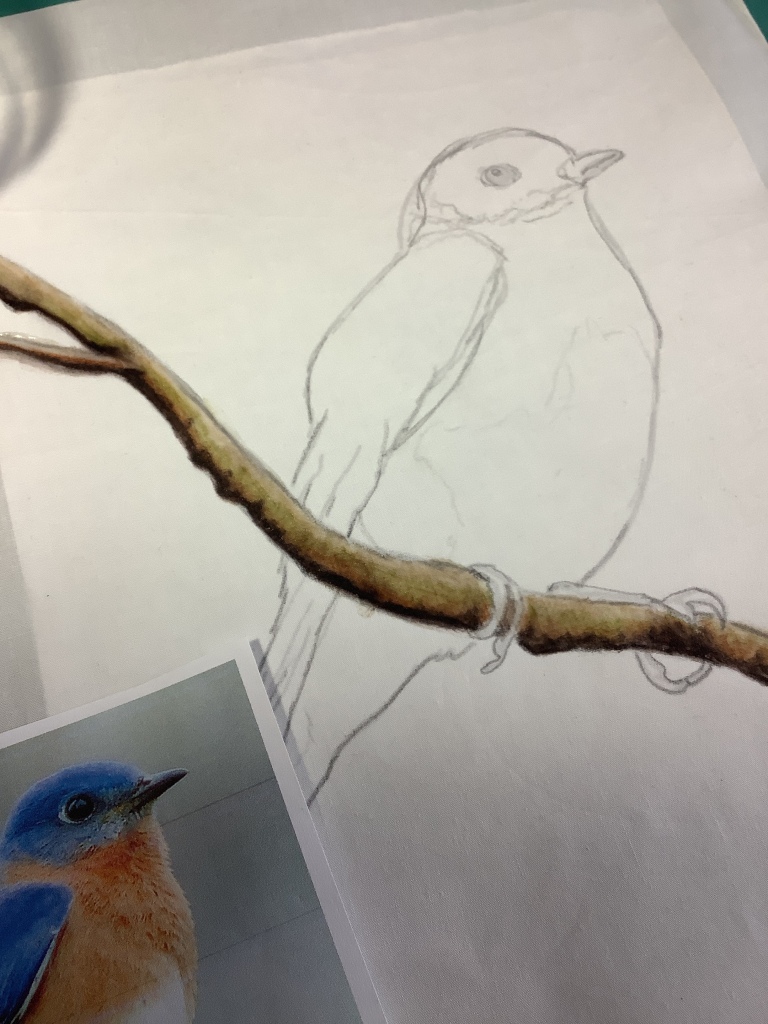
I’ll start with the branches.

Dry, no aloe vera added yet.
After brushing on the aloe vera and blending.

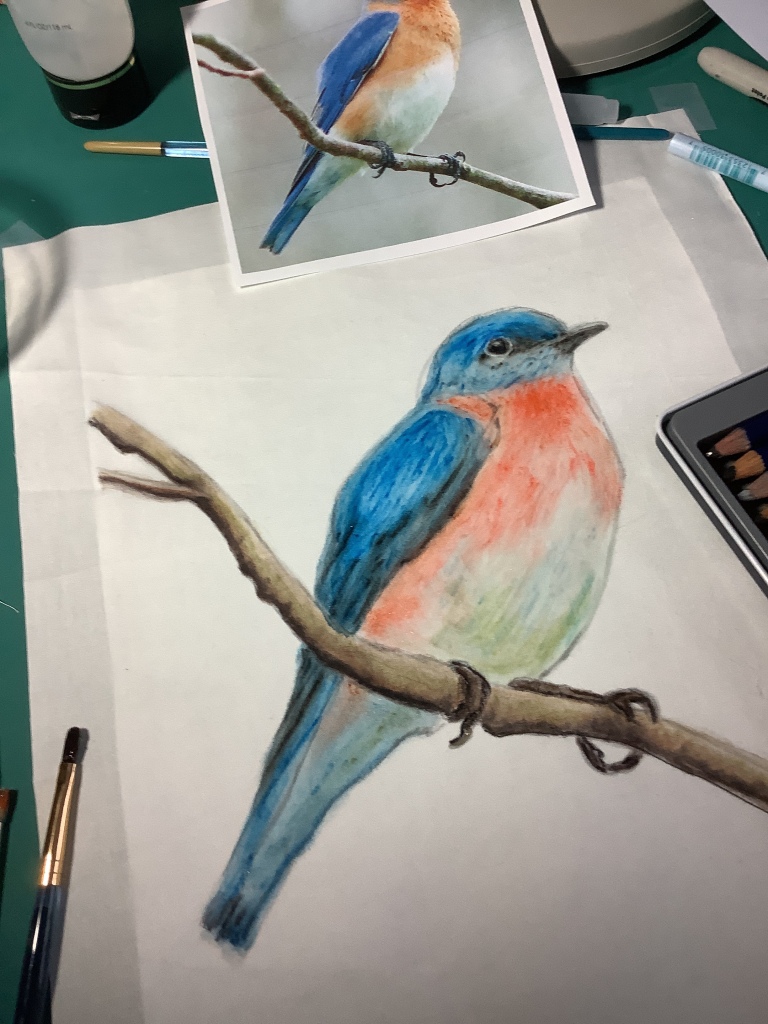
You can see how vibrant the color becomes on fabric when liquid is added to it! For the lighter areas I found brushing on the aloe vera first, adding bits of color and blending worked better. I even took my wet bruch and dabbed it right on the pencil to add the color.

Not perfect, but not too bad for a first try

Next I need to let it dry. I may come back and add details using a permanent fine tip marker after it’s done drying.

I’ll come back and show you the finished art quilt when it’s done. For now I’m going to think about what background I’ll use. will it be pieced? Painted? Or a batik?

Until next time, Happy Quilting! Jane

Mulberry Patch Quilts

Combining Art Quilting Techniques

Combining Art Quilting Techniques

When you have an idea in mind for your art quilt, often combining techniques you’ve learned along the way and a little experimentation will help you reach your goal.

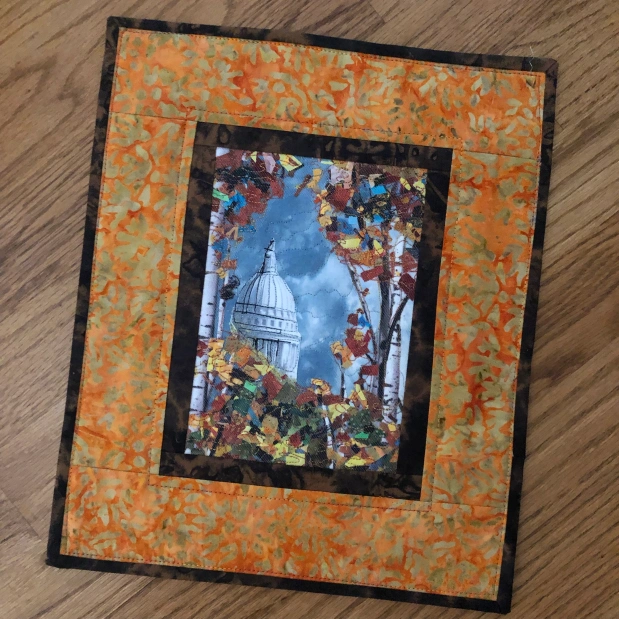
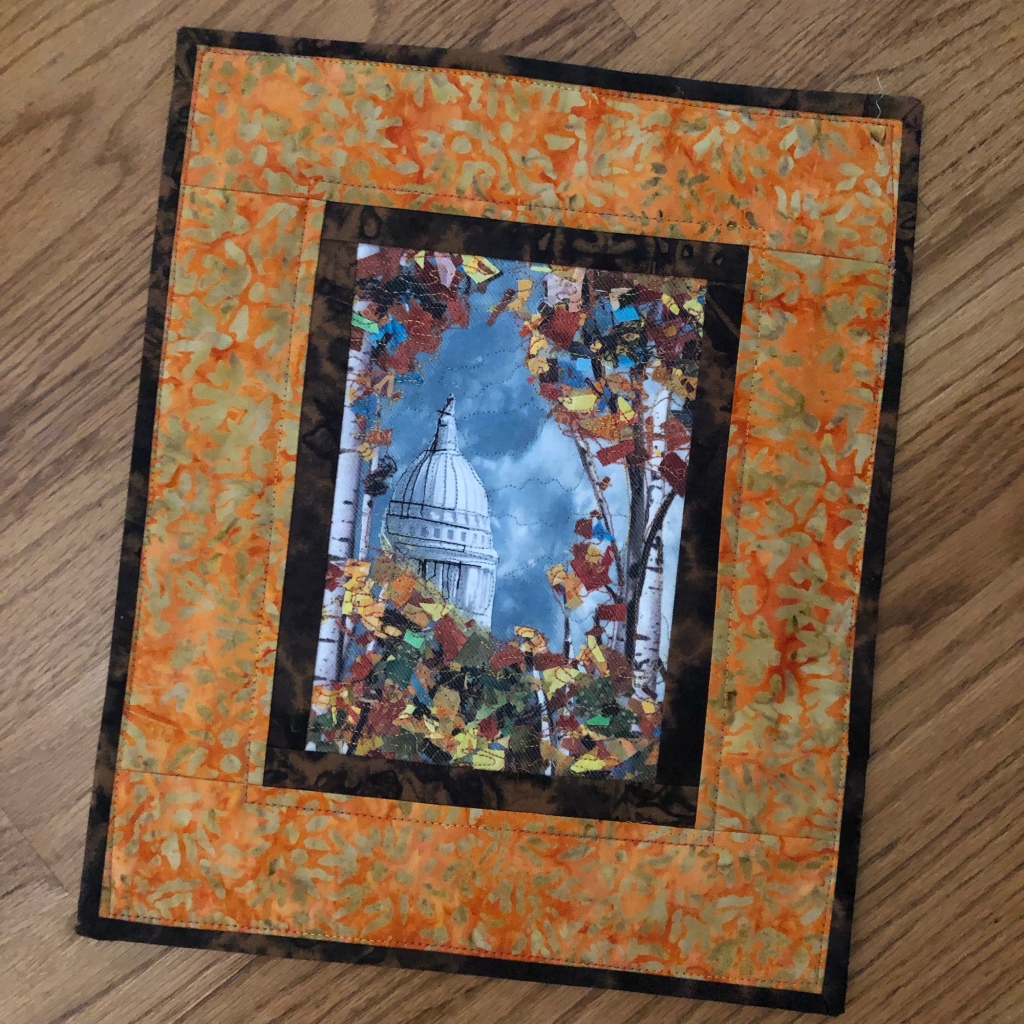
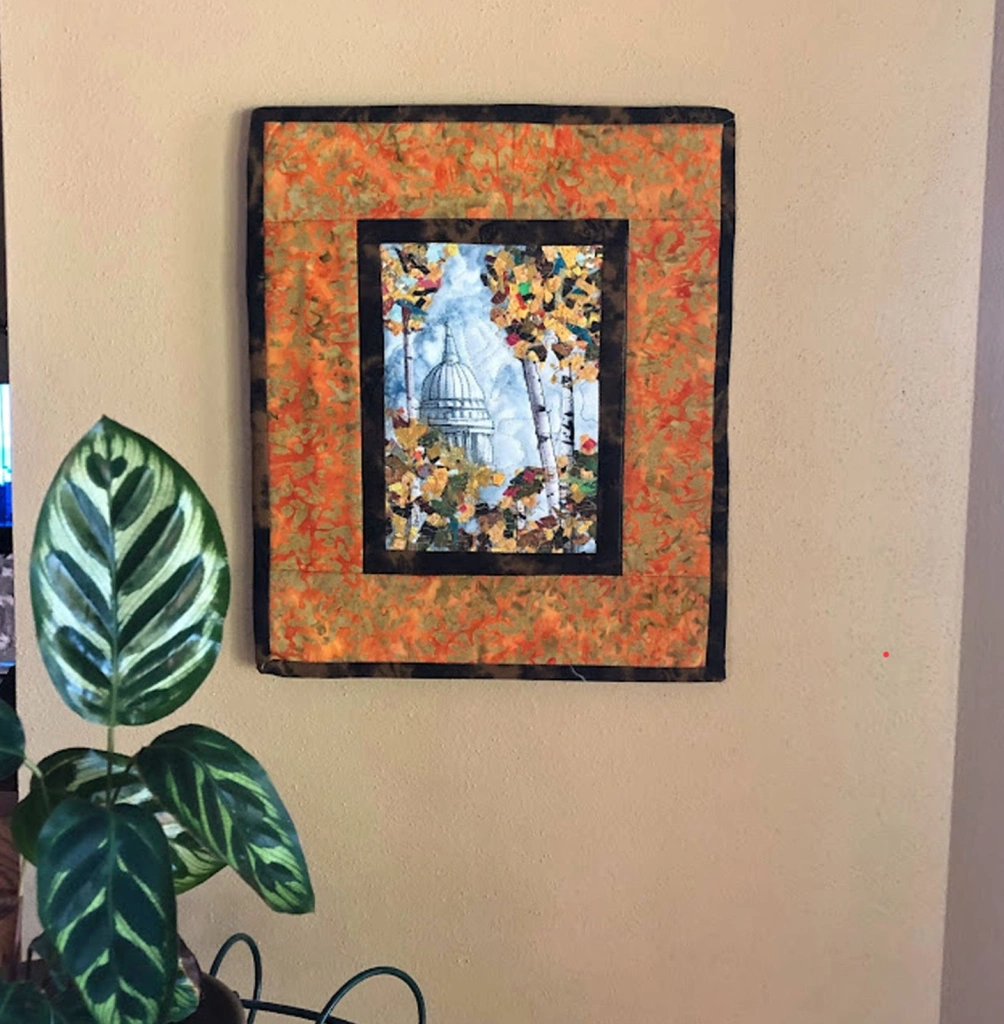
My goal for this small landscape art quilt was to recreate a scene of our Capitol shown in the distance through the autumn leaves. The fall season is my favorite, and so beautiful at the UW-Madison with the variety of trees and colors. Having worked in the heart of this beautiful campus for many years, I’ve had many opportunities to view it.

So how do I begin to reach this goal…where do I start? I cut a base of scrim and a thin wool batting about 8×10” and drew a 6×8” border, giving me a background with border parameters.

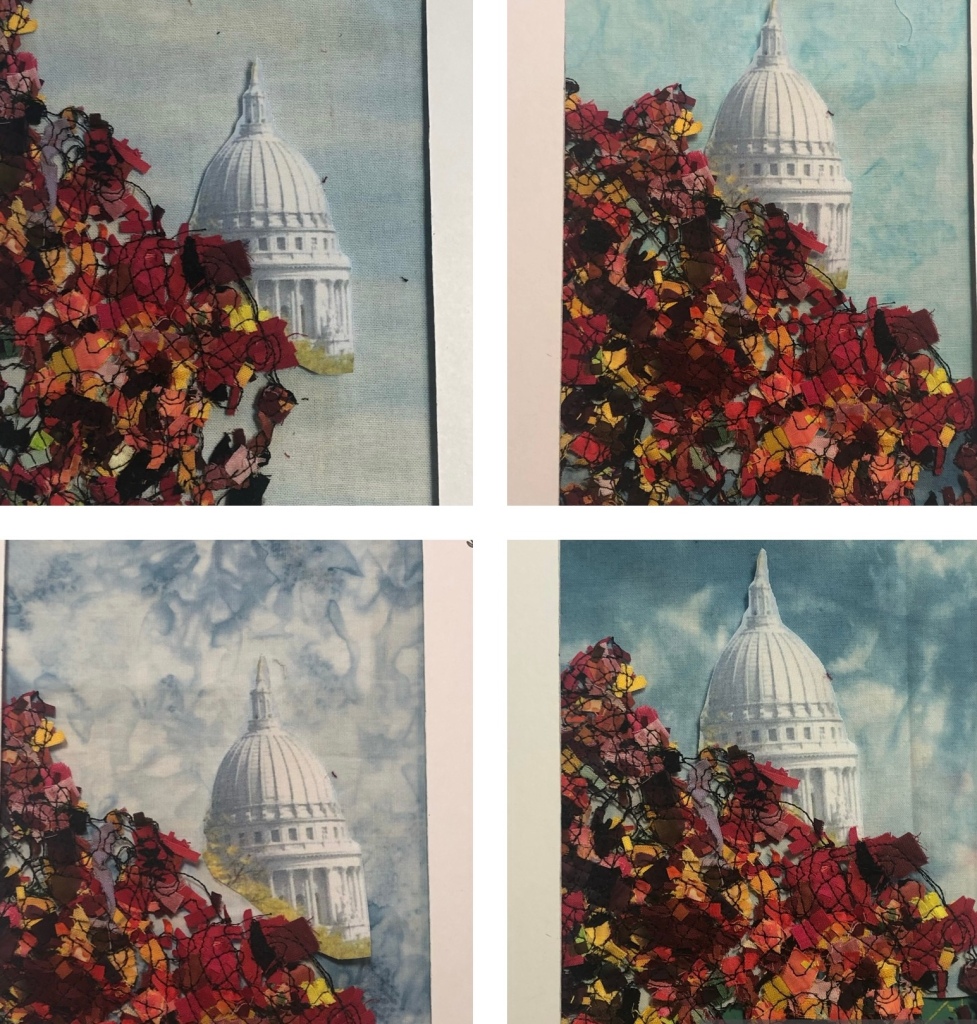
I knew I needed to begin with two important elements for the background … the Capitol and the perfect hand-dyed fabric for the sky. For the Capitol I used photo-transfer. And for the sky I auditioned several fabrics, until I narrowed it down to four. (Note: The “leaves” in the photos were left over from another project—just used temporarily to me help decide.

When I was experimenting with dying cotton fabric with Procion dye a few years ago, I made lots of fabrics that work nicely for sky and water. It’s great to have that stash on hand!

I liked the sky fabrics in the two bottom photos the most. I felt they had more depth and interest. So I made two. Why not? It’ll give me a chance to experiment more with my stitching and color choices for leaves & thread.

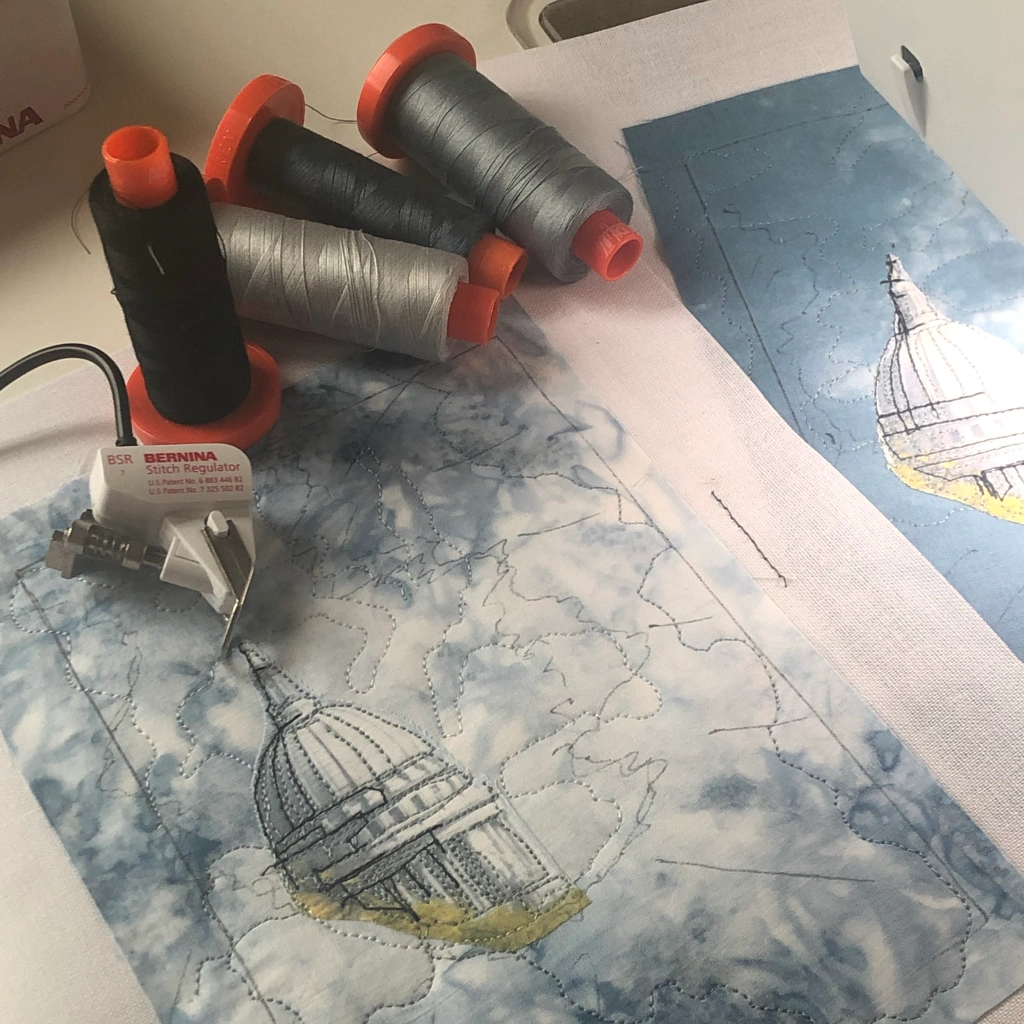
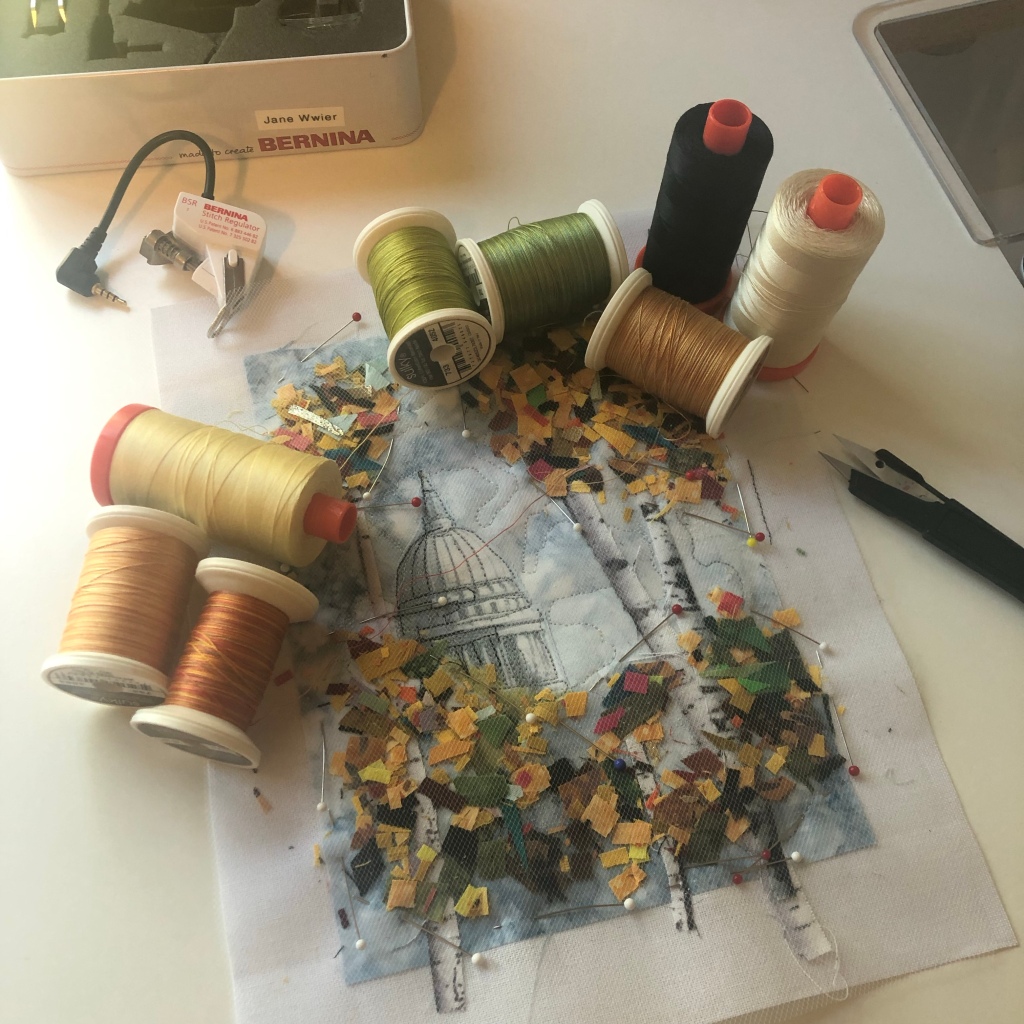
I found several colors of Aurifil and Sulky threads to “thread paint” texture and detail into the building and sky. Shades of grey blend nicely.

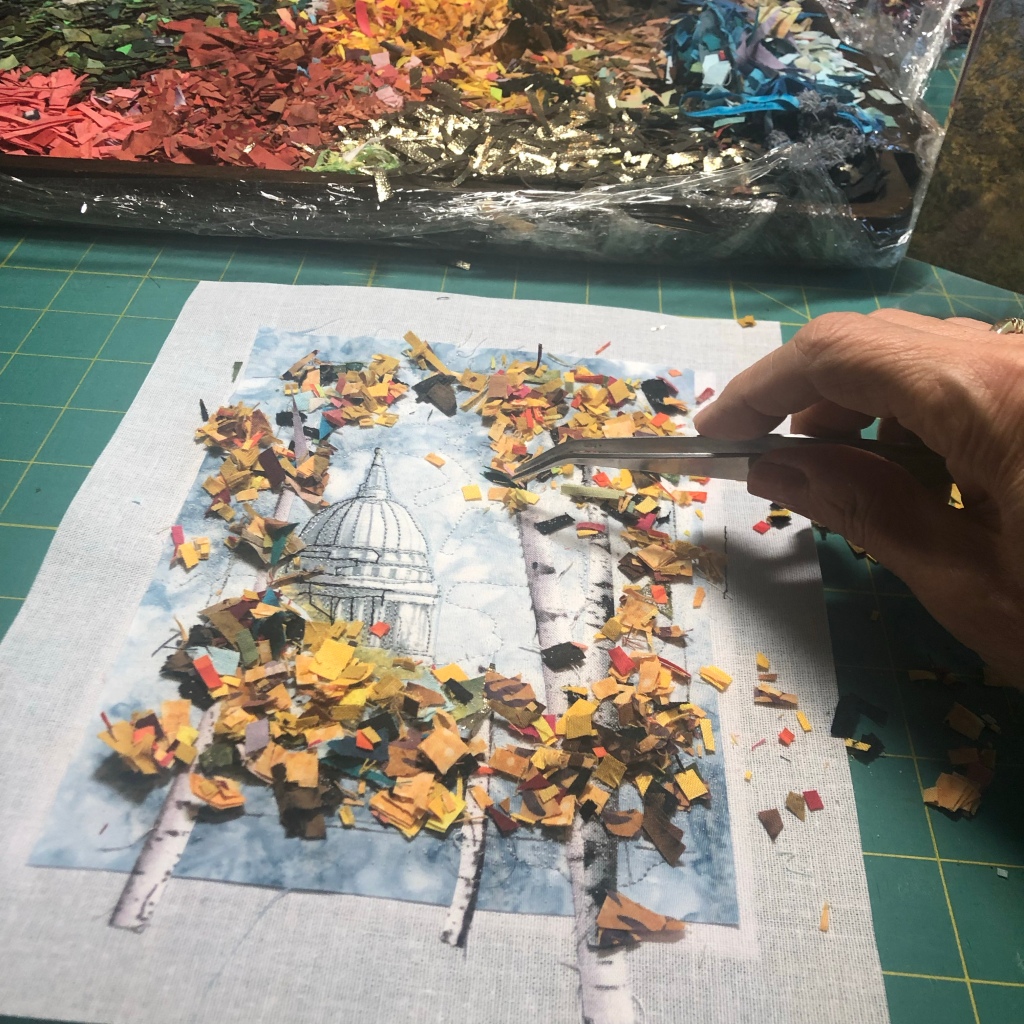
Now for the tress and autumn leaves. First I experimented by cutting individual leaves to fuse in larger chunks, but I didn’t like the look (sorry, I forgot to take a photo). So instead I opted to use the “confetti” technique by cutting small “confetti like” pieces of fabric and placing them directly on the background, covering it with tulle, pinning, and then stitching it down to keep in it place.

I rotary cut dozens of batik fabrics in fall colors and started planning out where the leaves would go. A tweezers helps with this process. …don’t sneeze!!

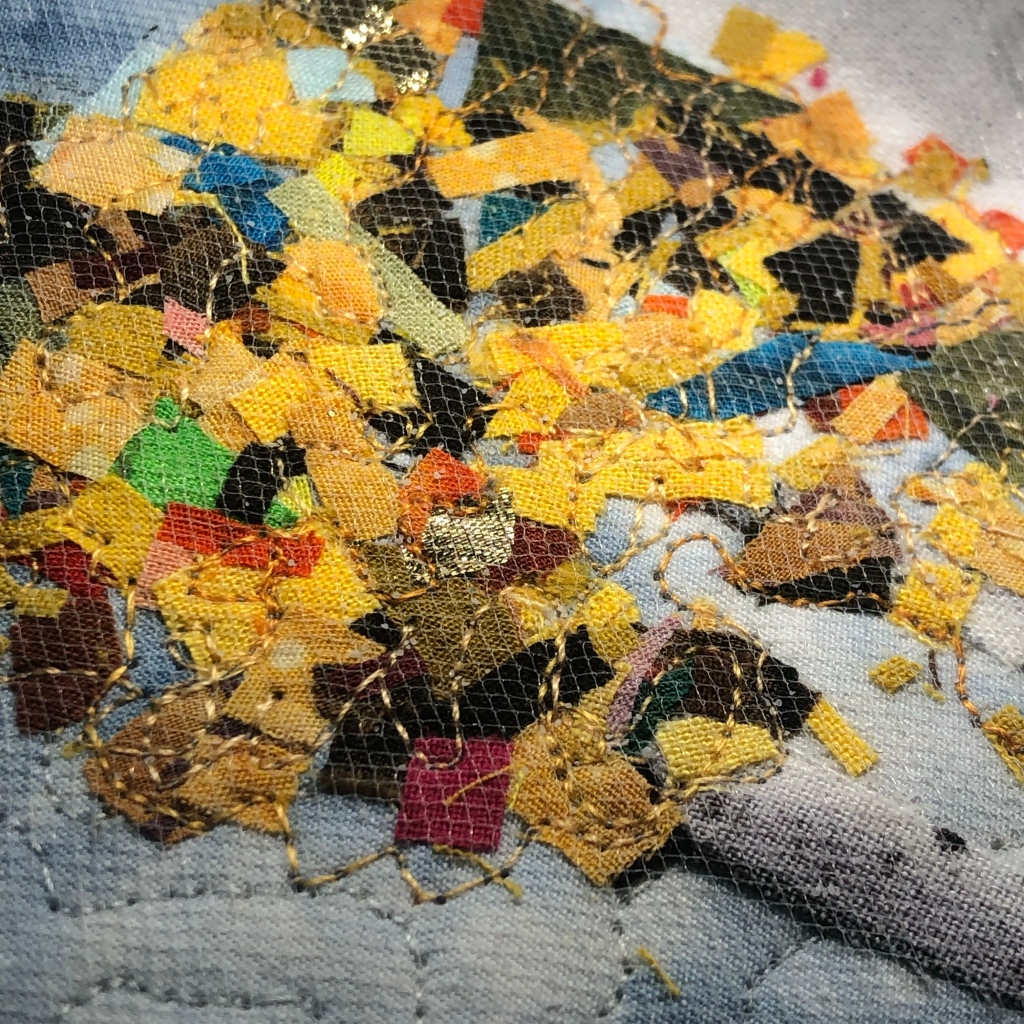
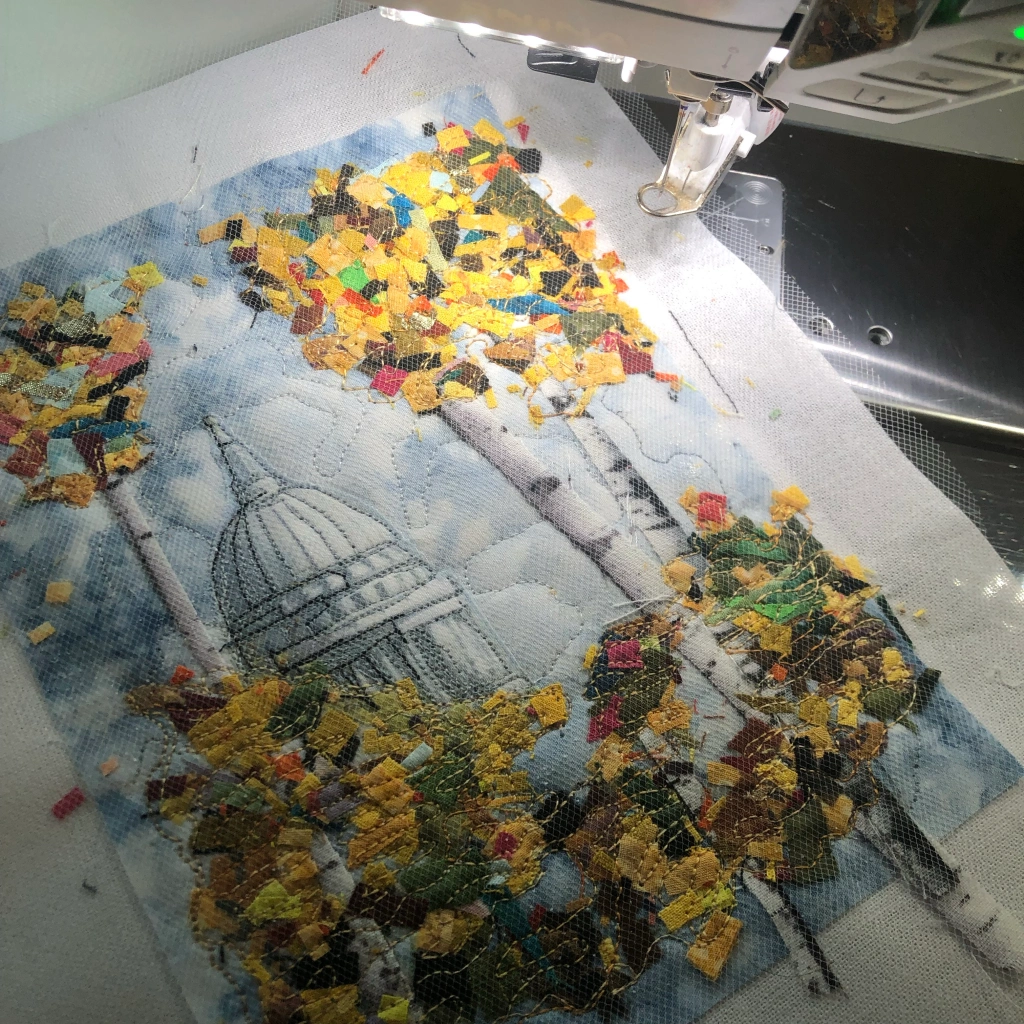
Once I was satisfied with the placement, I covered it with white tulle (to keep it lighter), pinned it together, and auditioned some of my Sulky and Aurifil threads to machine quilt it. Note the birch tree trunks added underneath.

The free-hand machine quilting not only keeps the little pieces of fabric together, but it adds texture and color.

I love the final look with the birch tree trunks under the stitched leaves. Now I need to remove (cut away) the excess tulle. And add a couple of borders, some backing, batting, and finally on the hanging triangles and binding.

Here’s a quick video of most of the final process:

Here’s a one minute video showing my process.

Whenever possible, I like to chose a fabric for the backing that’s interesting or fun. For one of them I found a fabric I’d experimented with marbleized on earlier, and for the other some fabric that gradated from green to brown. I like to sew folded triangles into the upper corners to make it easy to hang on the wall. (See the back of the quilt towards

the end of the video.)

Both art quilts are now in my Mulberry Patch Quilts Etsy Shop.

As always, I hope you enjoyed seeing the process. And that you’ll have fun creating your own favorite scene and experiment with different techniques along the way.

Happy Quilting!

Jane, Mulberry Patch Quilts