Resist Painted Wallhanging for #ProjectQuilting Season 15.2

Resist Painted Wallhanging for #ProjectQuilting Season 15.2

I try to participate in Project Quilting every year. It’s a great excuse to try a new technique and play.

This week’s challenge is “Sky Color (not blue). We’re supposed to create a quilted item within one week start to finish.

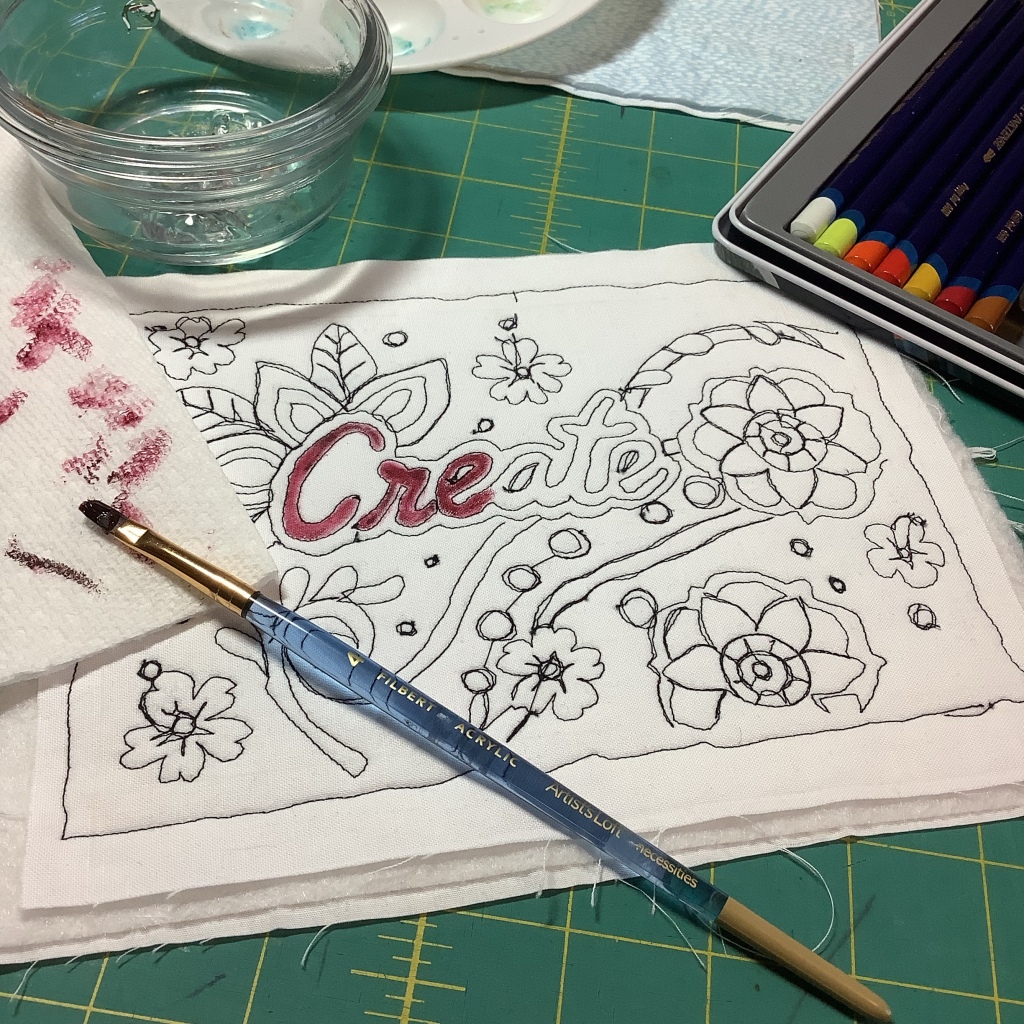
I decided to try a resist technique I saw demonstrated by Quilter Julie B. Booth on Quilting Arts TV (Episode 1703 “You can’t resist this”). She demonstrated how to use ordinary liquid dishwashing soap as a resist on fabric.

Here’s a youtube Quilting Arts TV preview… see it on the end:

Intro to the episode featuring her technique

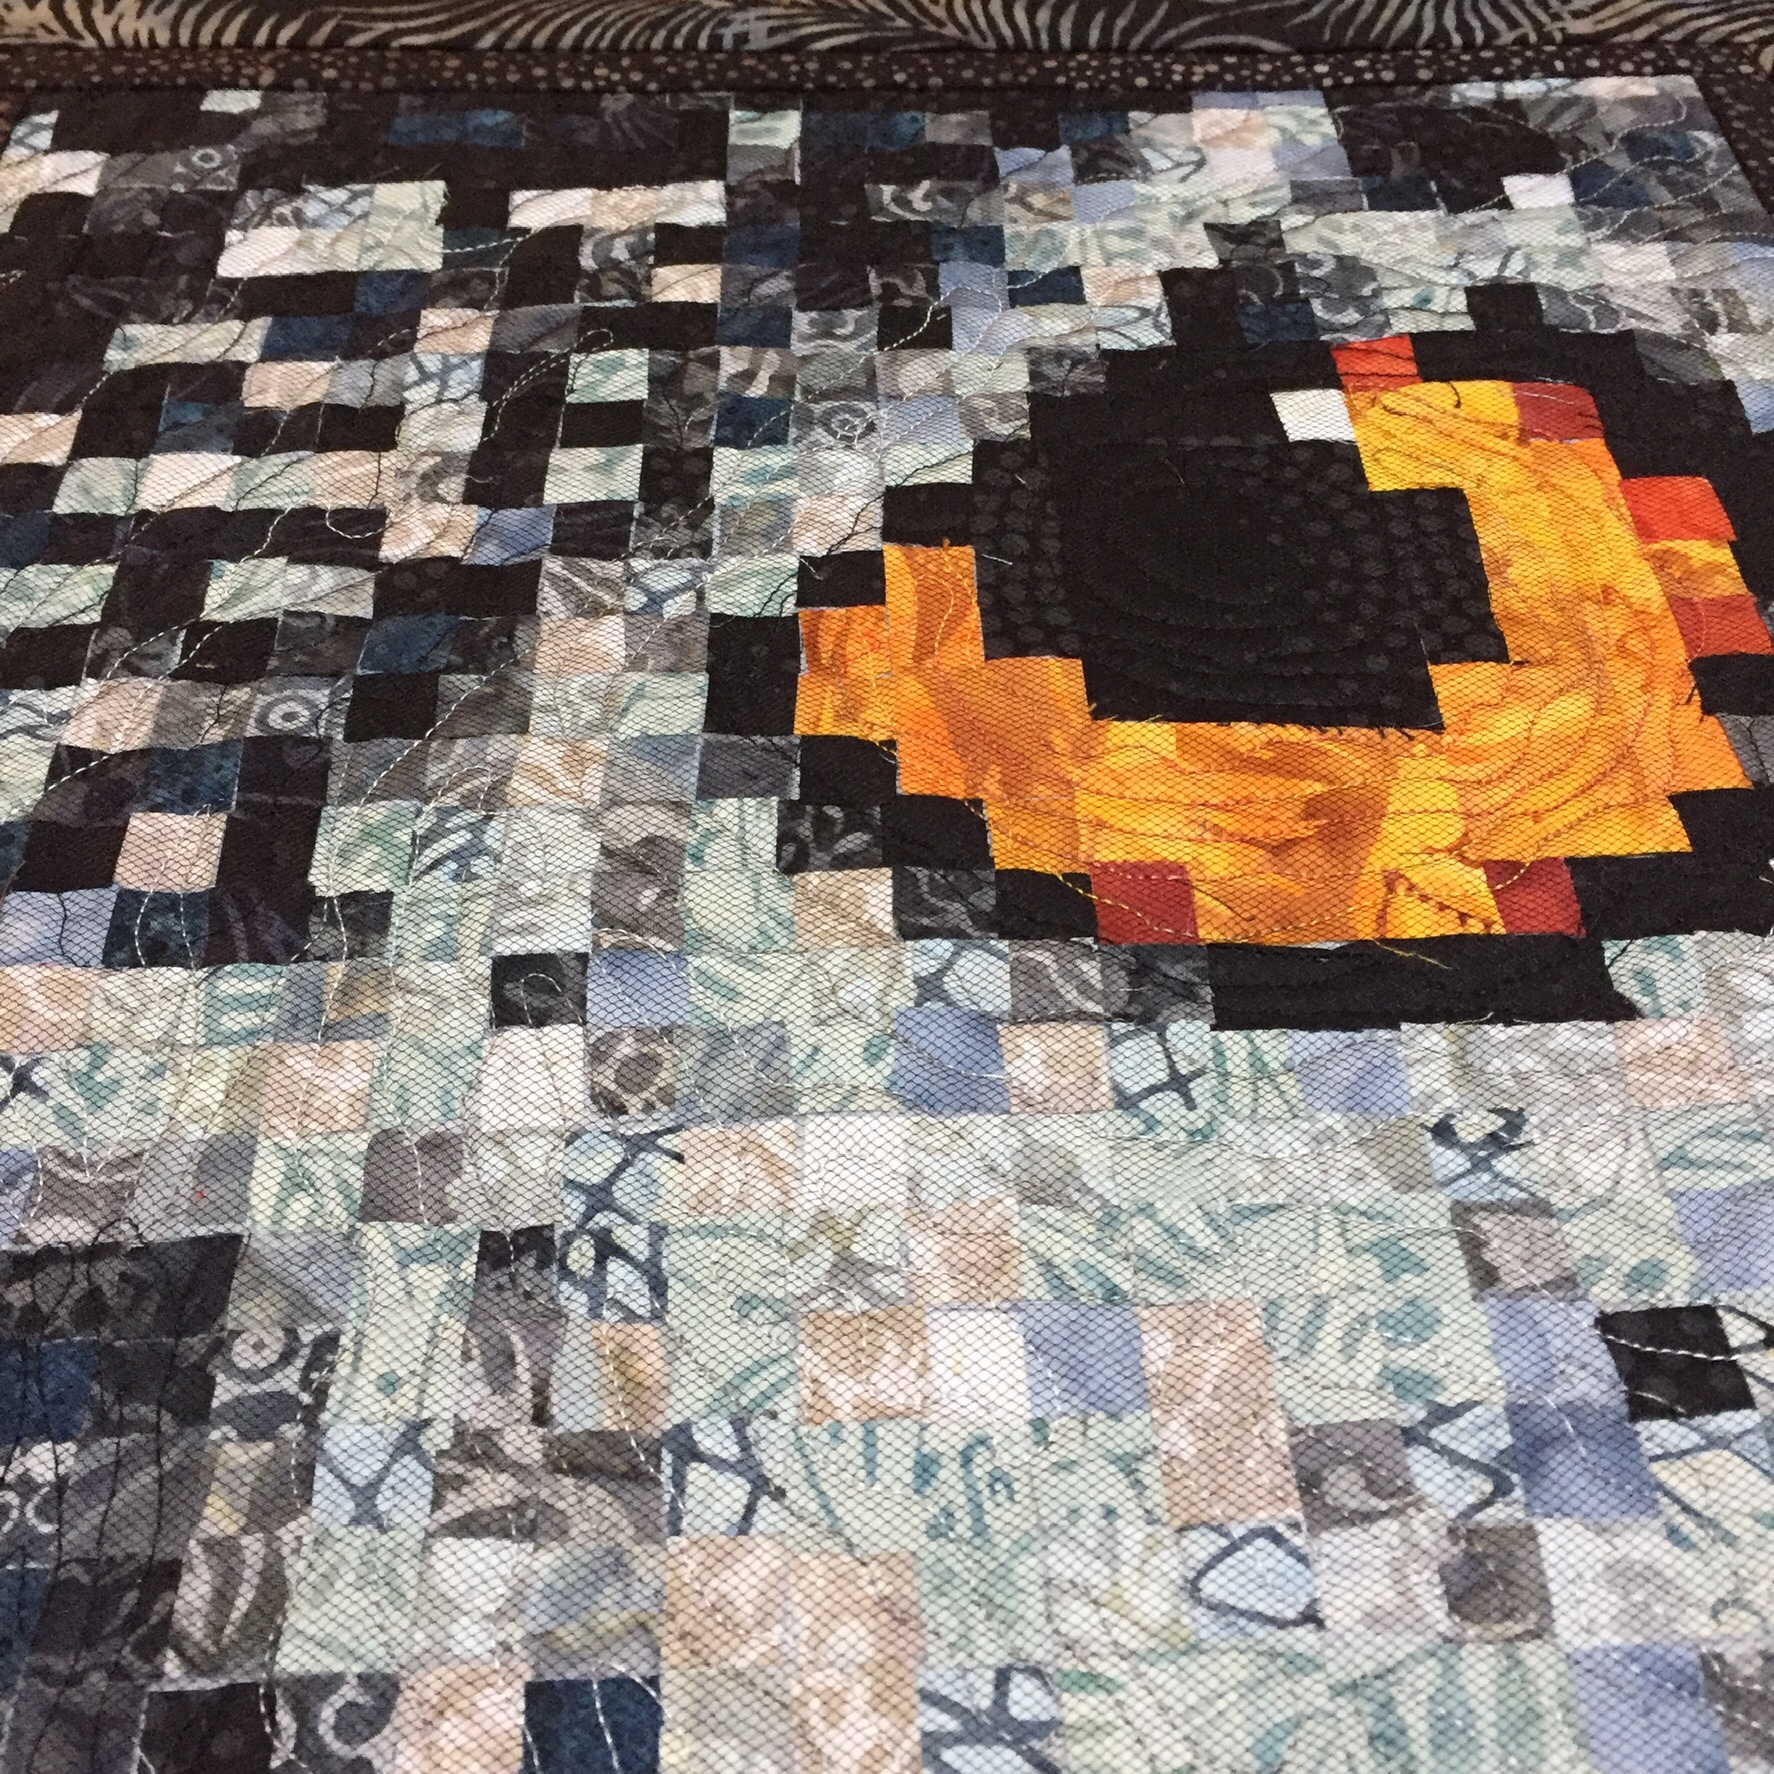
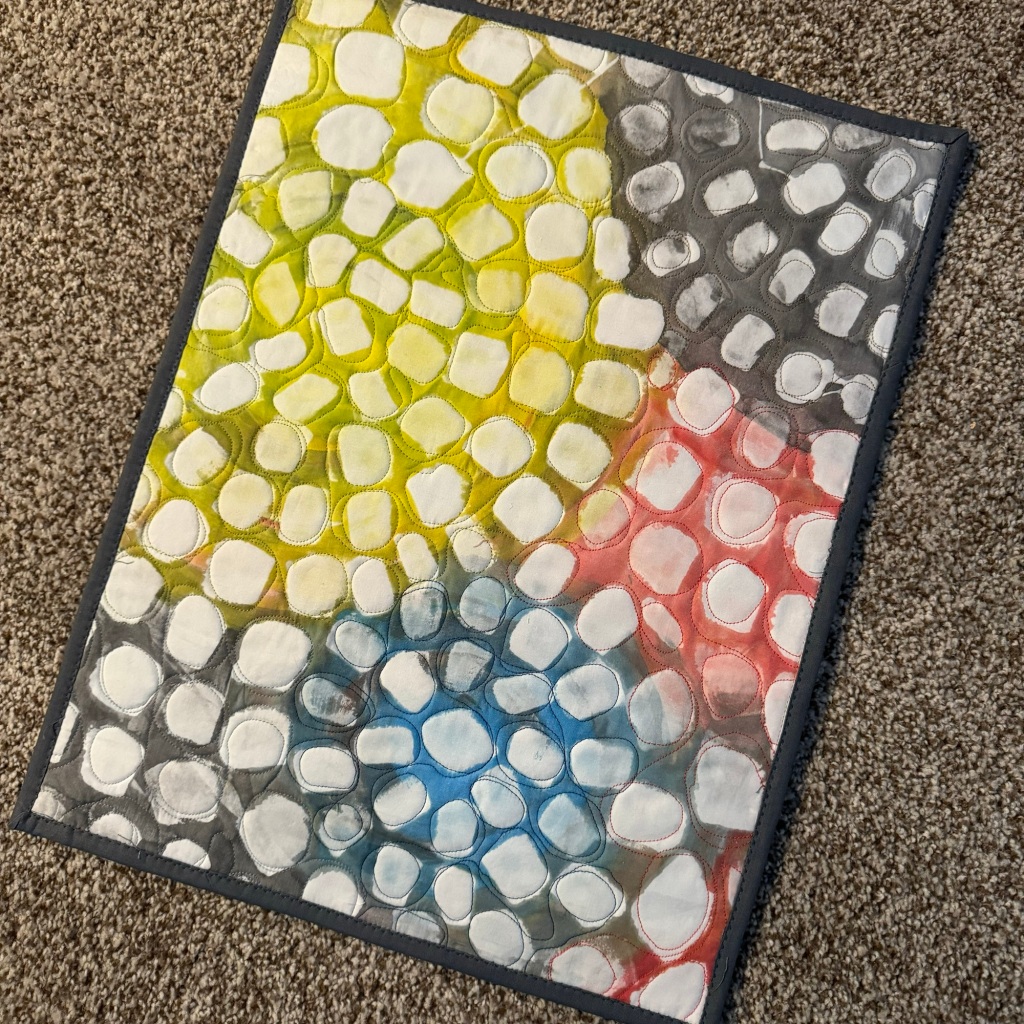
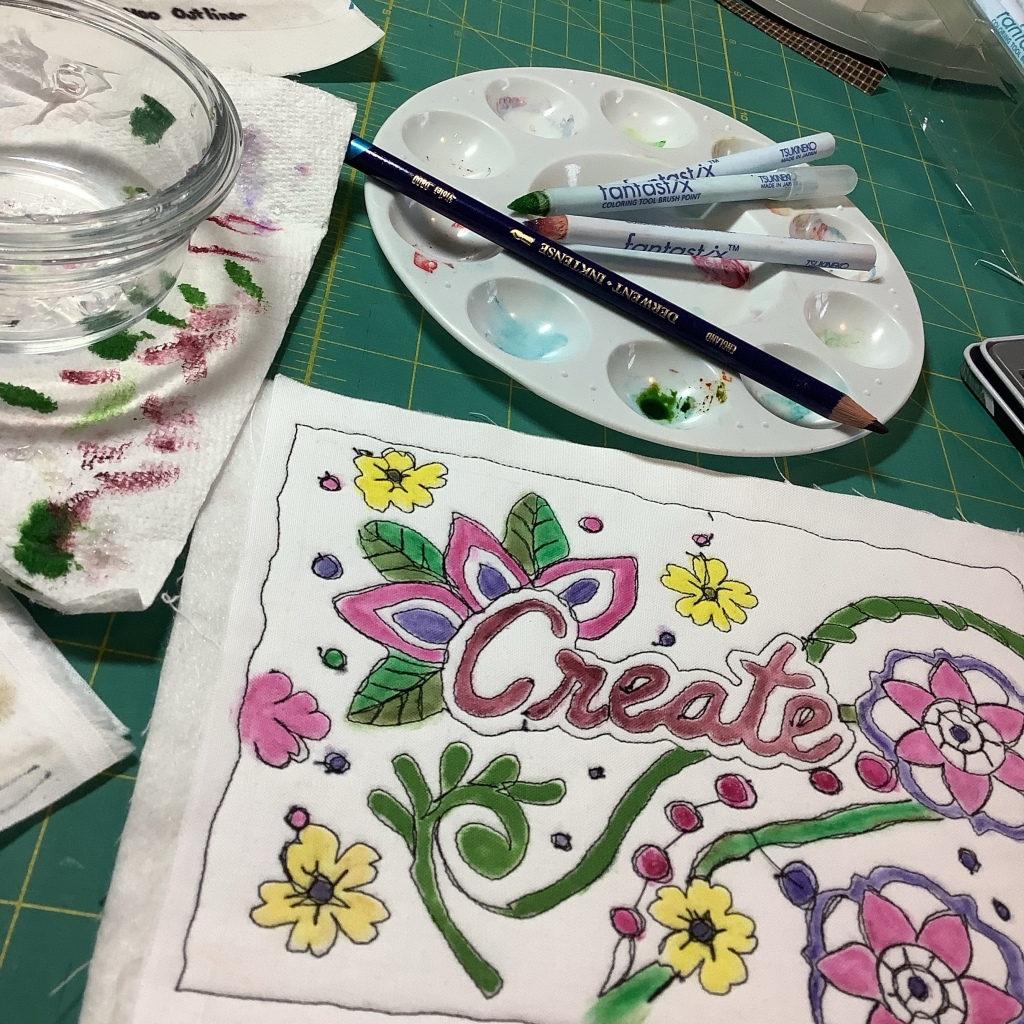
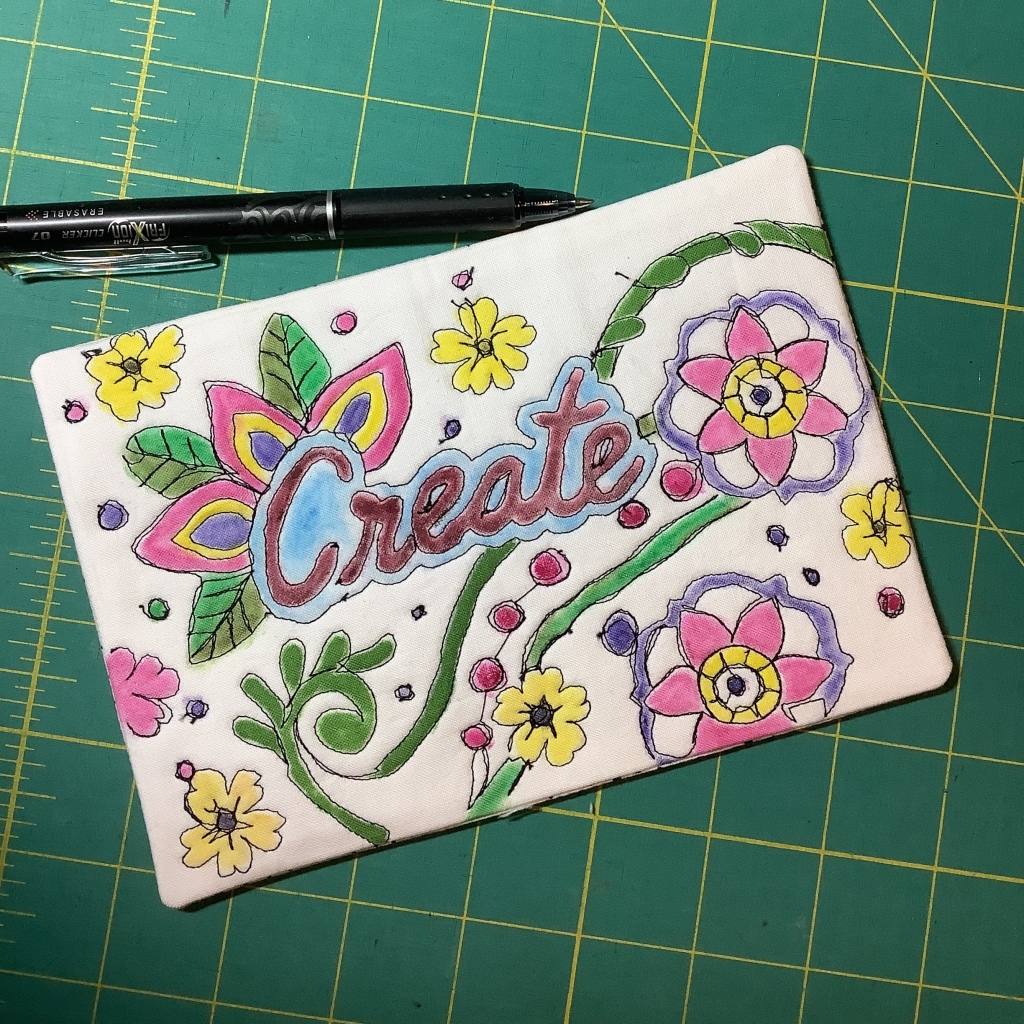
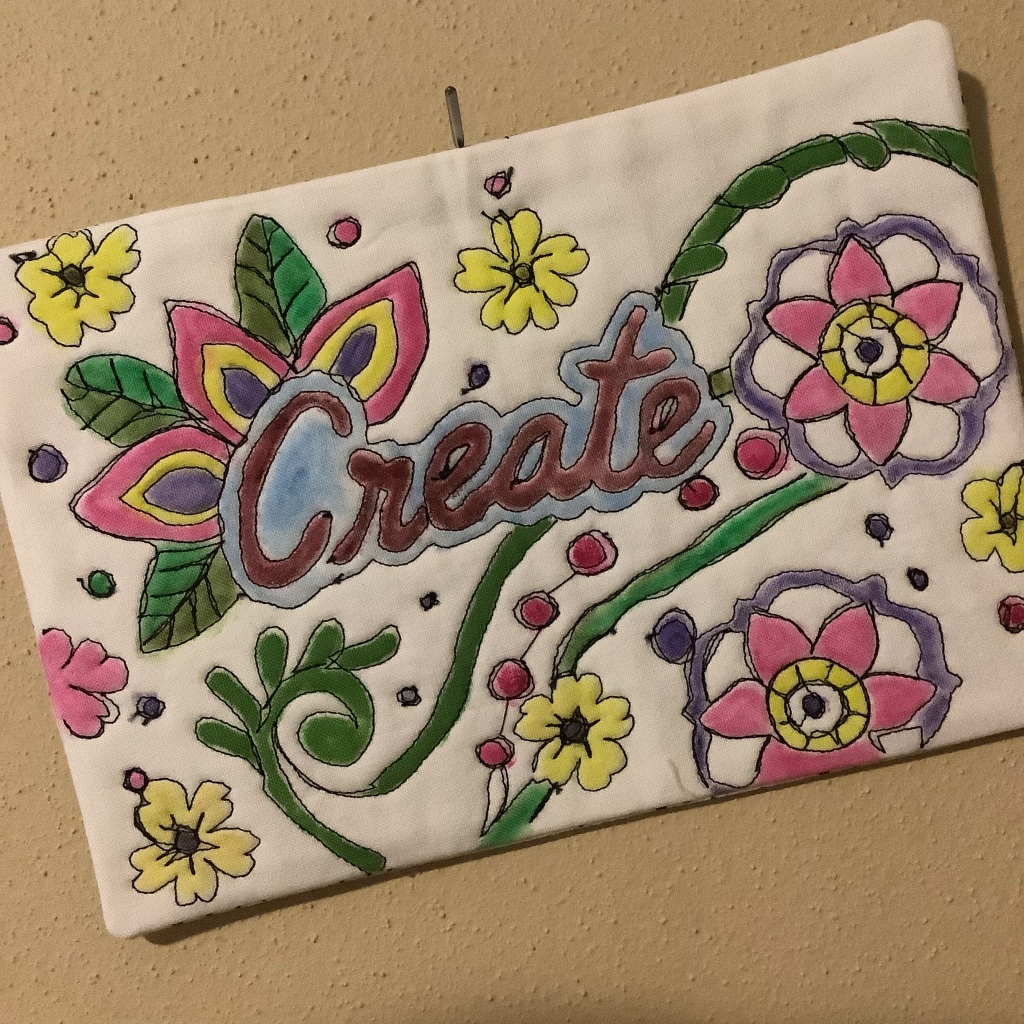
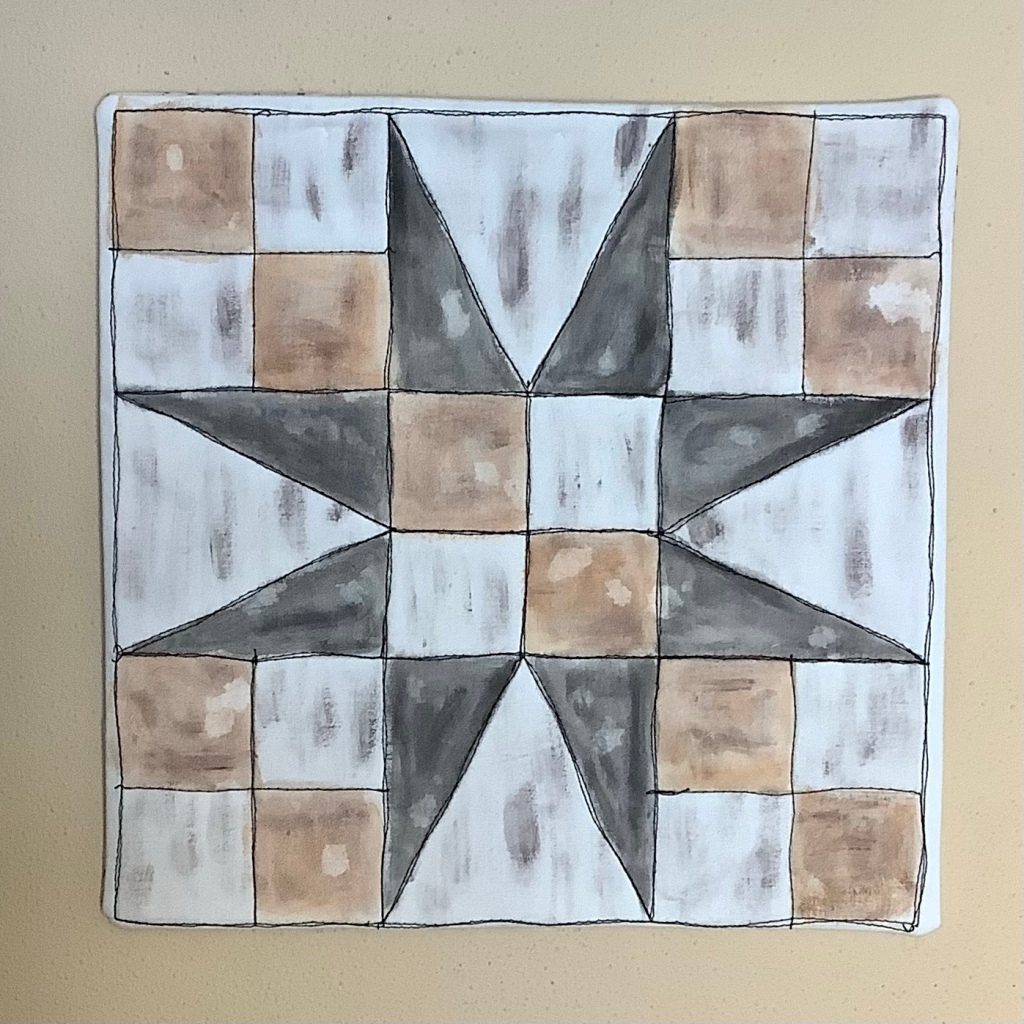
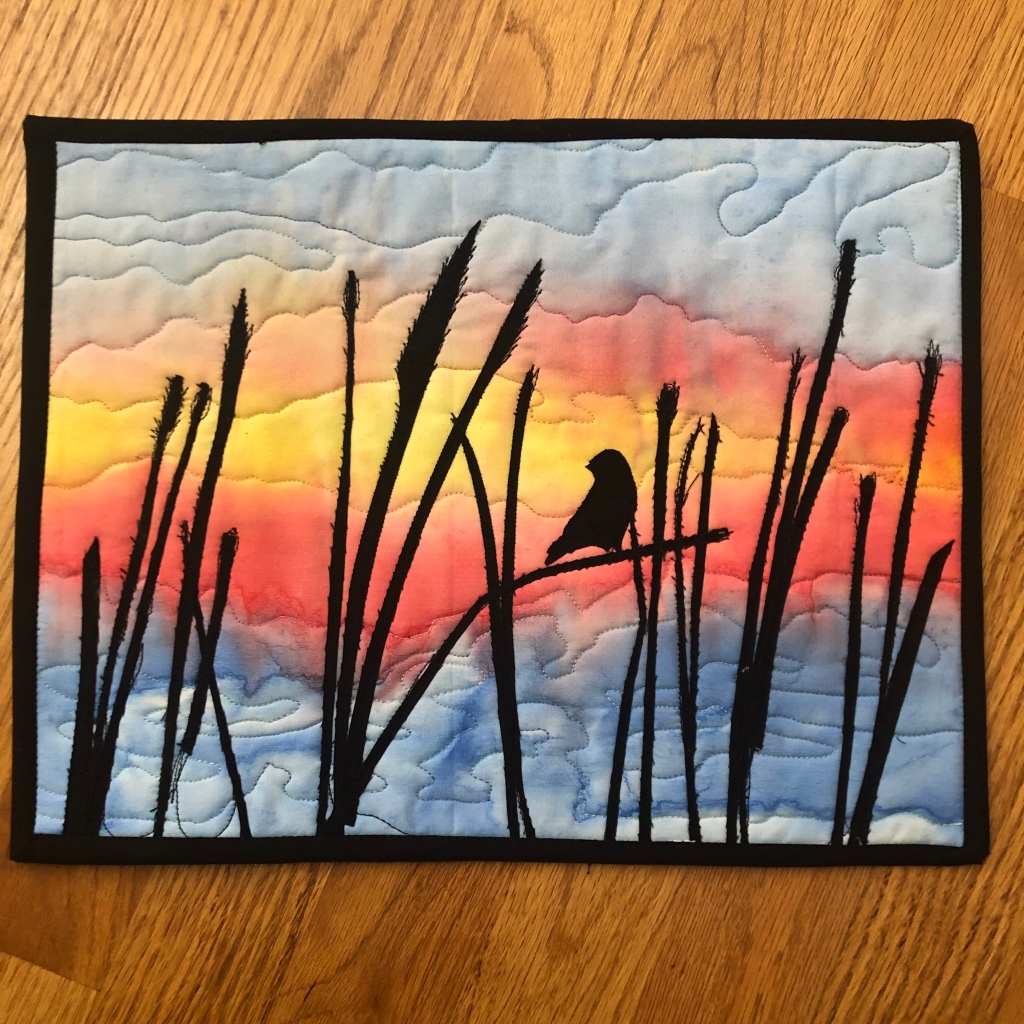
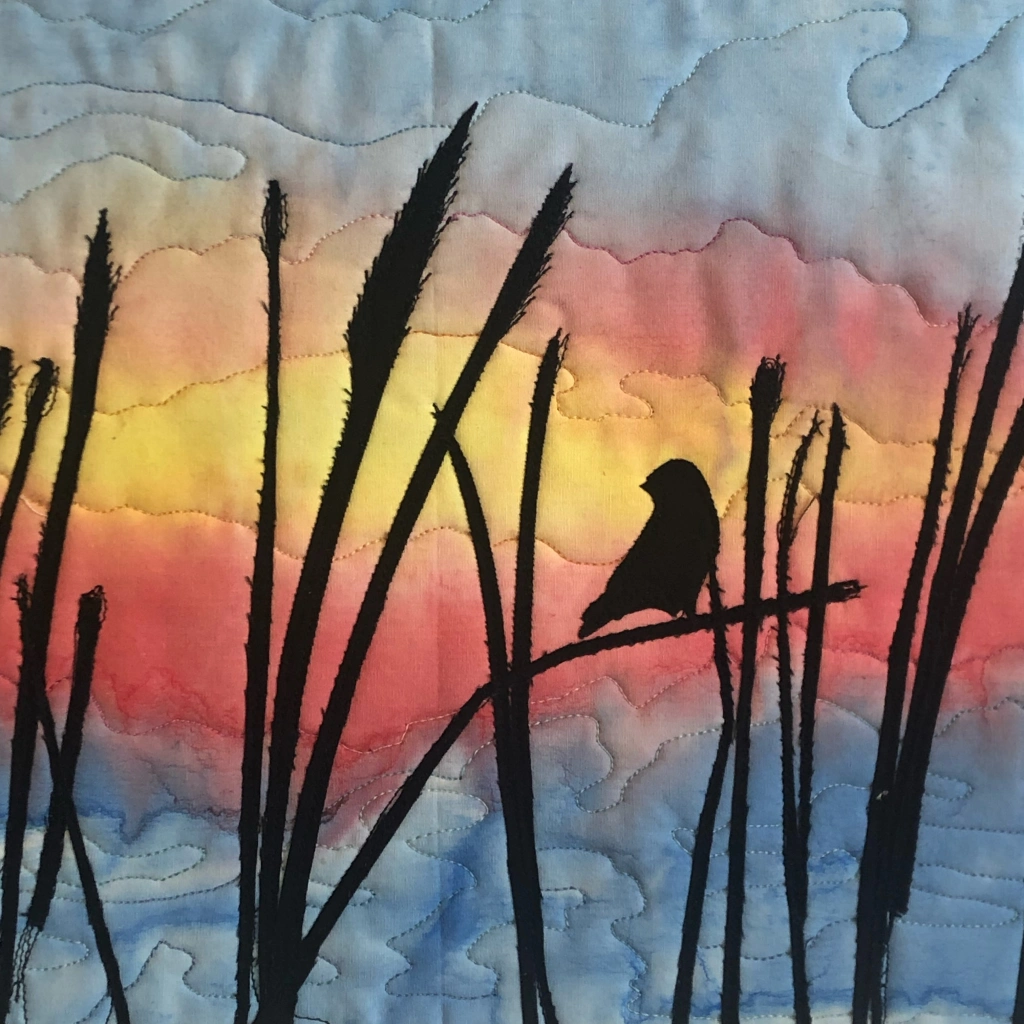
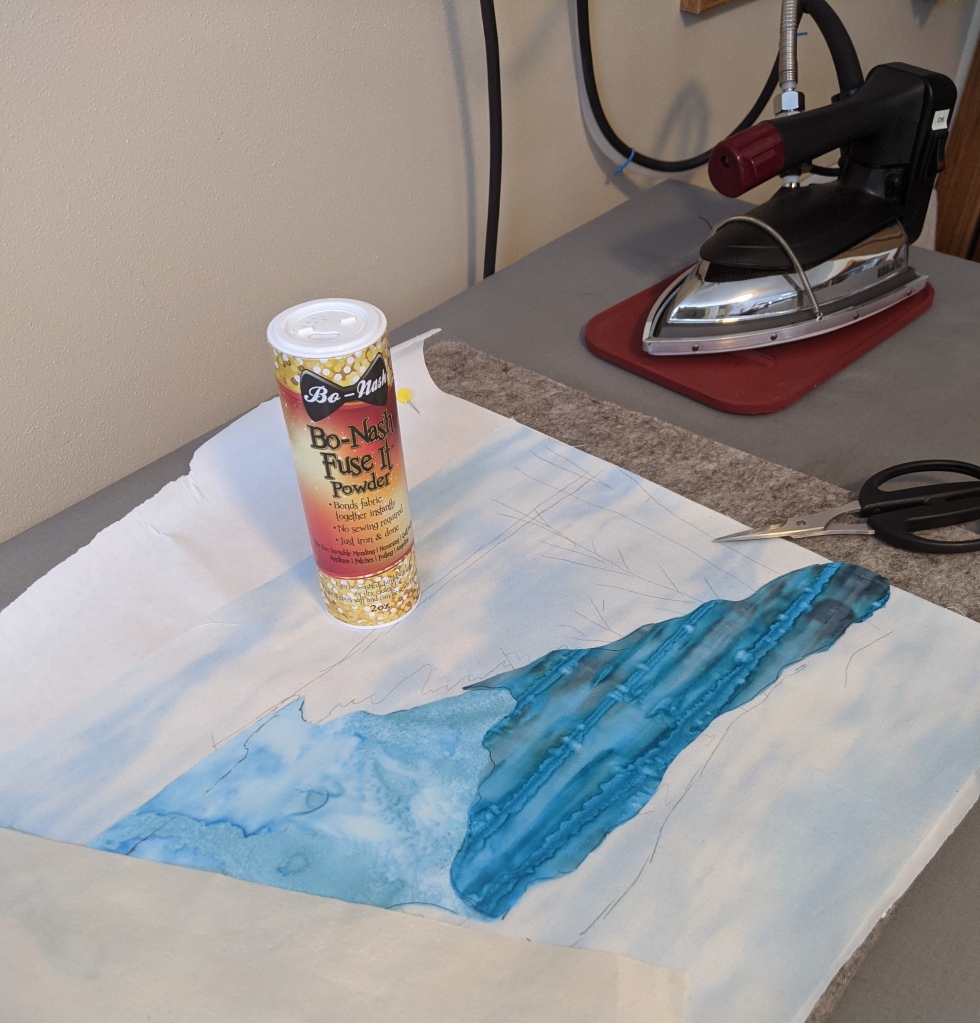
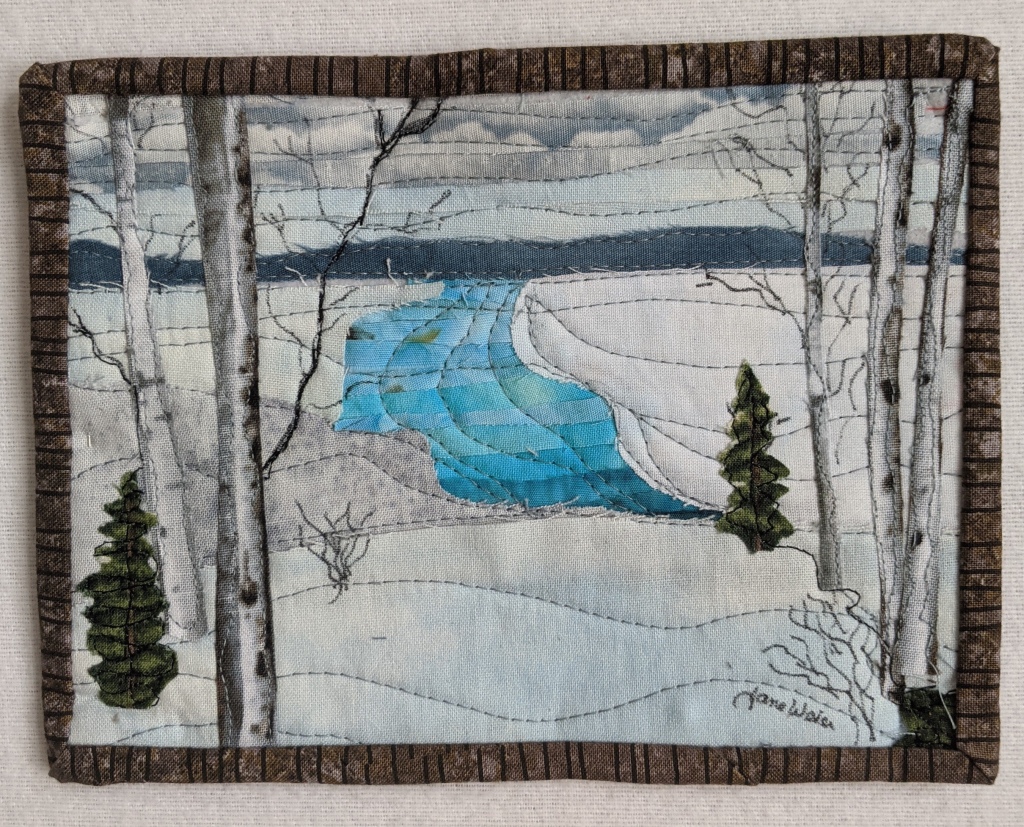
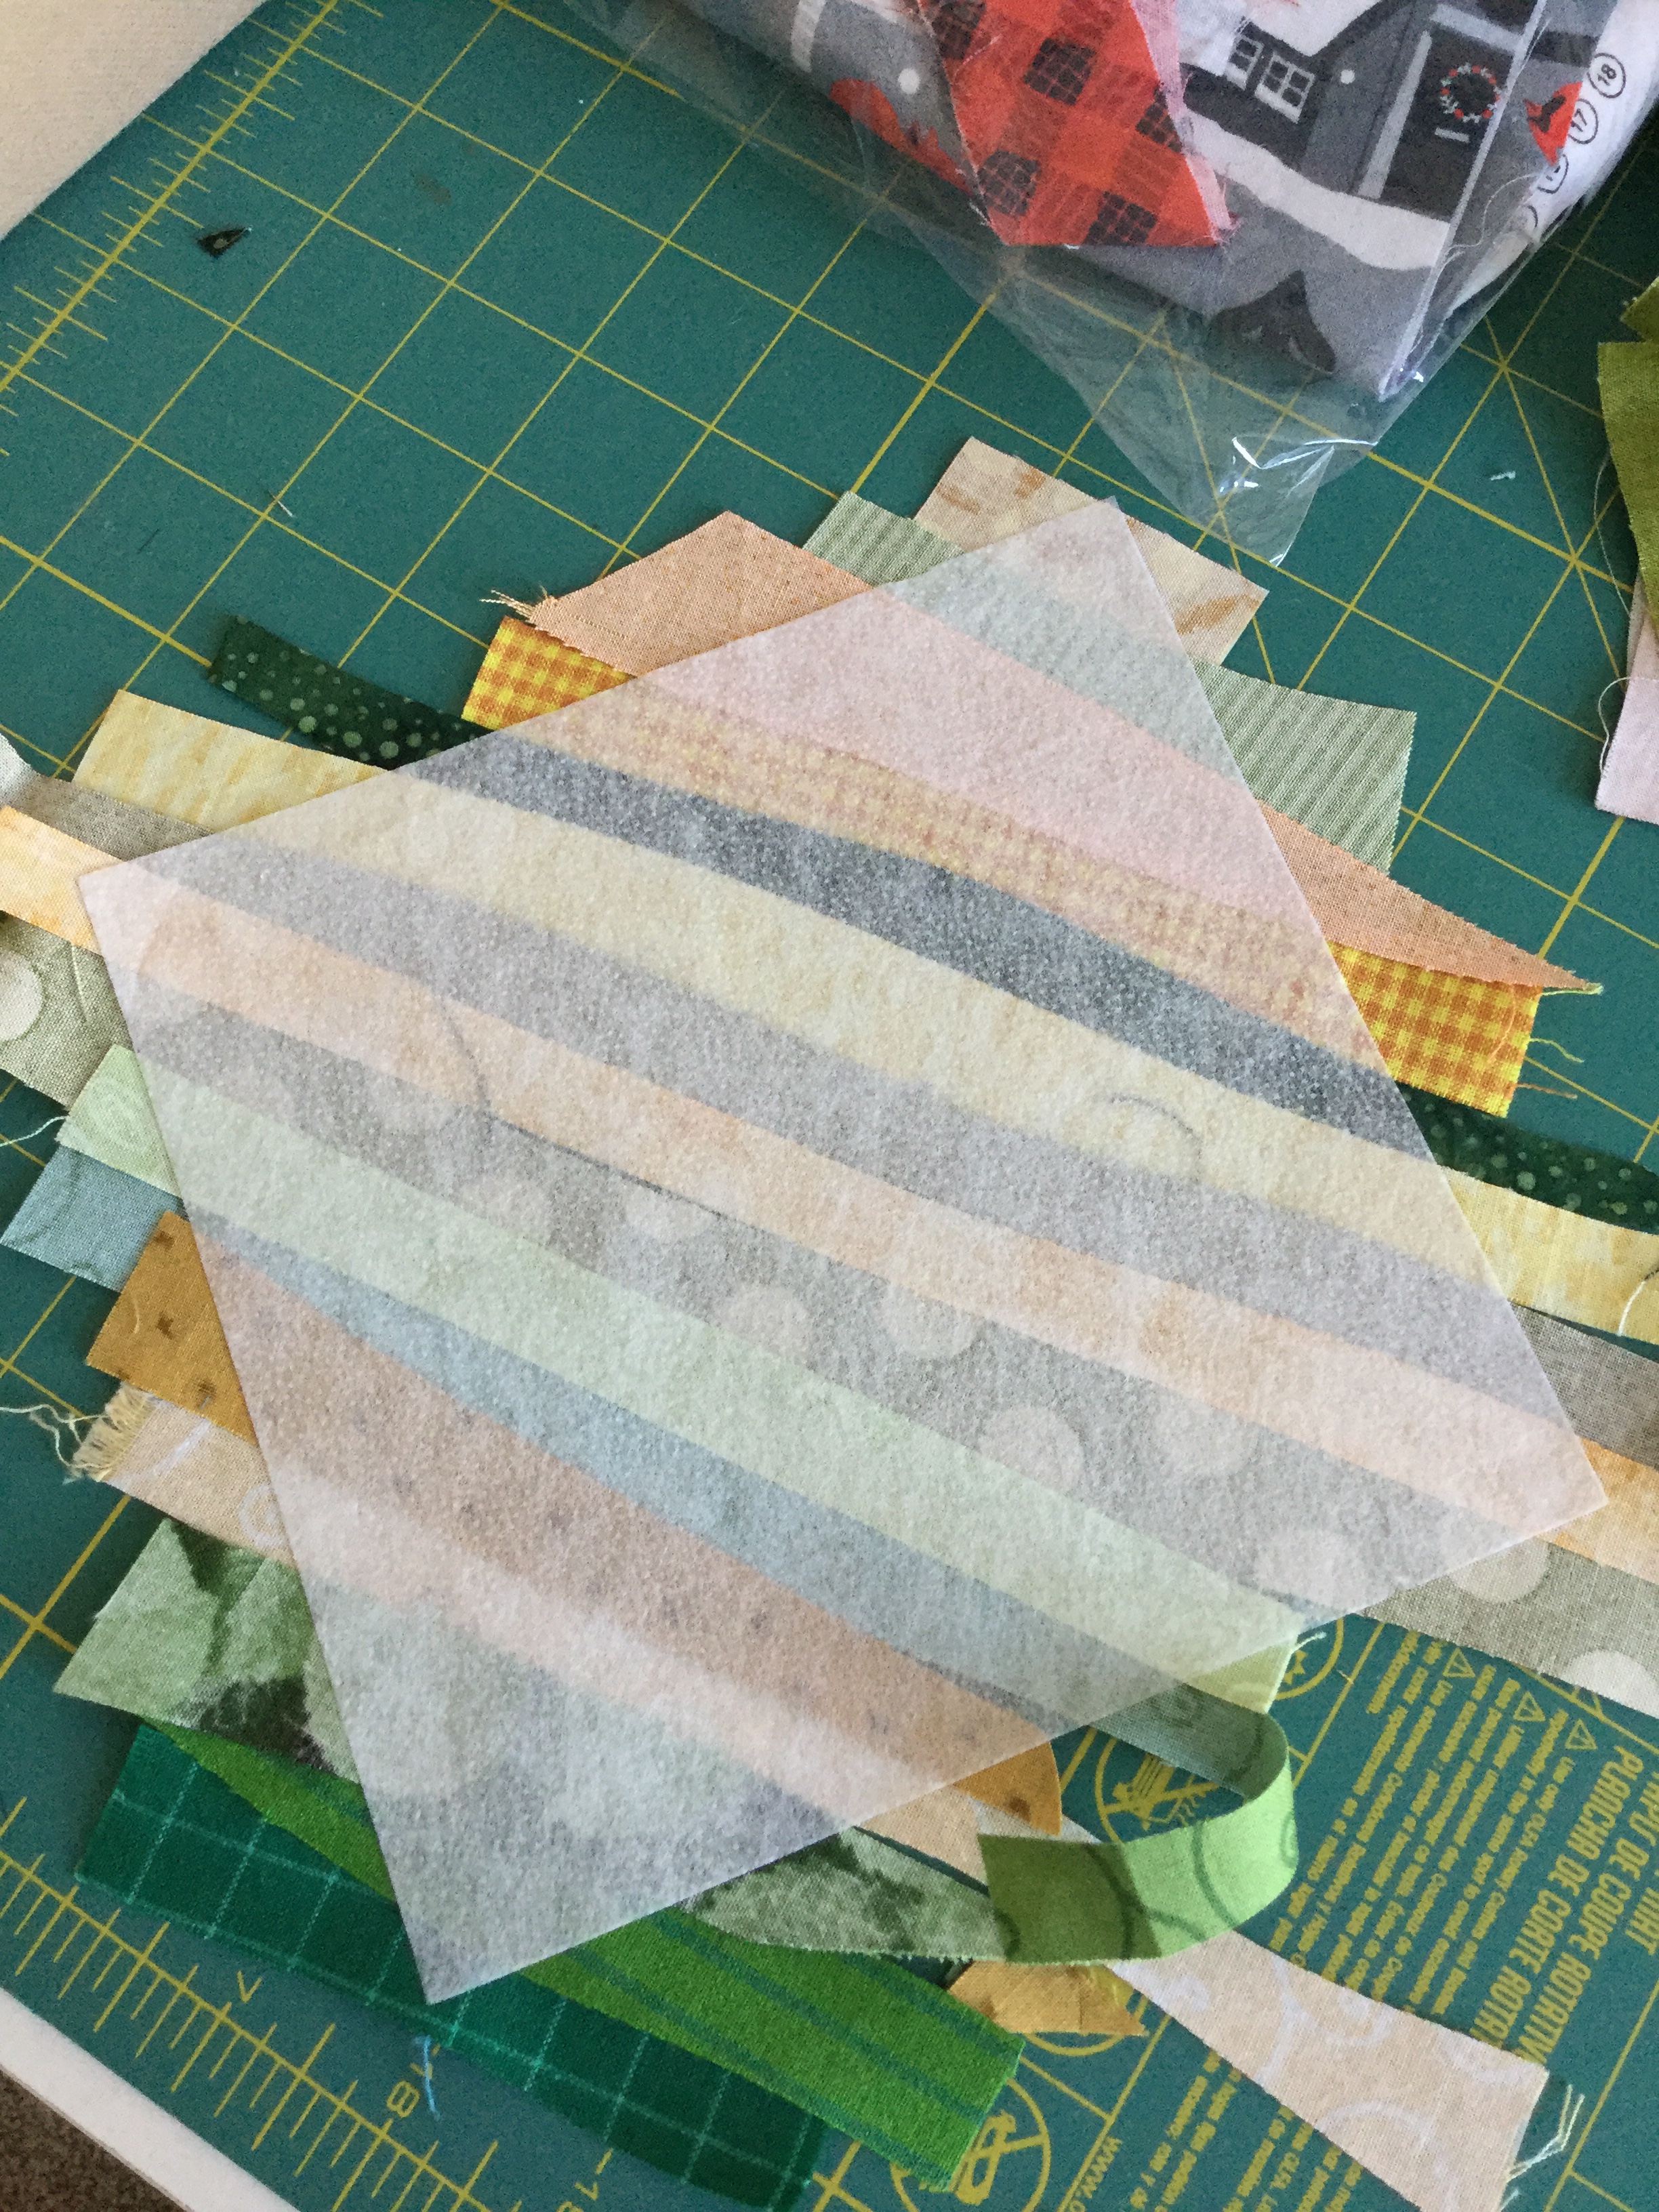
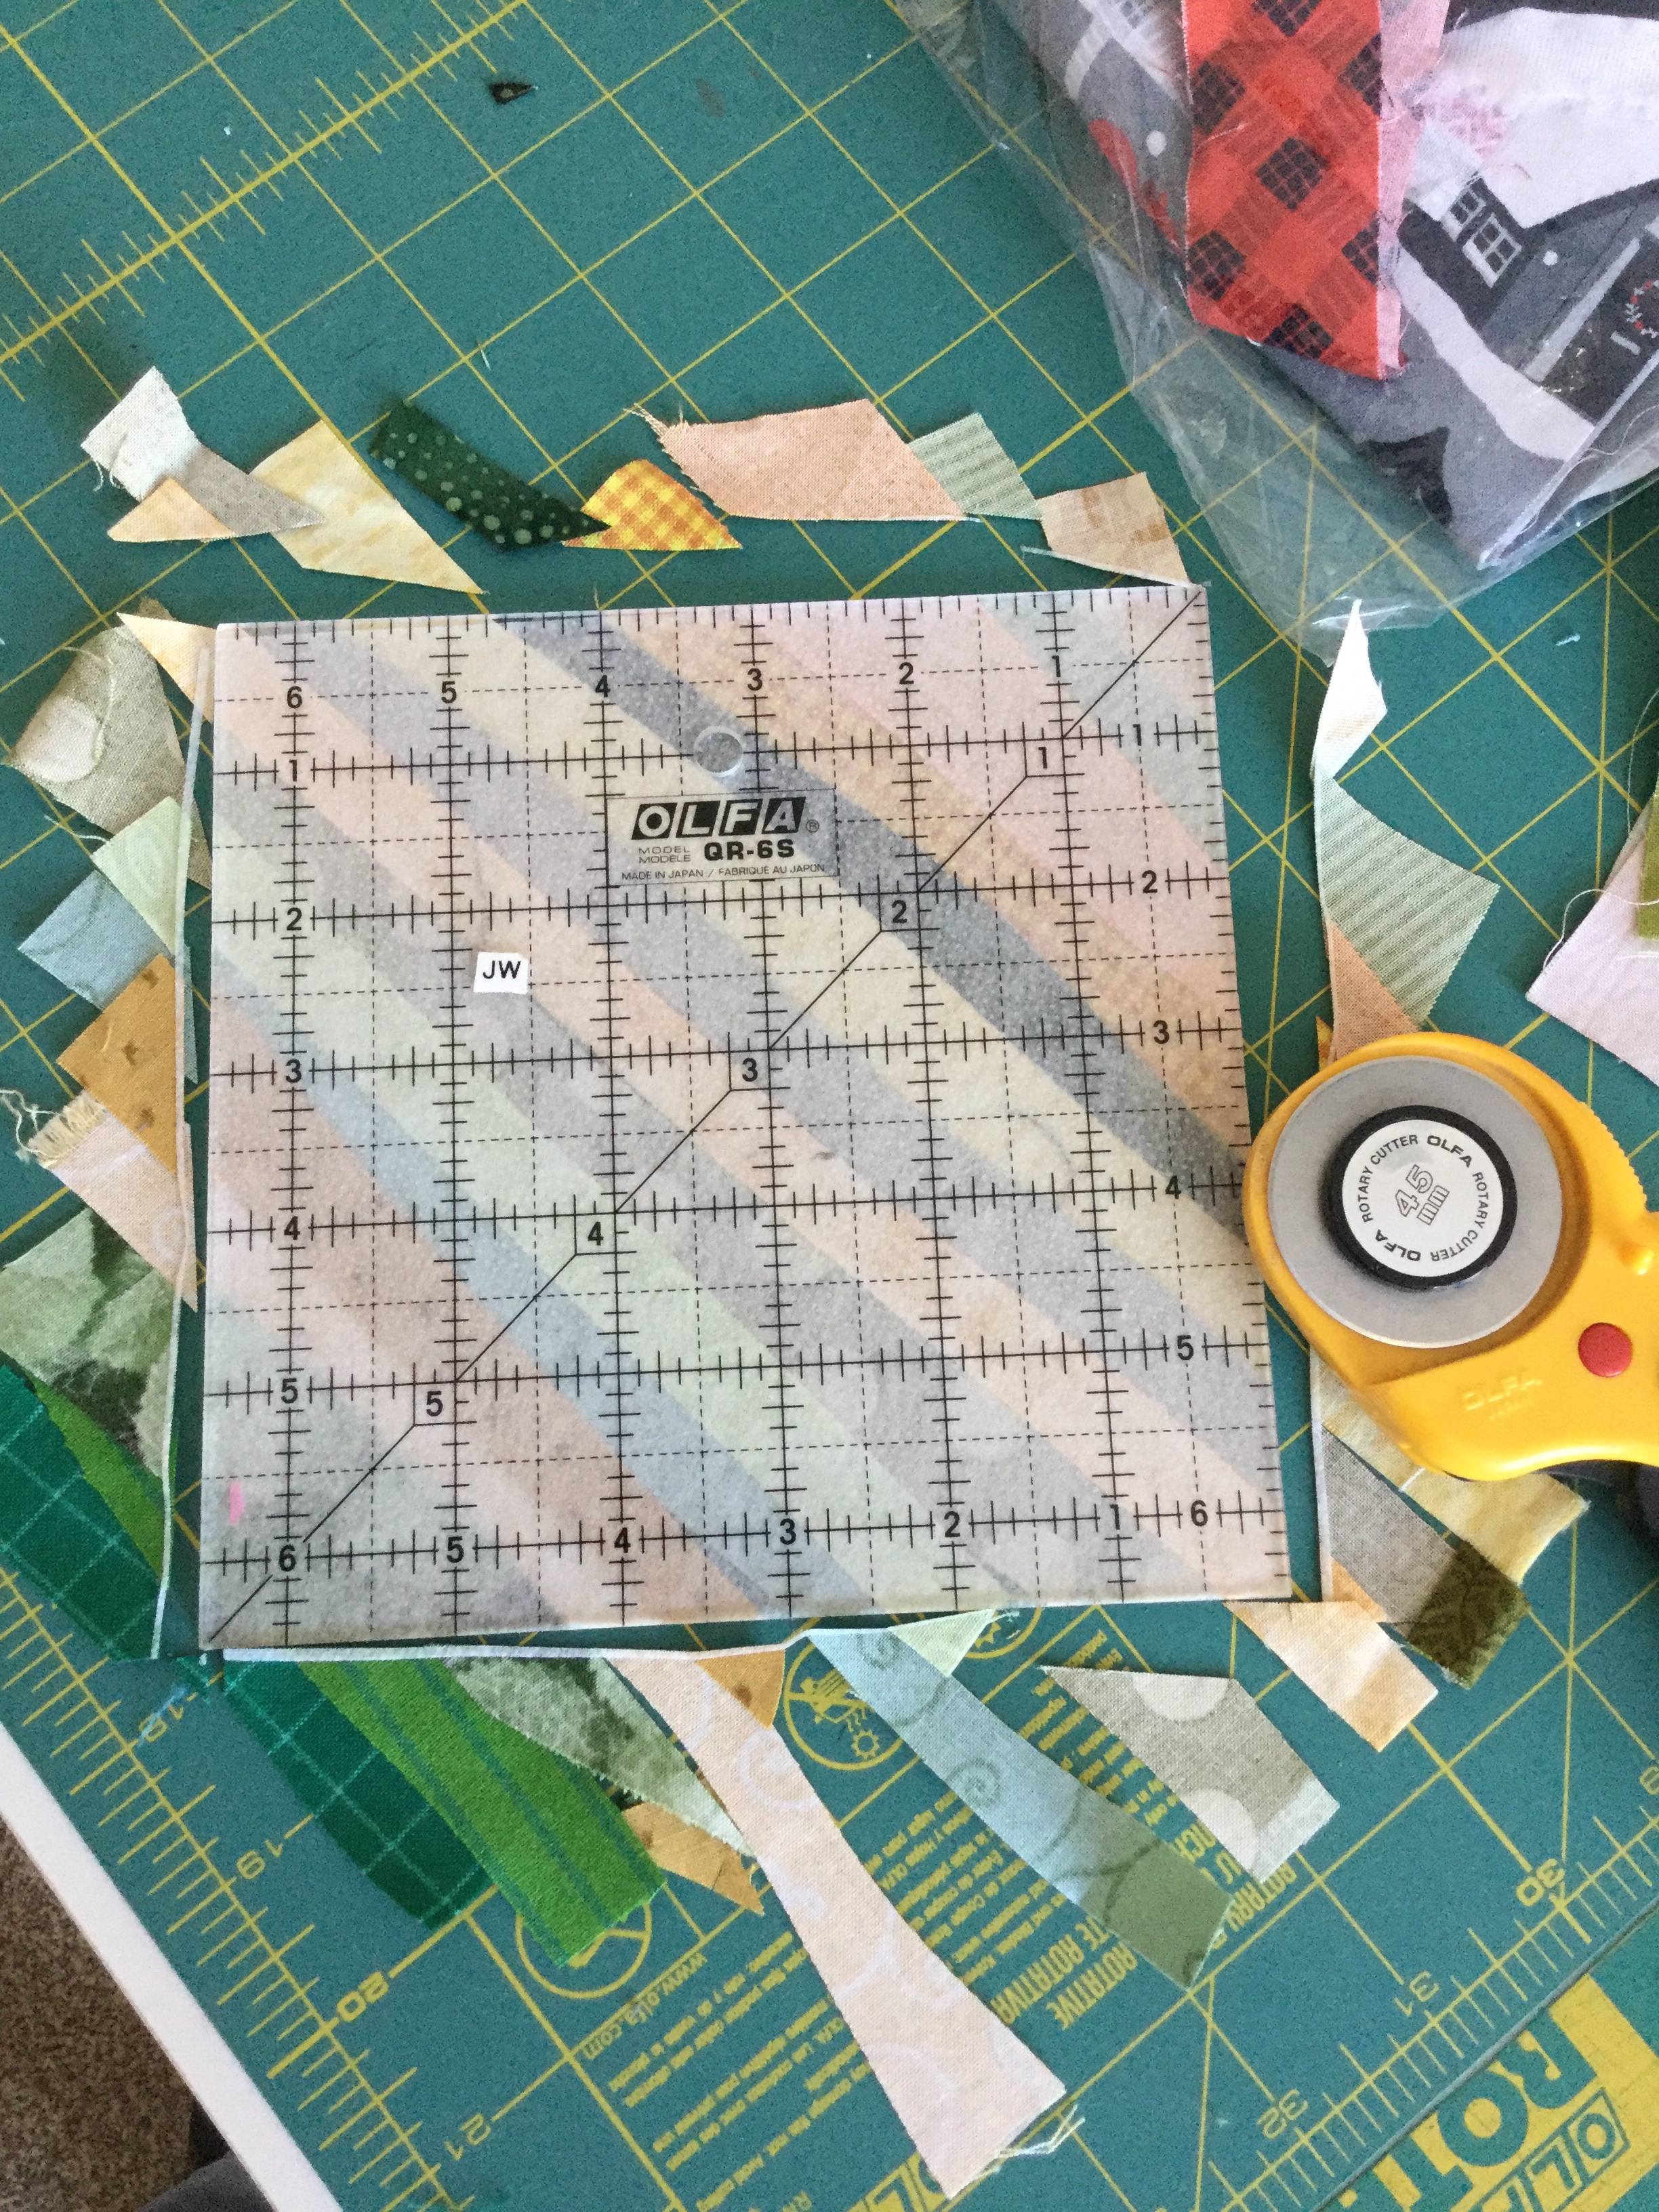
Since she sells her instructions online, I won’t go into detal here. But I painted the gel-like liquid on my white cotton fabric, let it dry, and then painted over it with blue, red, yelliw, grey, paint, After washing and ironing it, this is what I ended up with:

After resist & painting on white cotton fabric

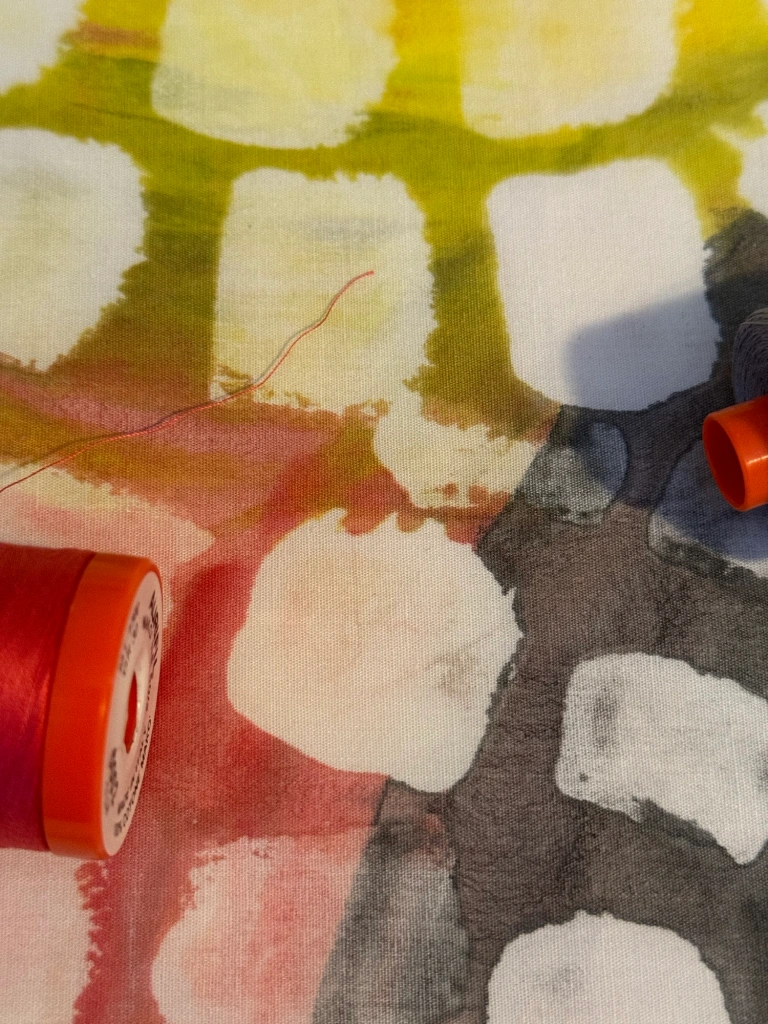
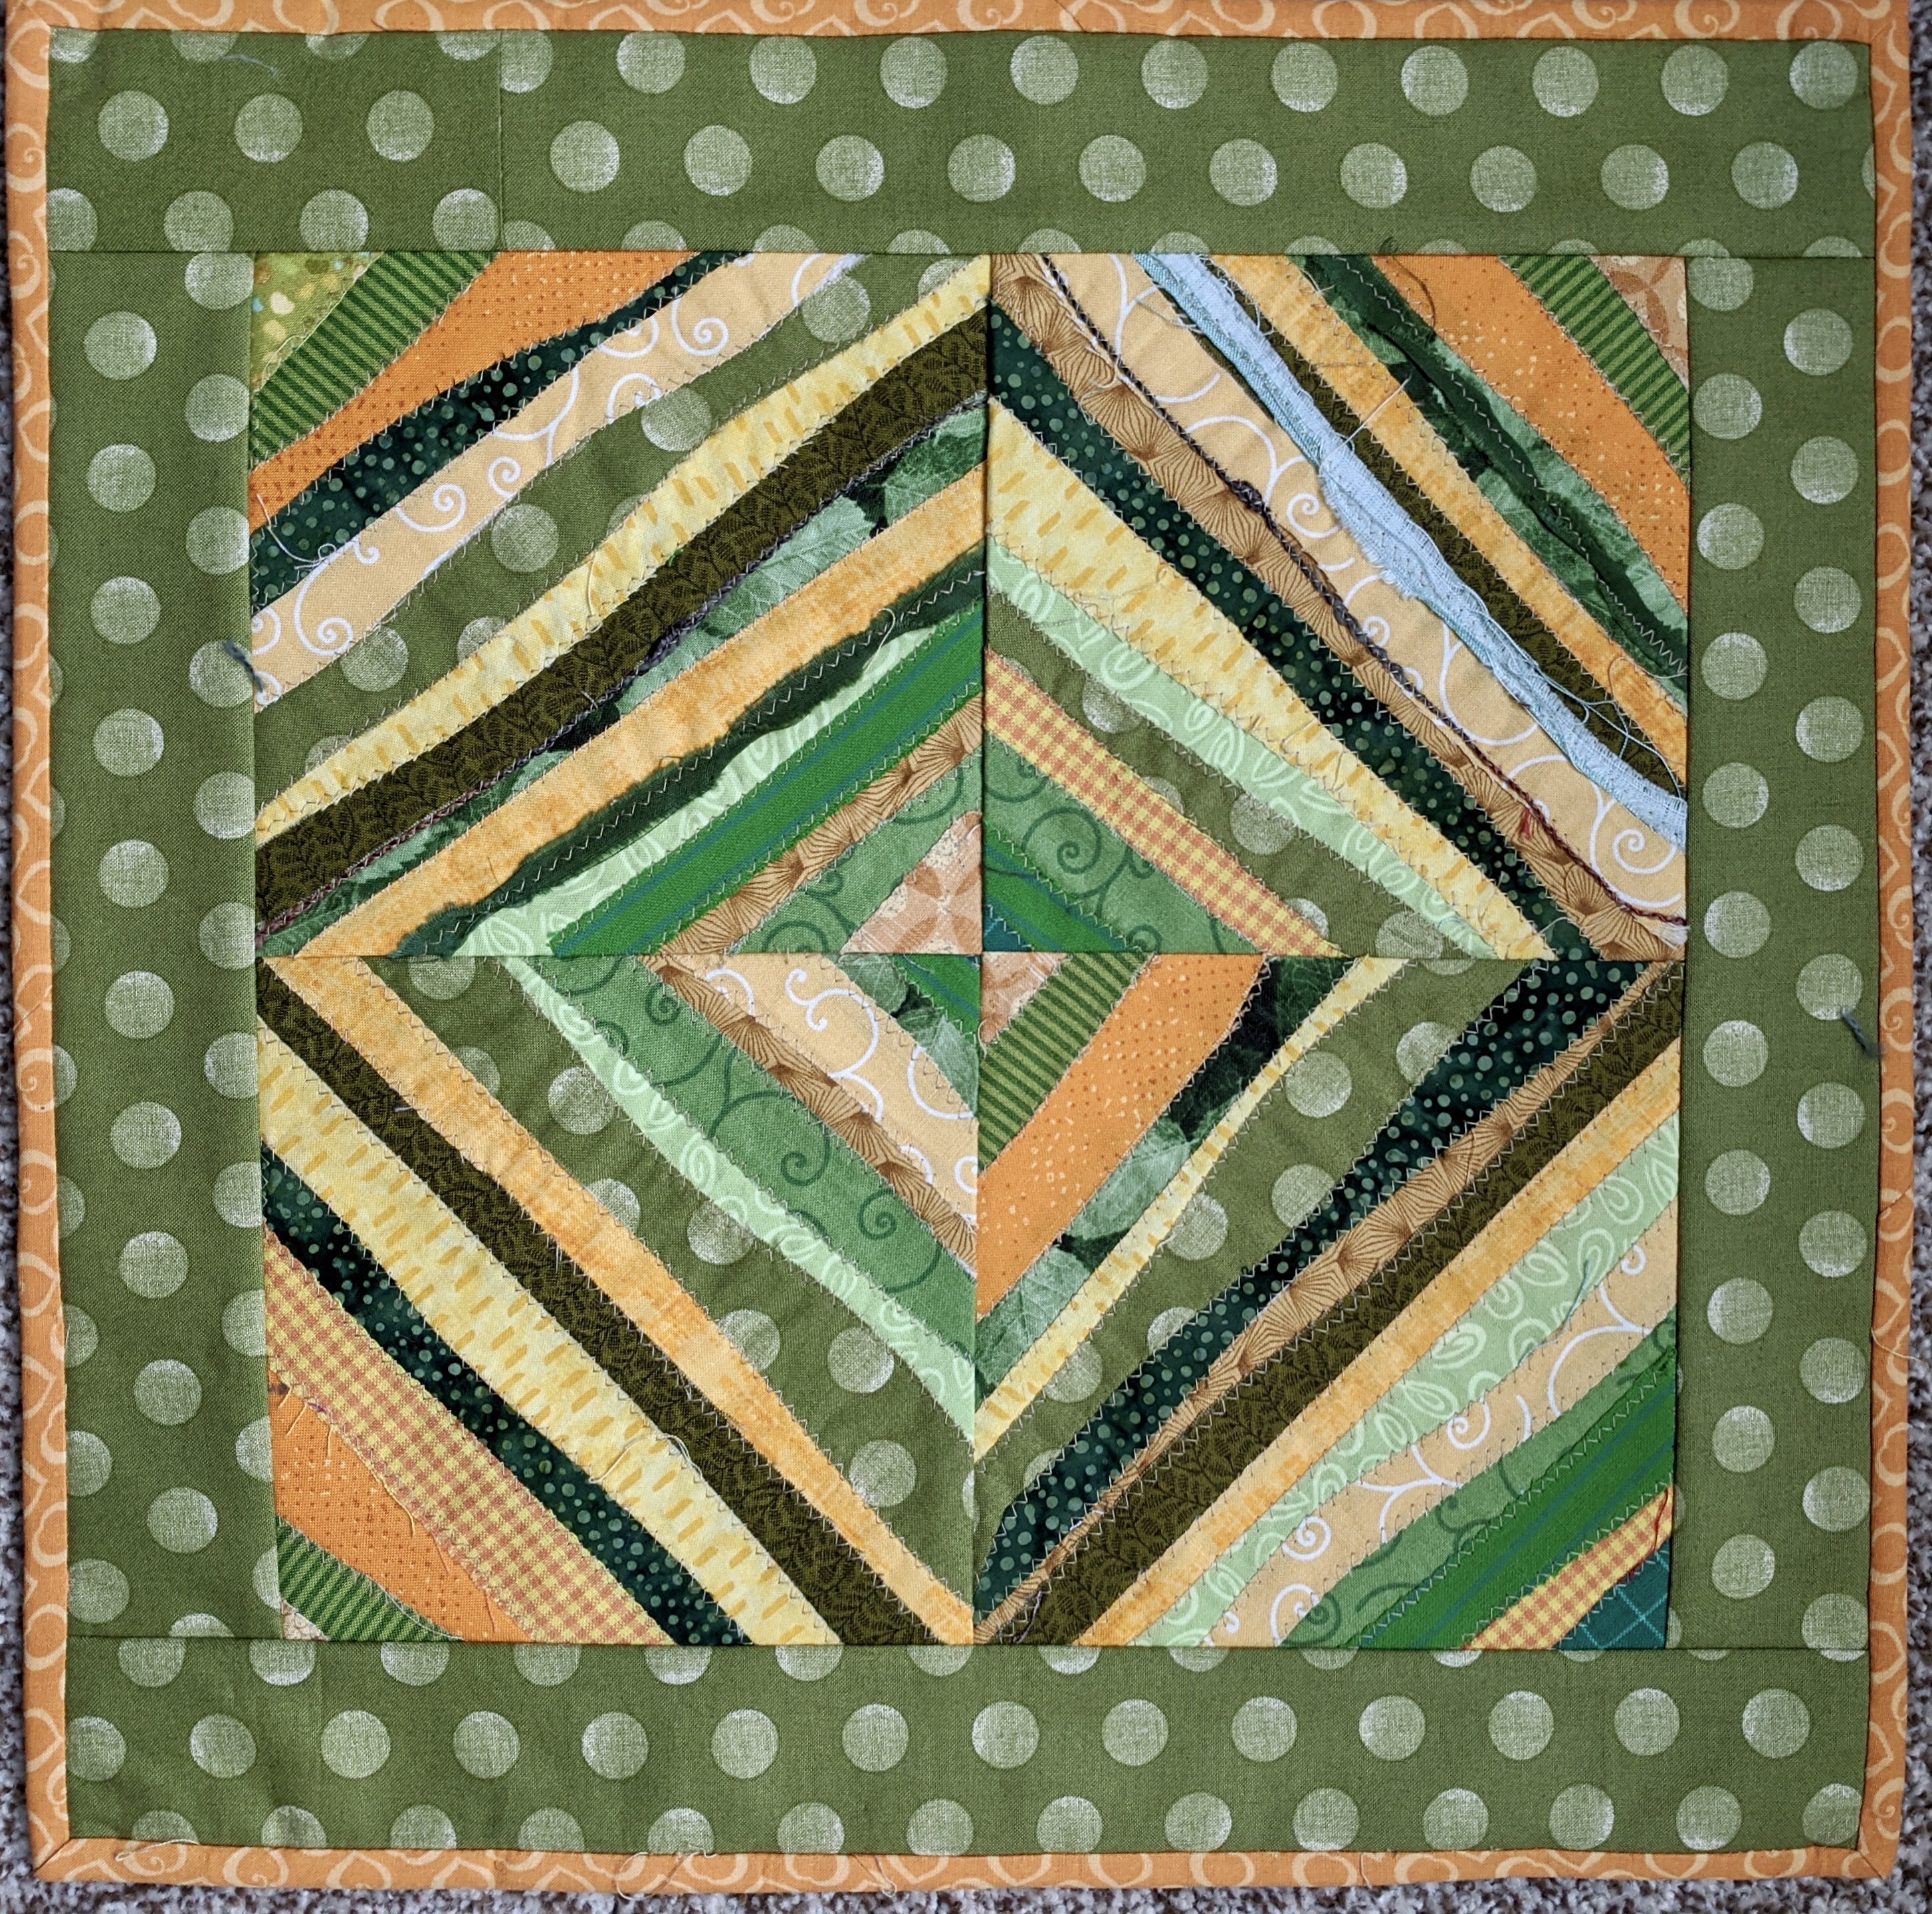
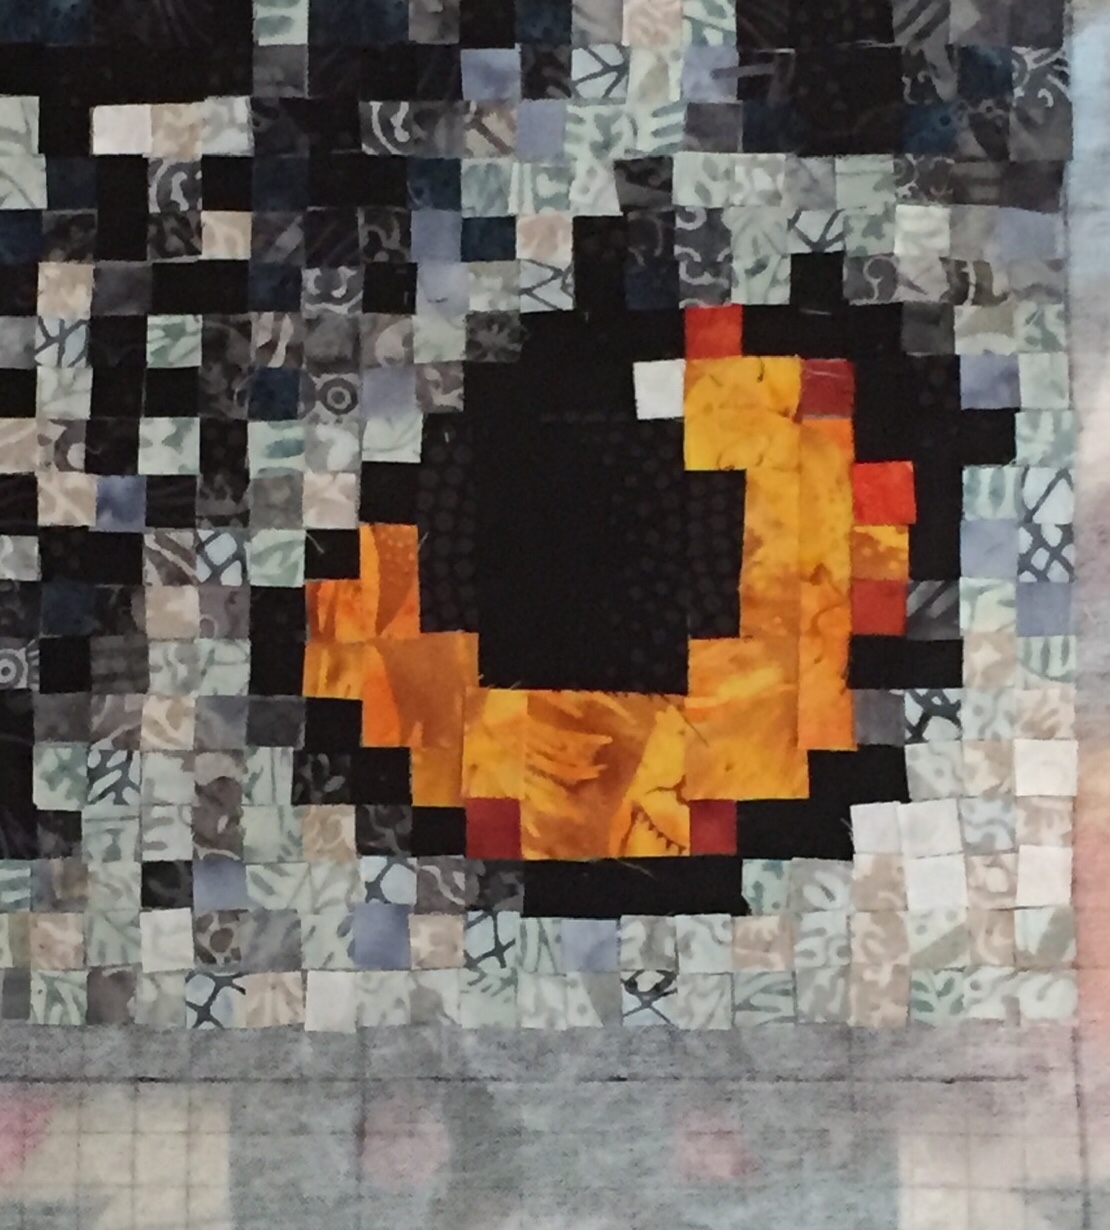
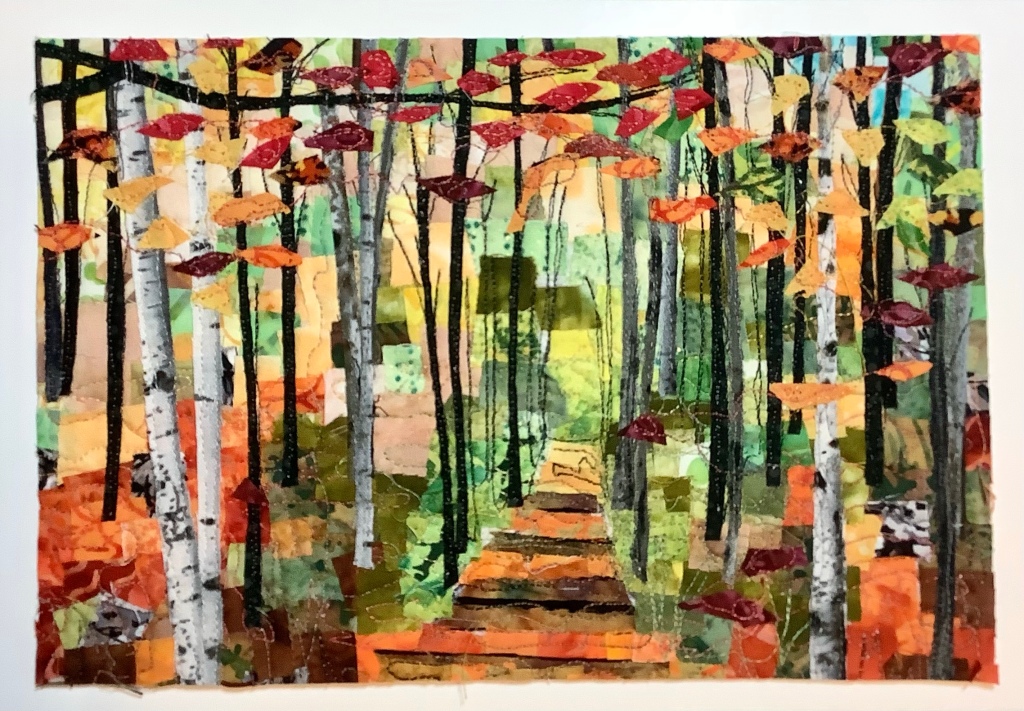
I’m thrilled that it turned out for this week’s challenge, looking somewhat like a mosaic sunset, with just a little blue. Perfect.

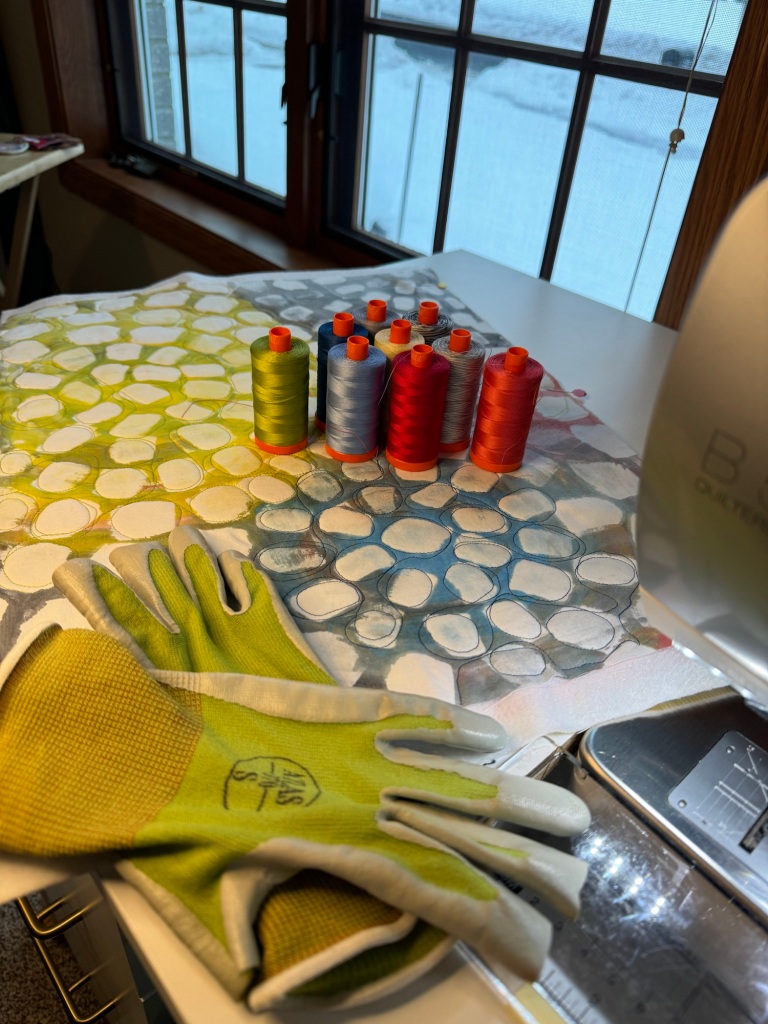
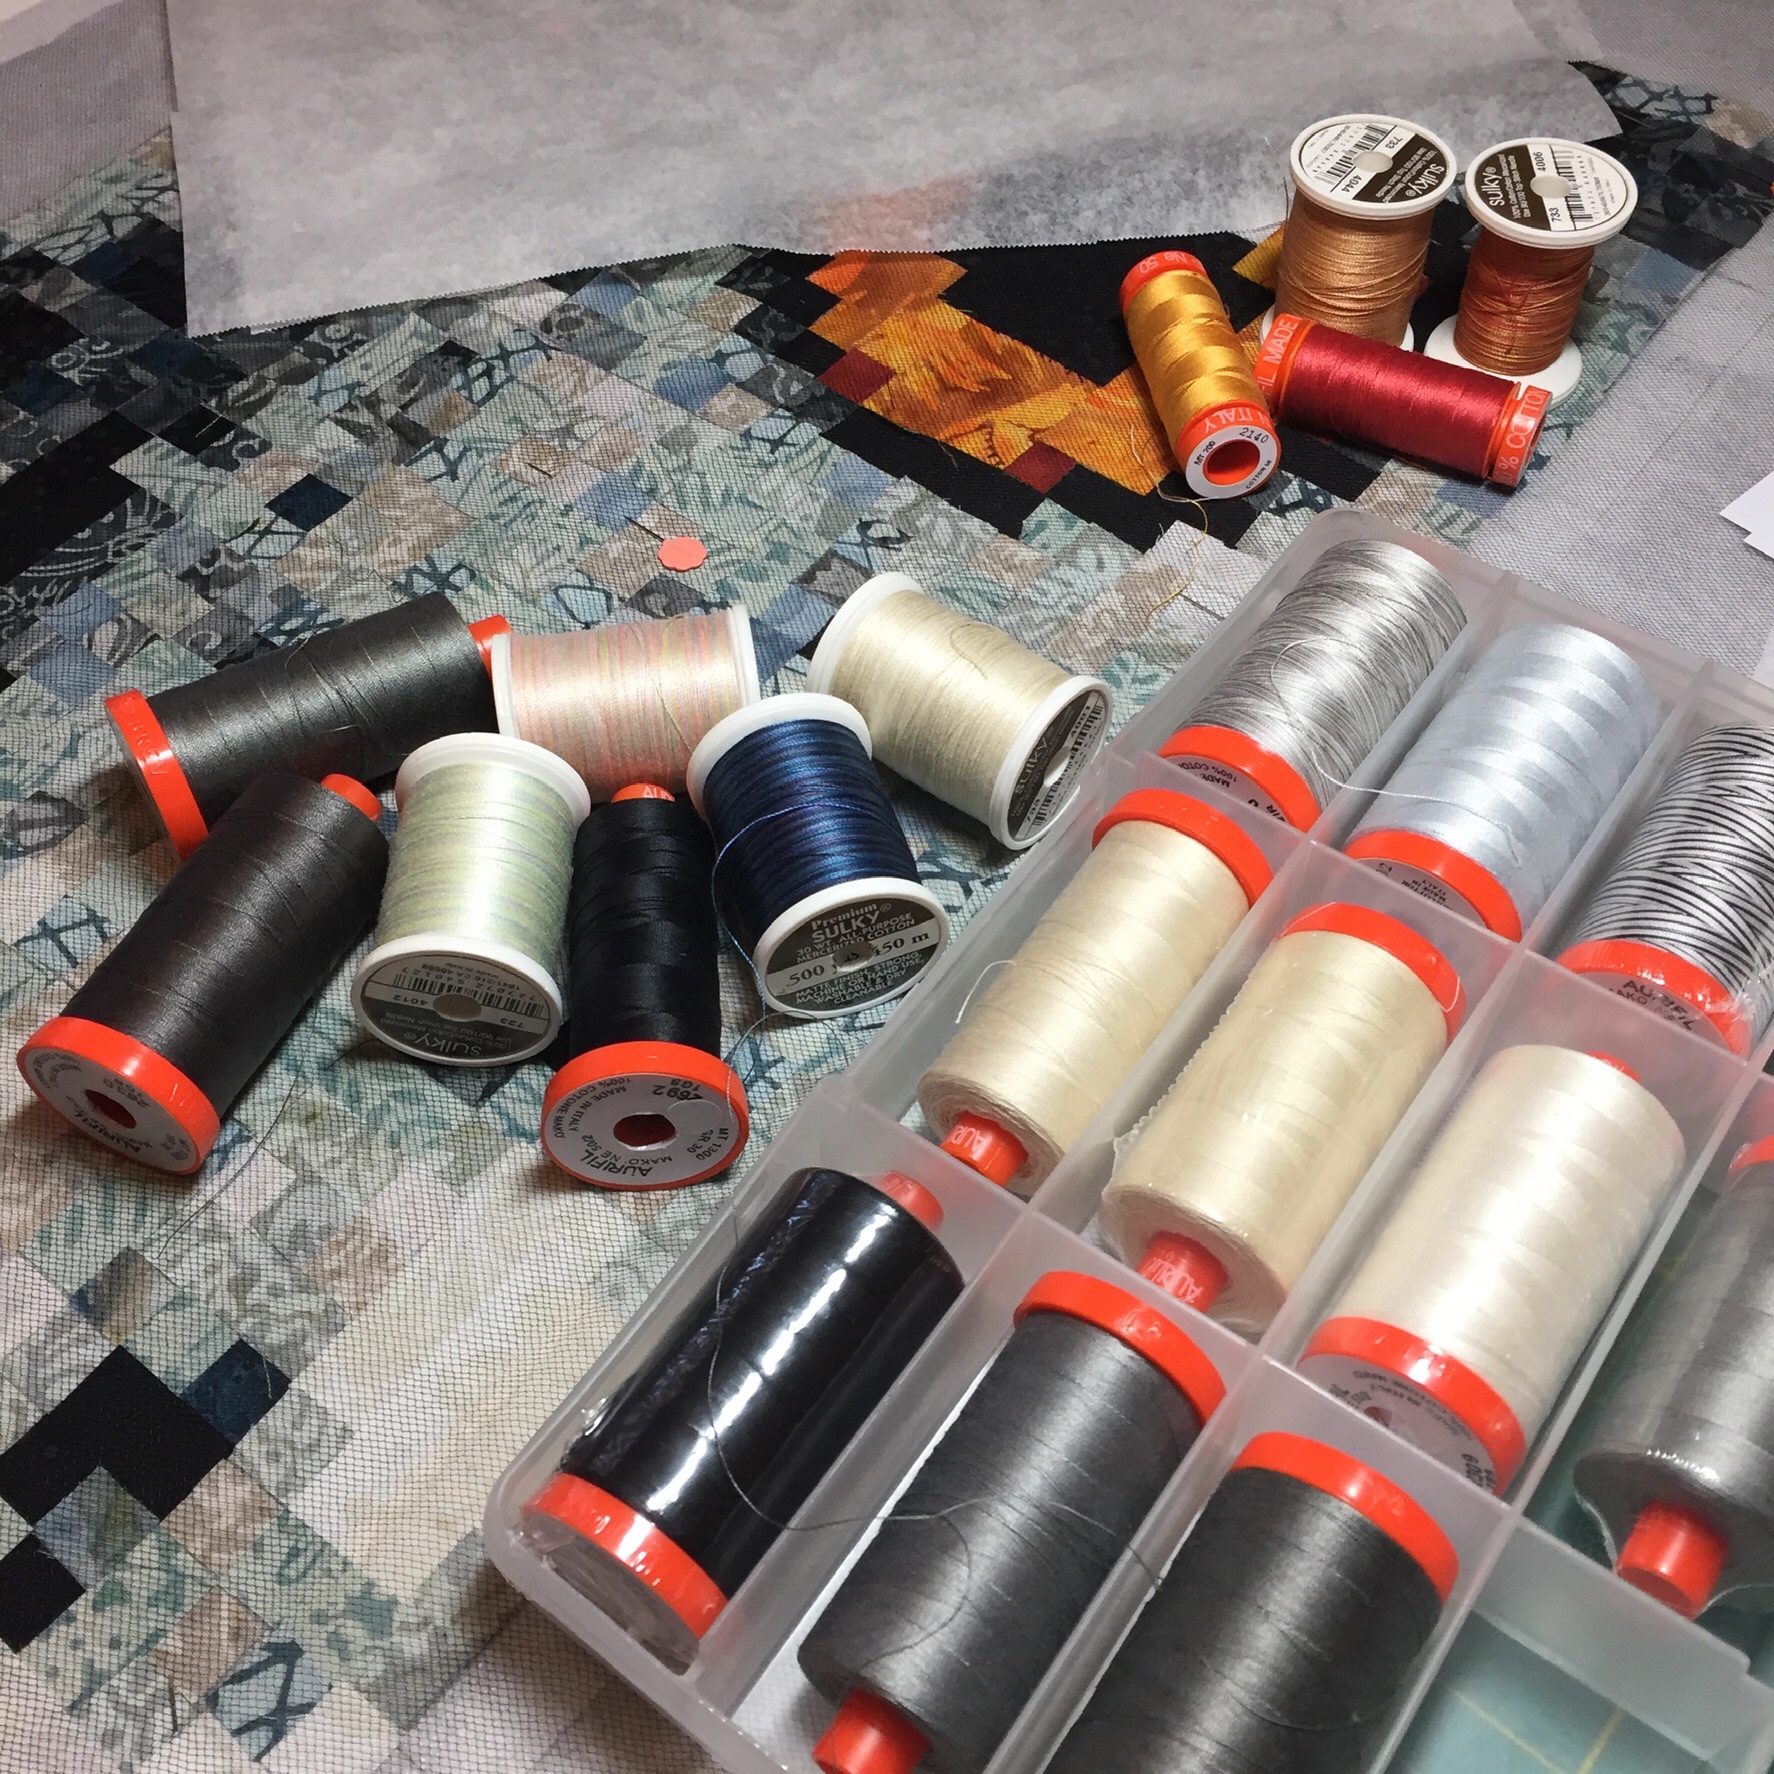
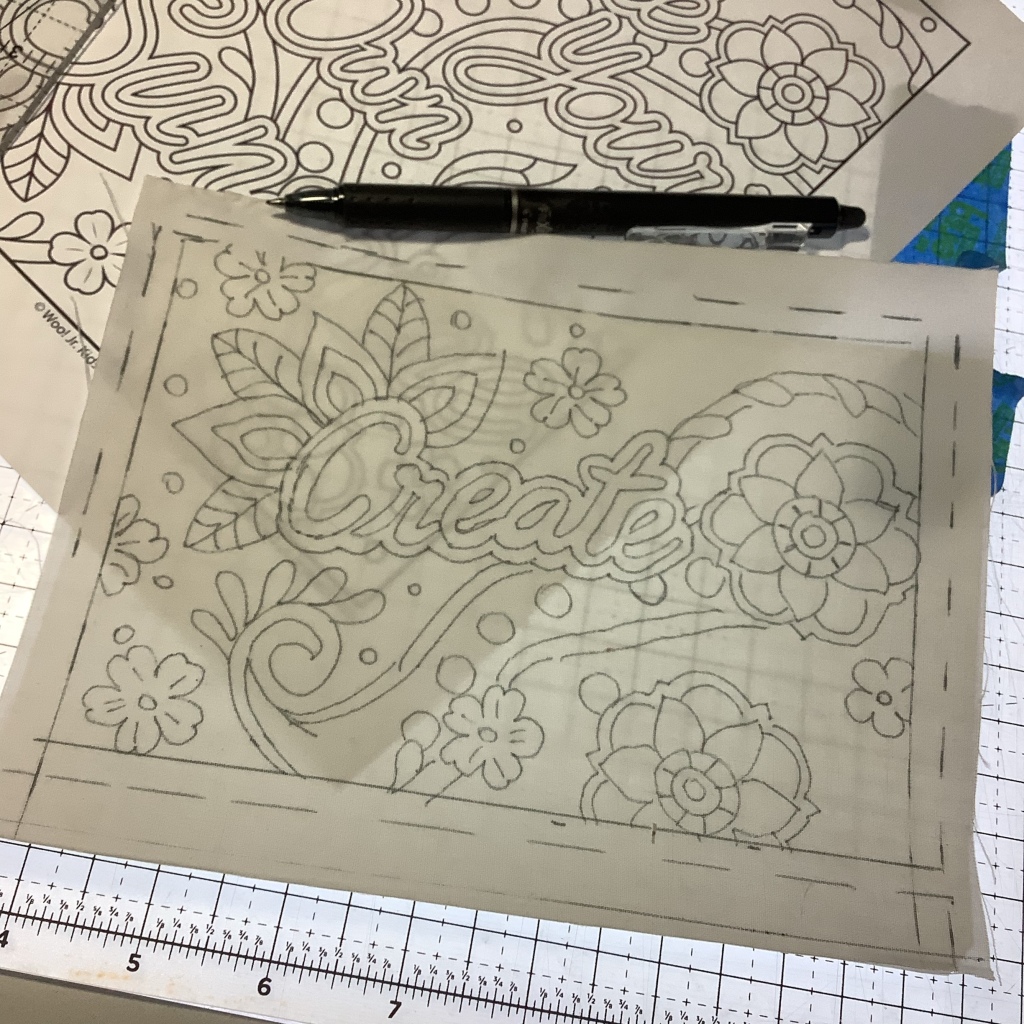
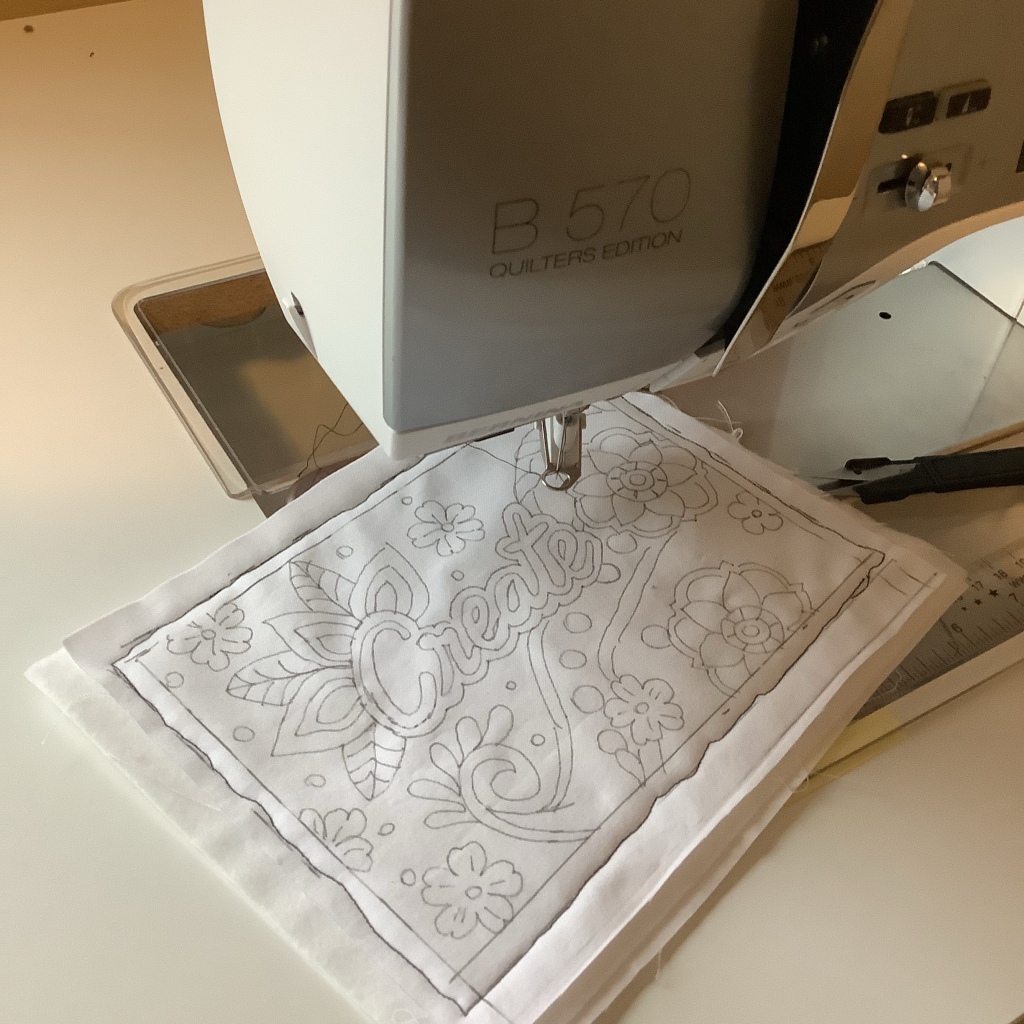
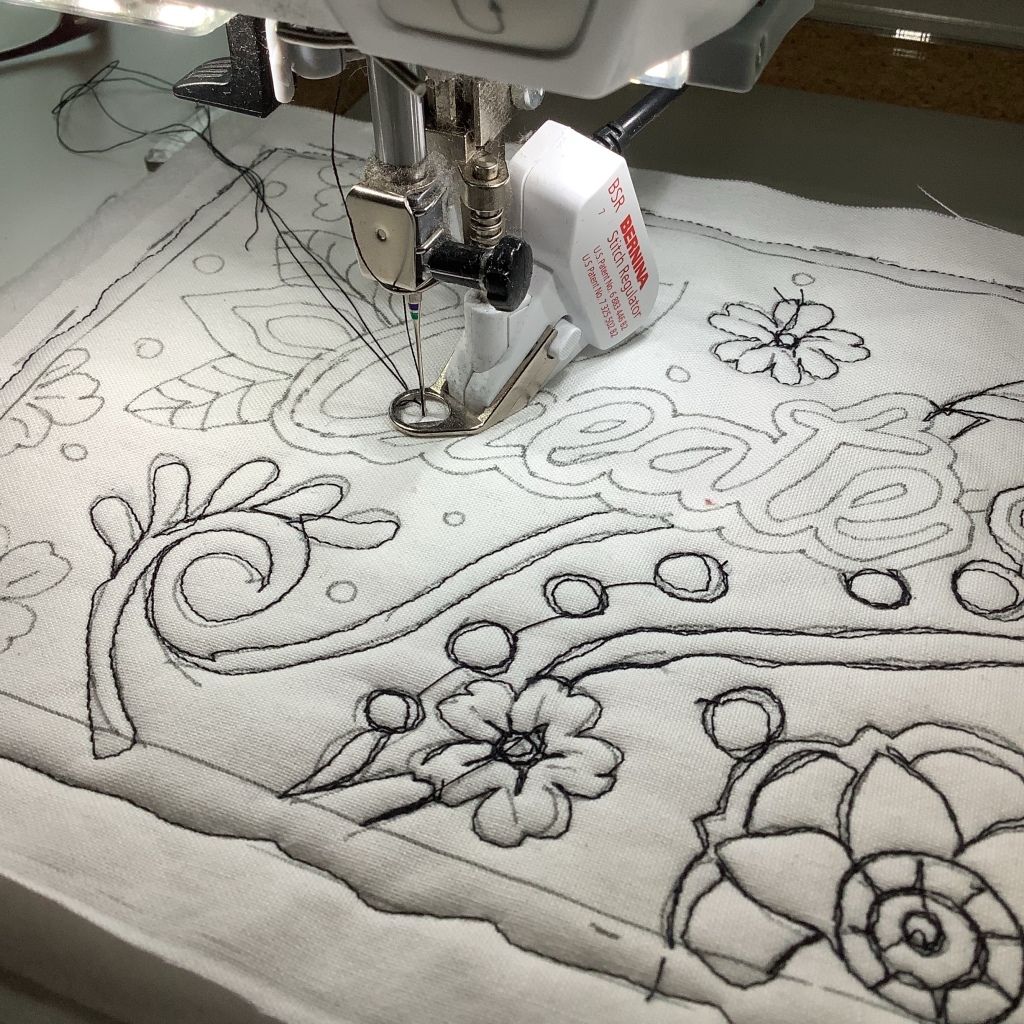
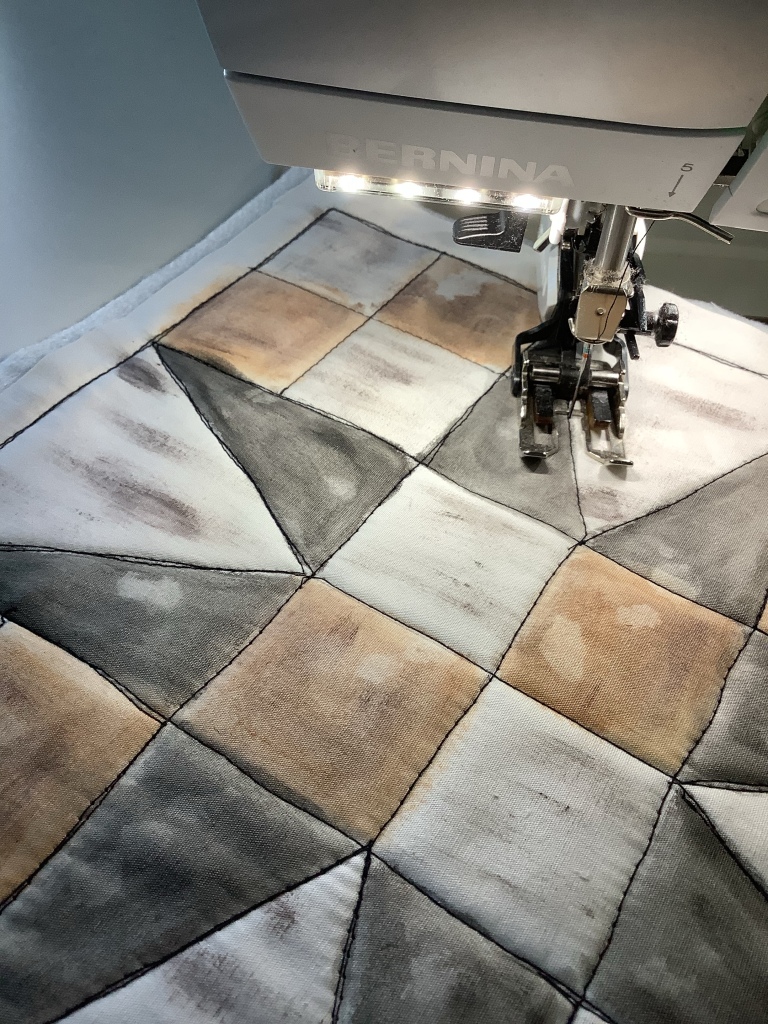
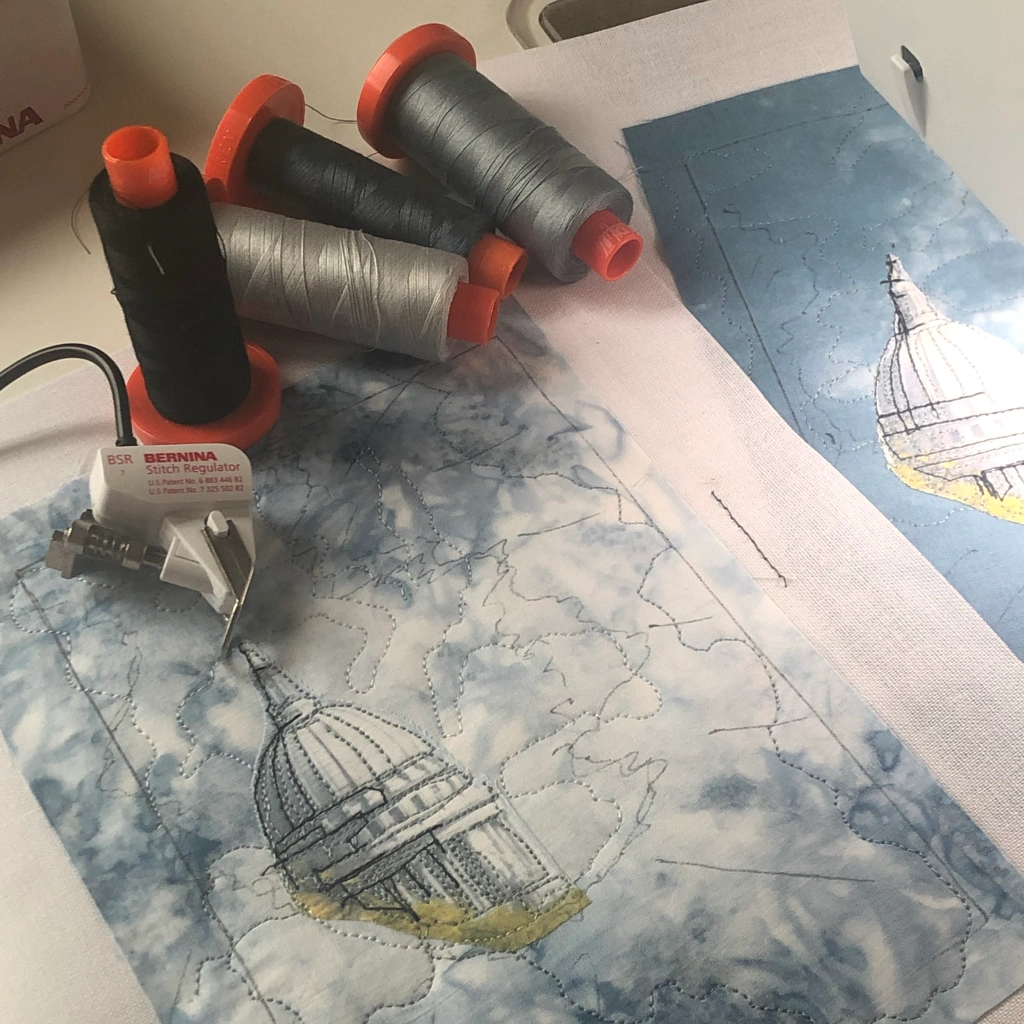
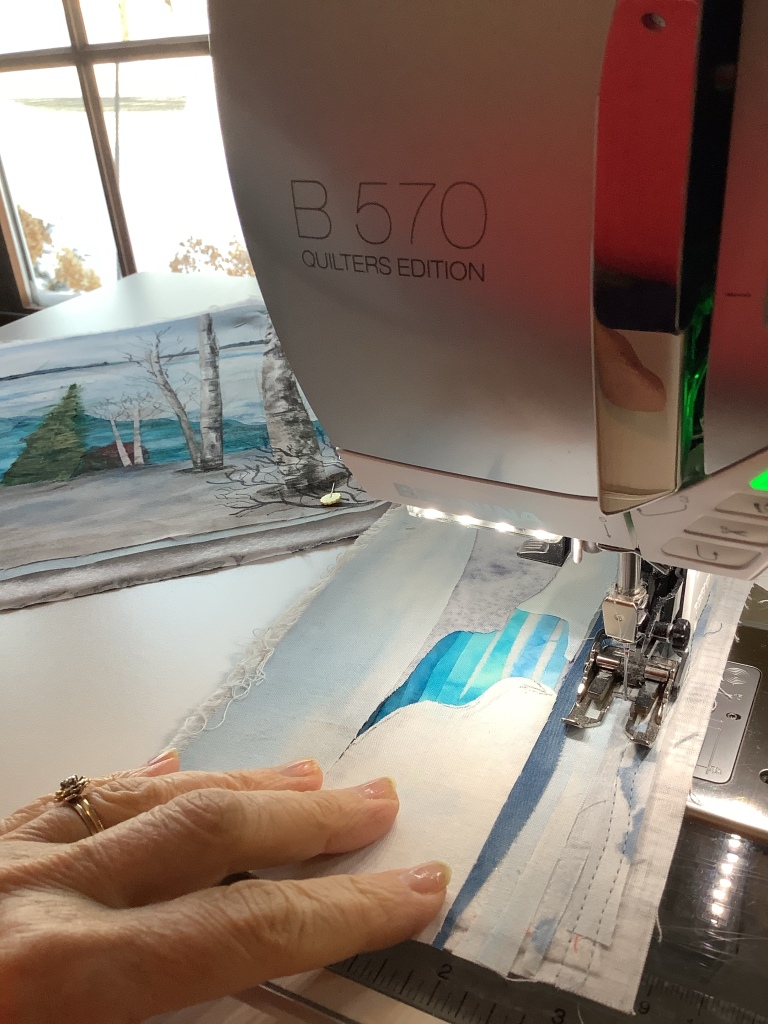
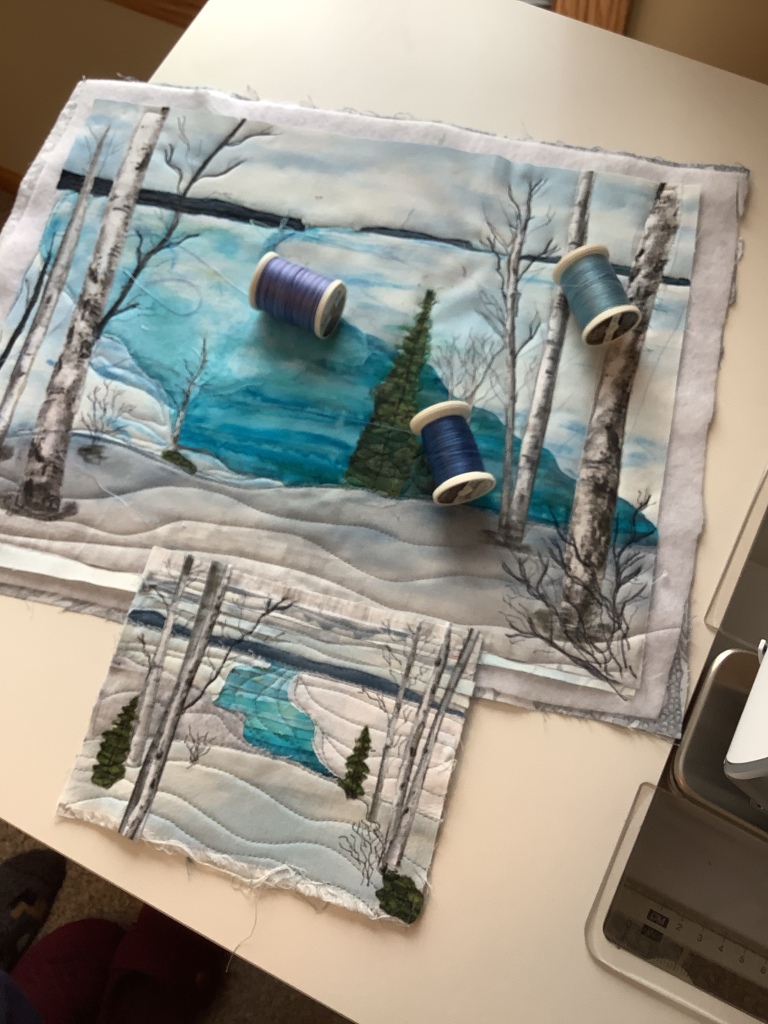
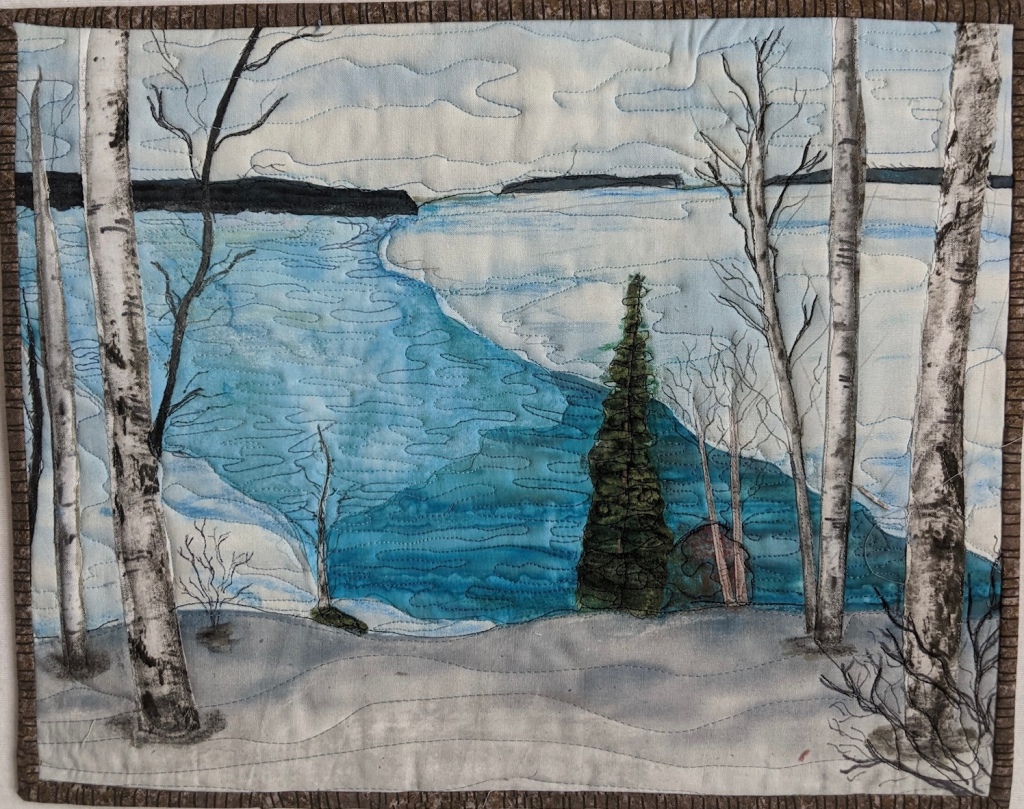
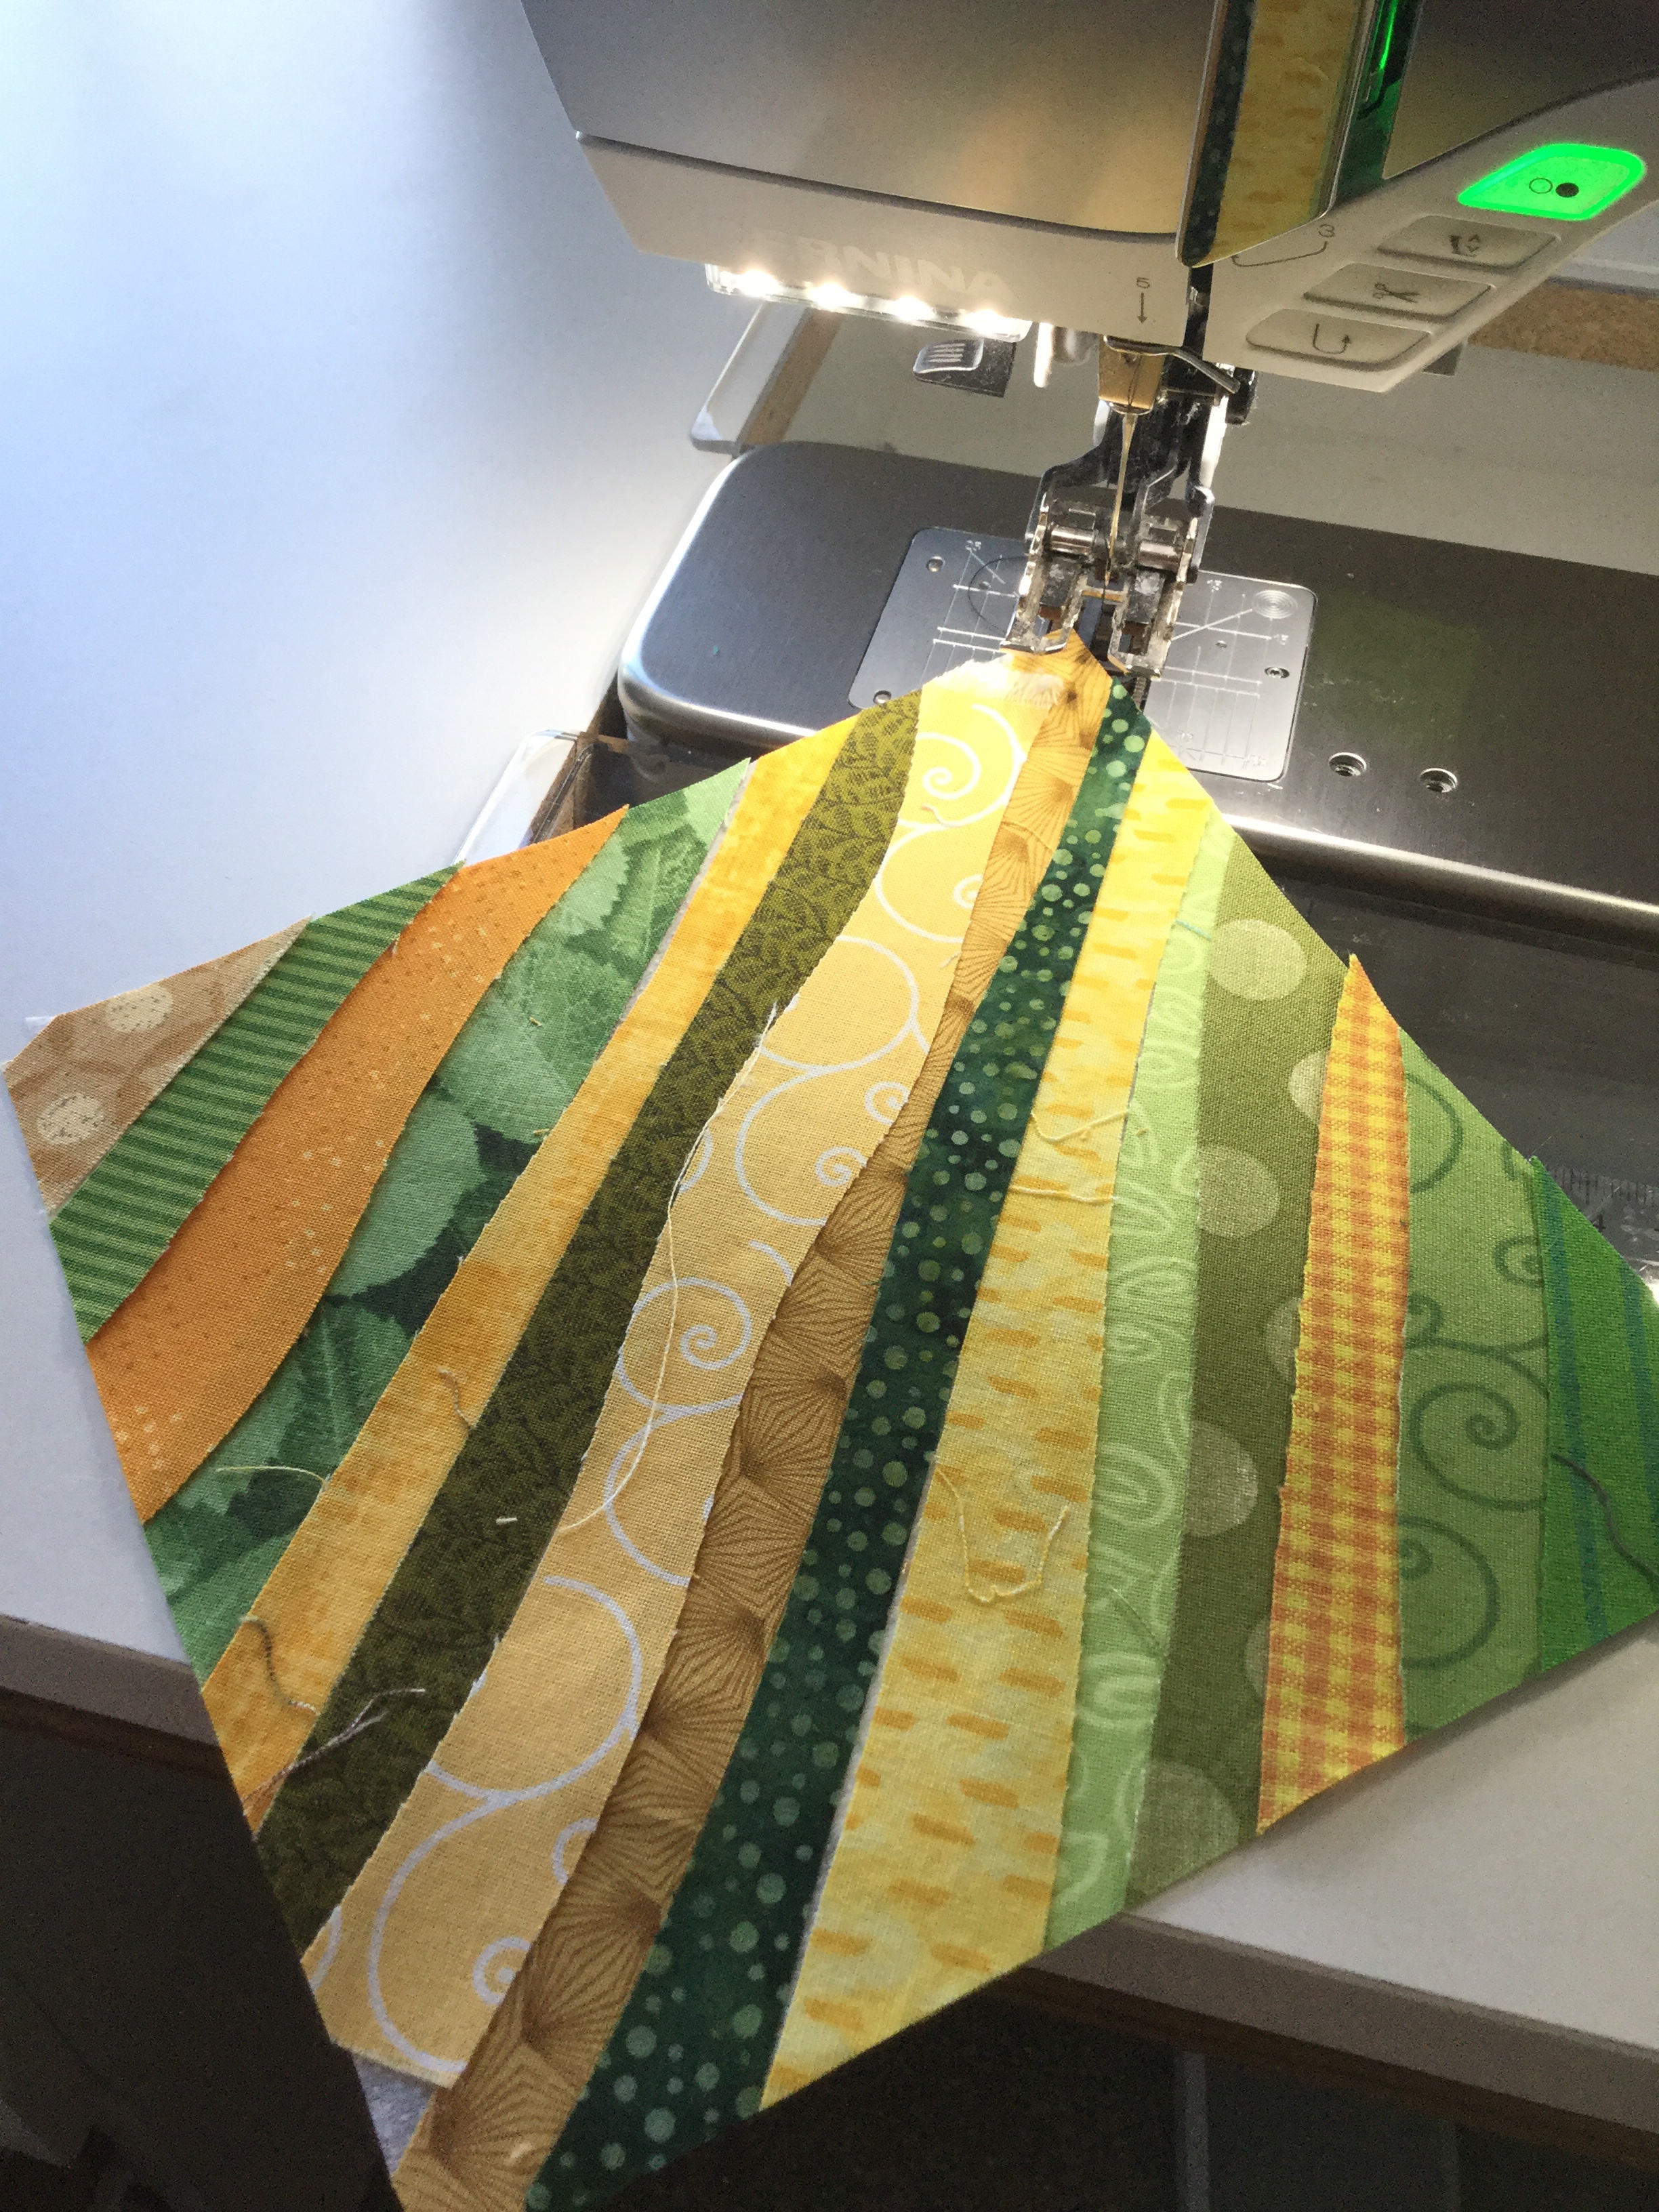
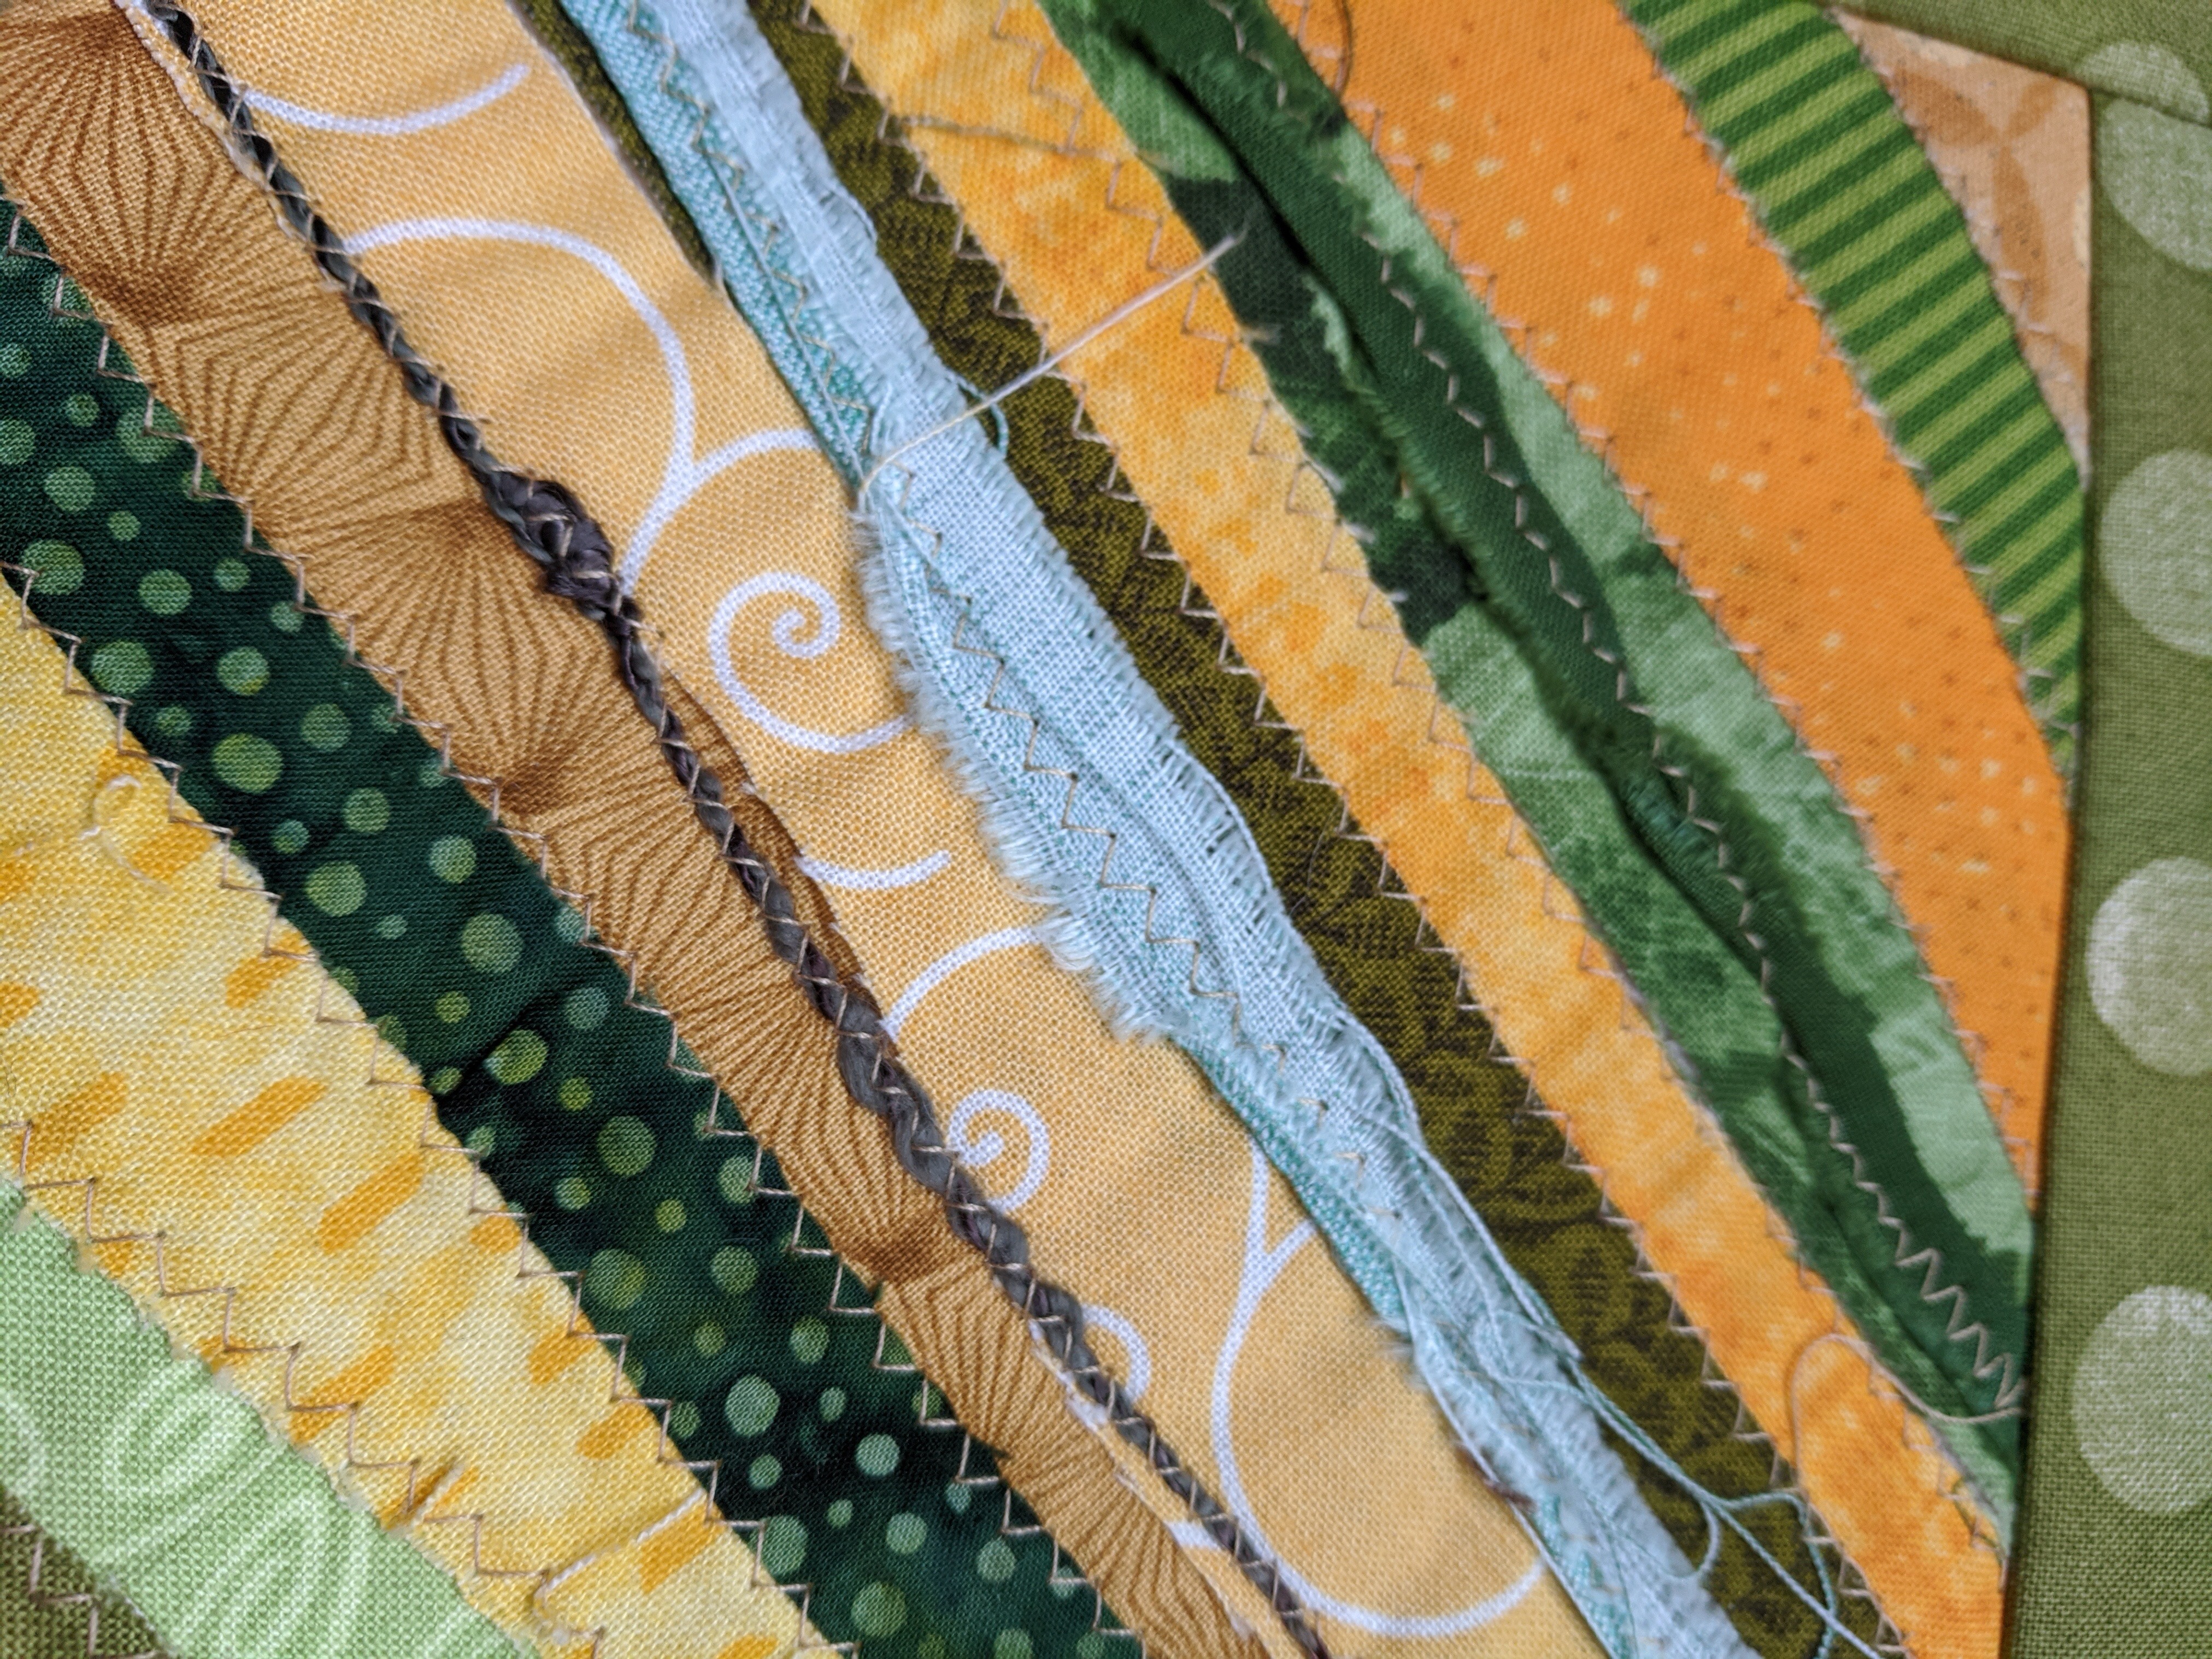
It needed some machine free-hand quilting, so I got our every Aurifil thread I had in similar colors and set up my Bernina.

I love to crank up the music and “get in the zone” and just let the fabric tell me how to quilt it.
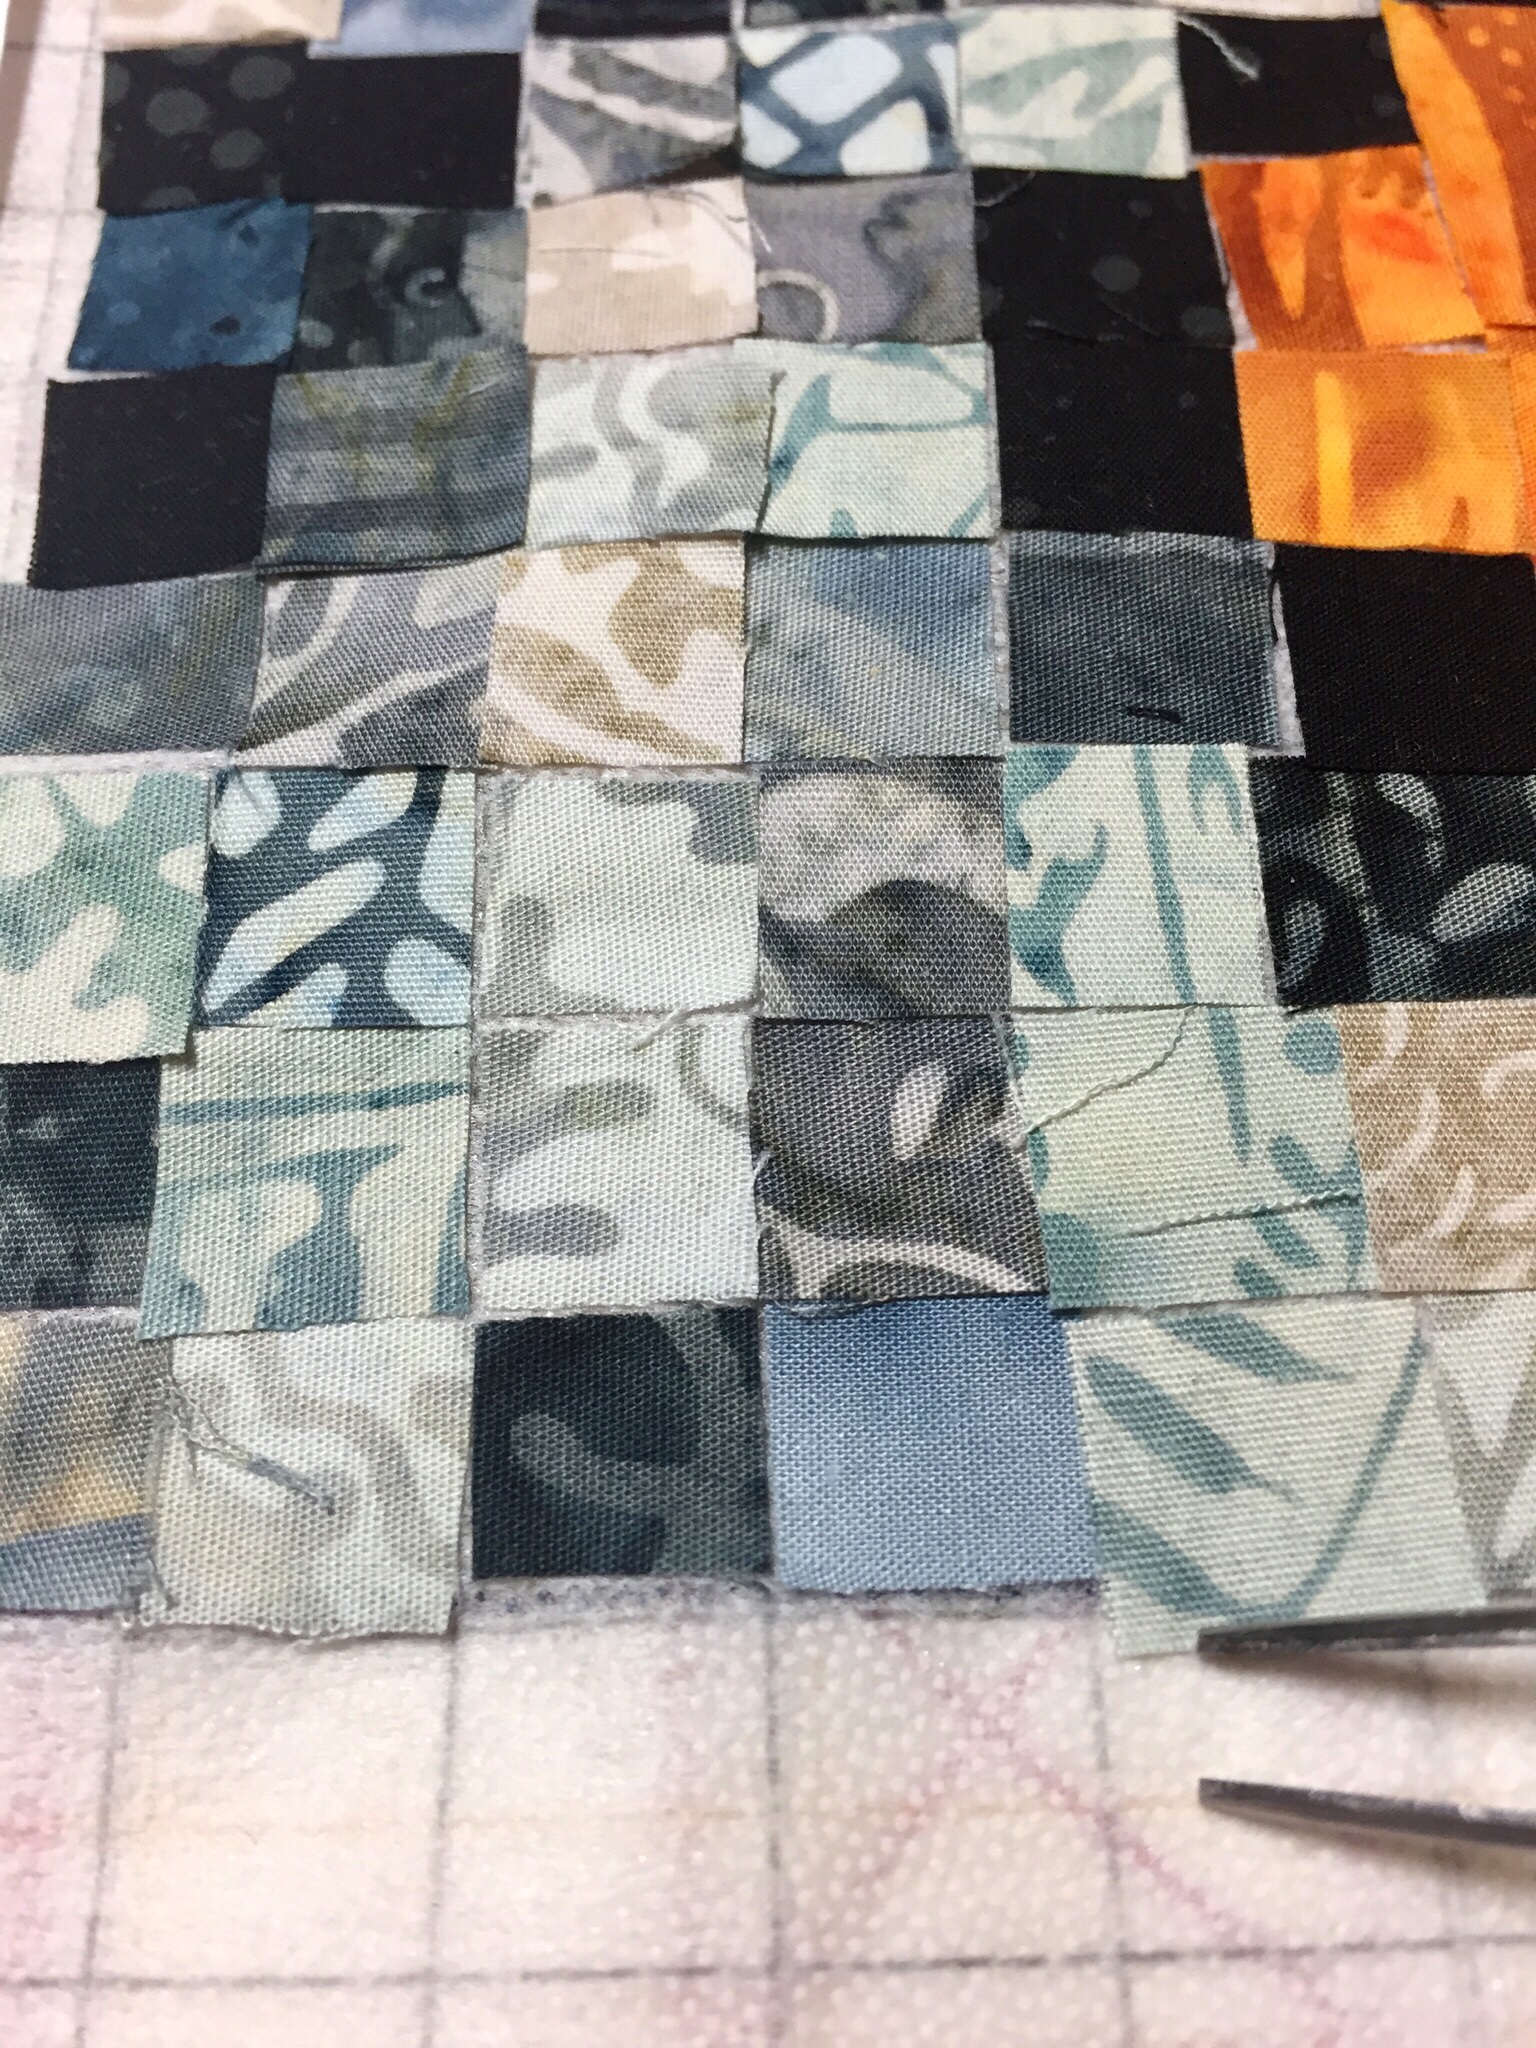
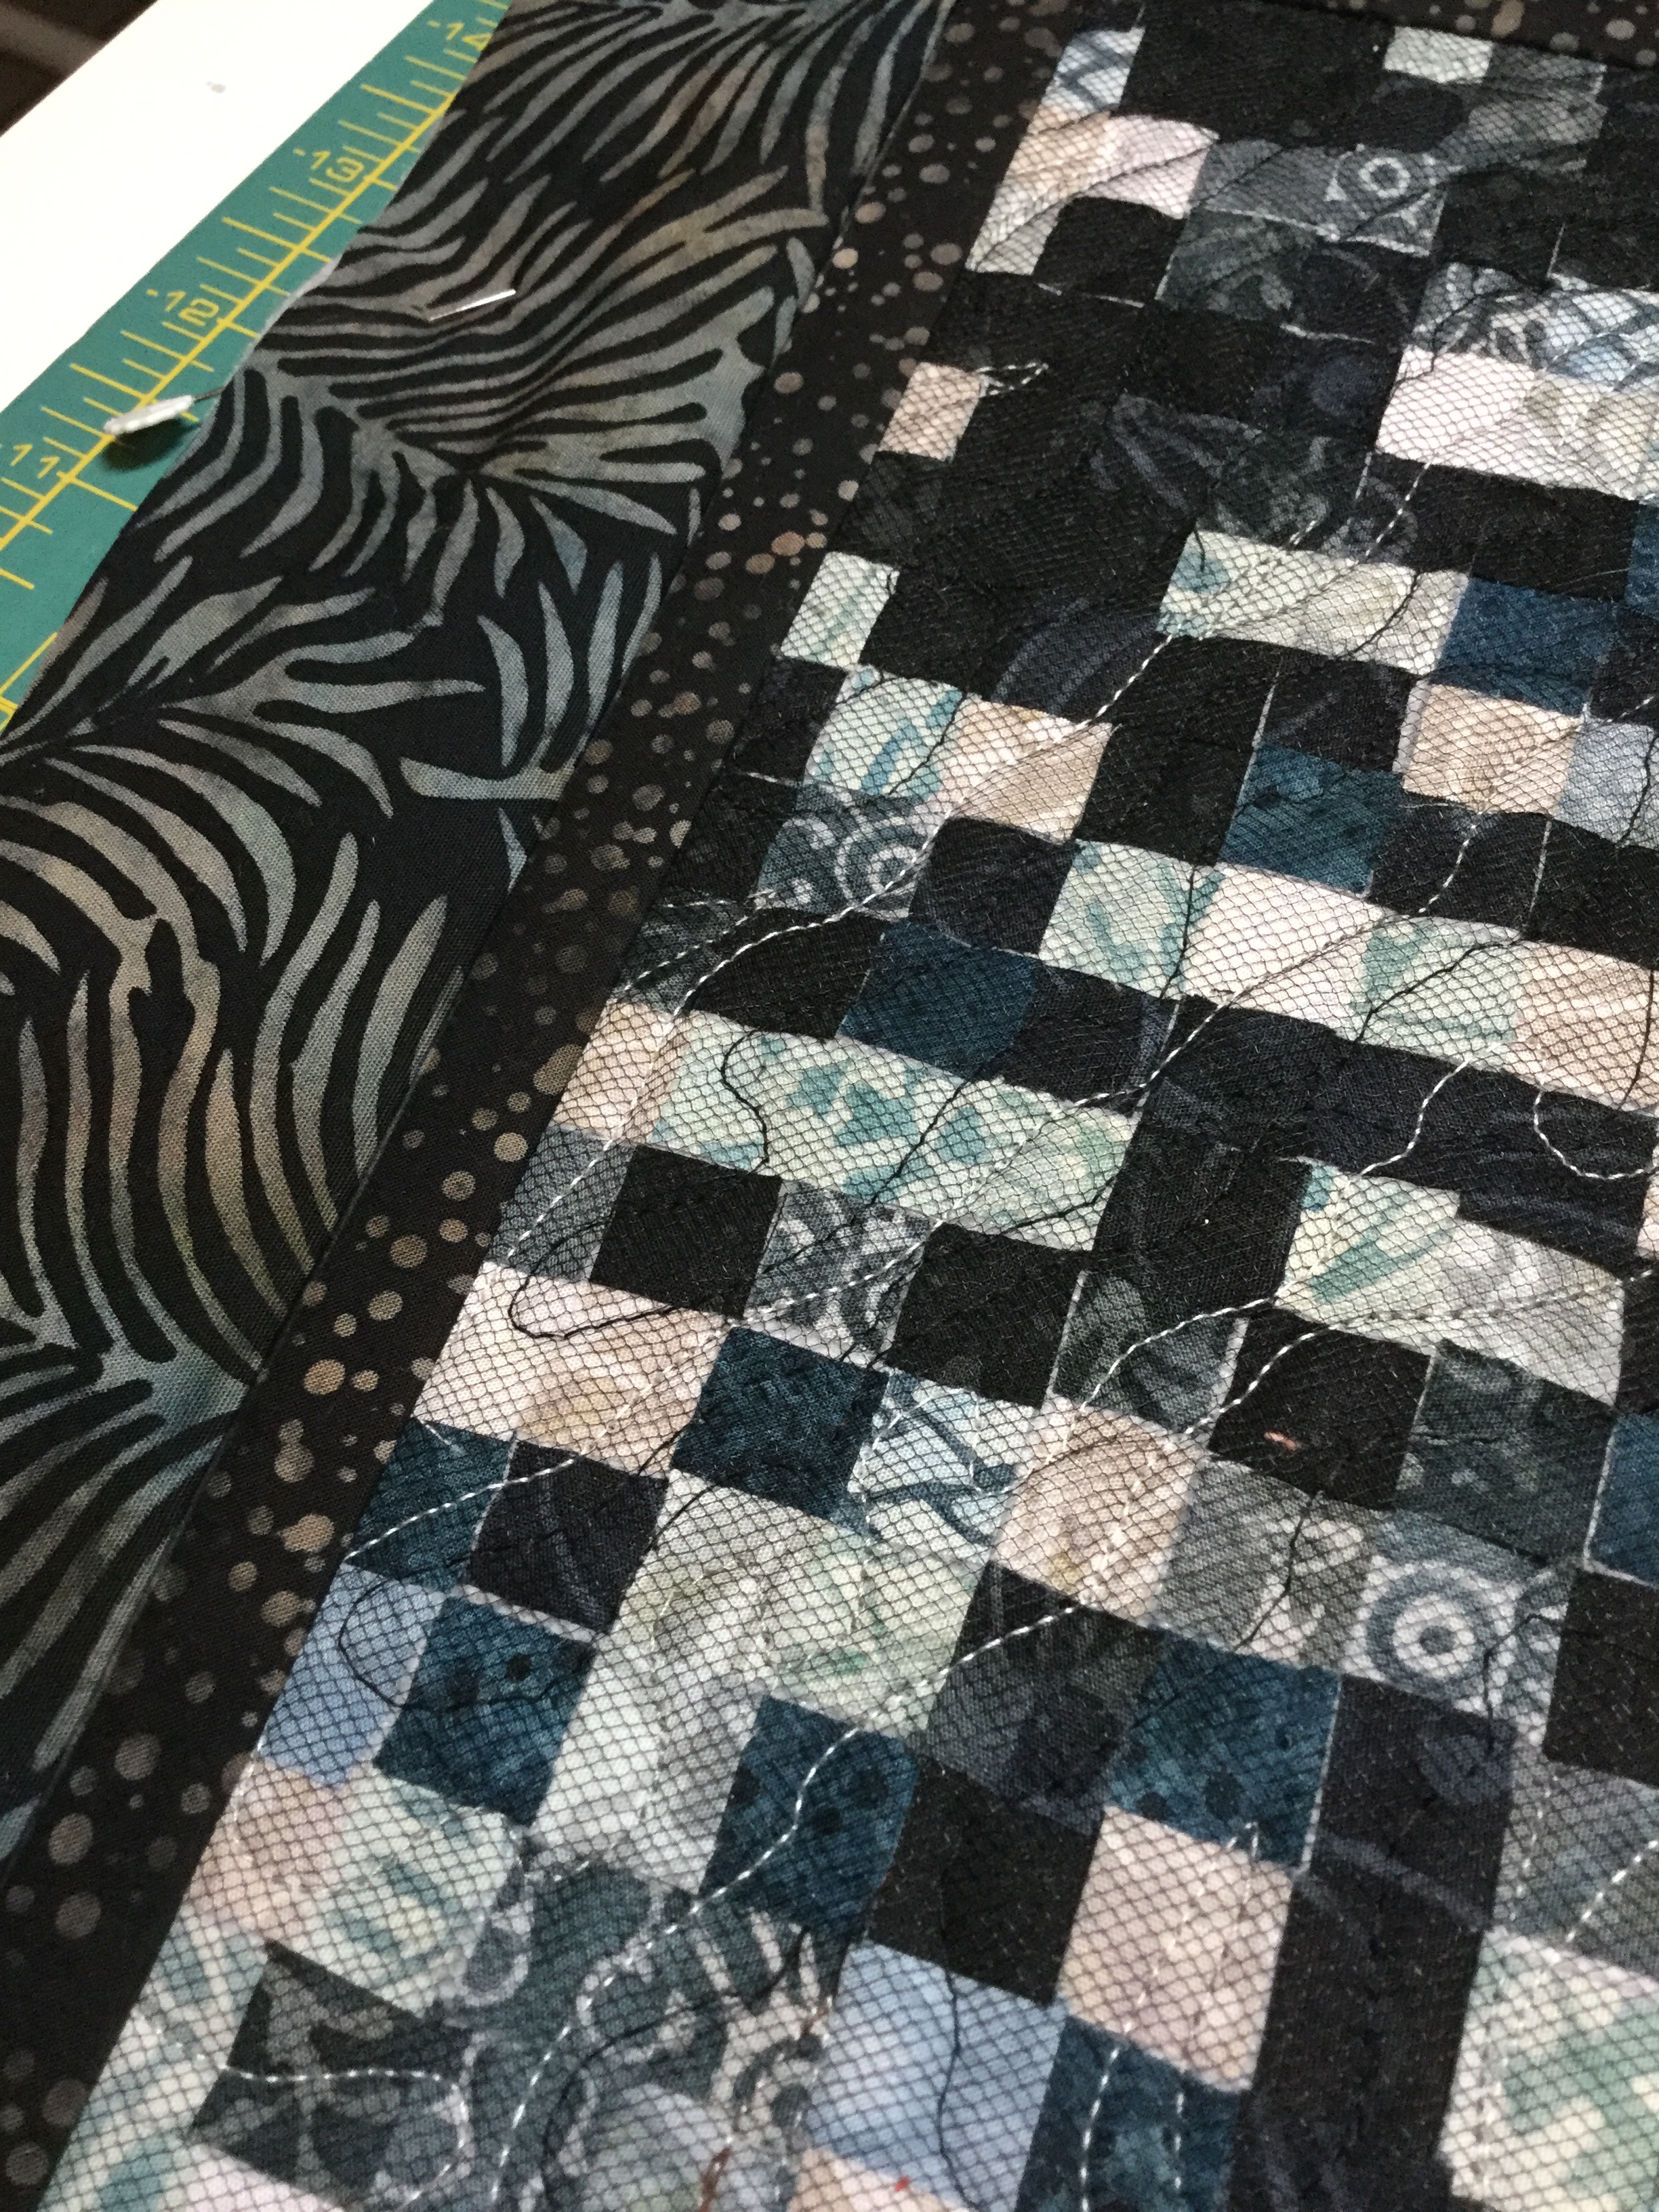
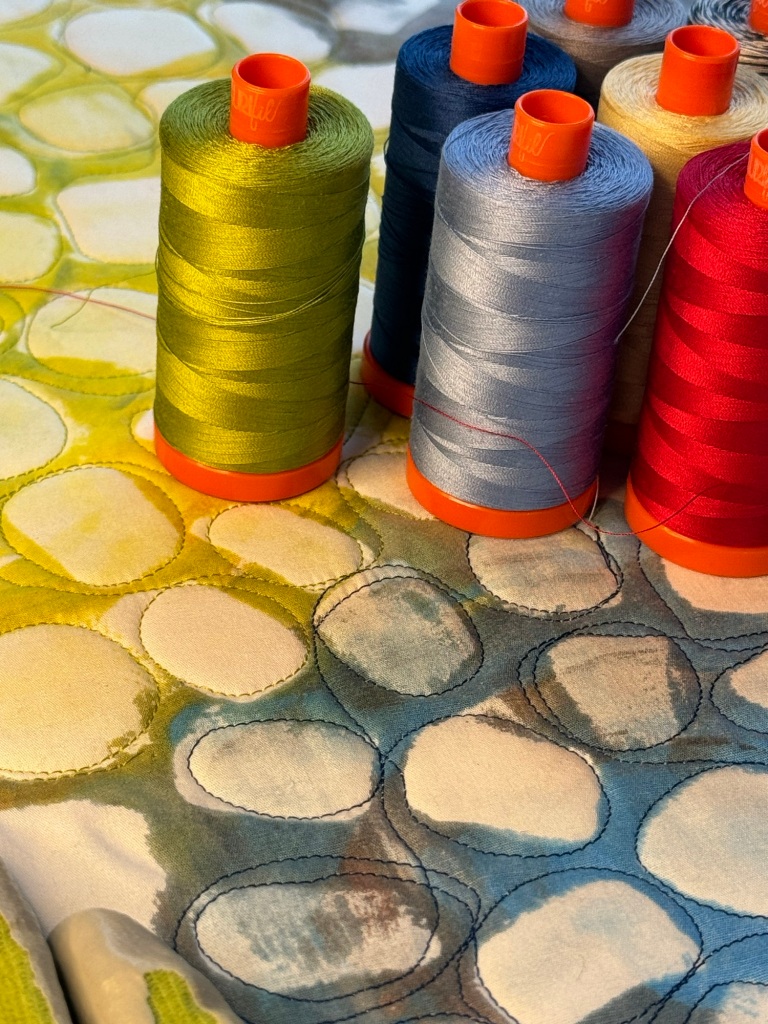
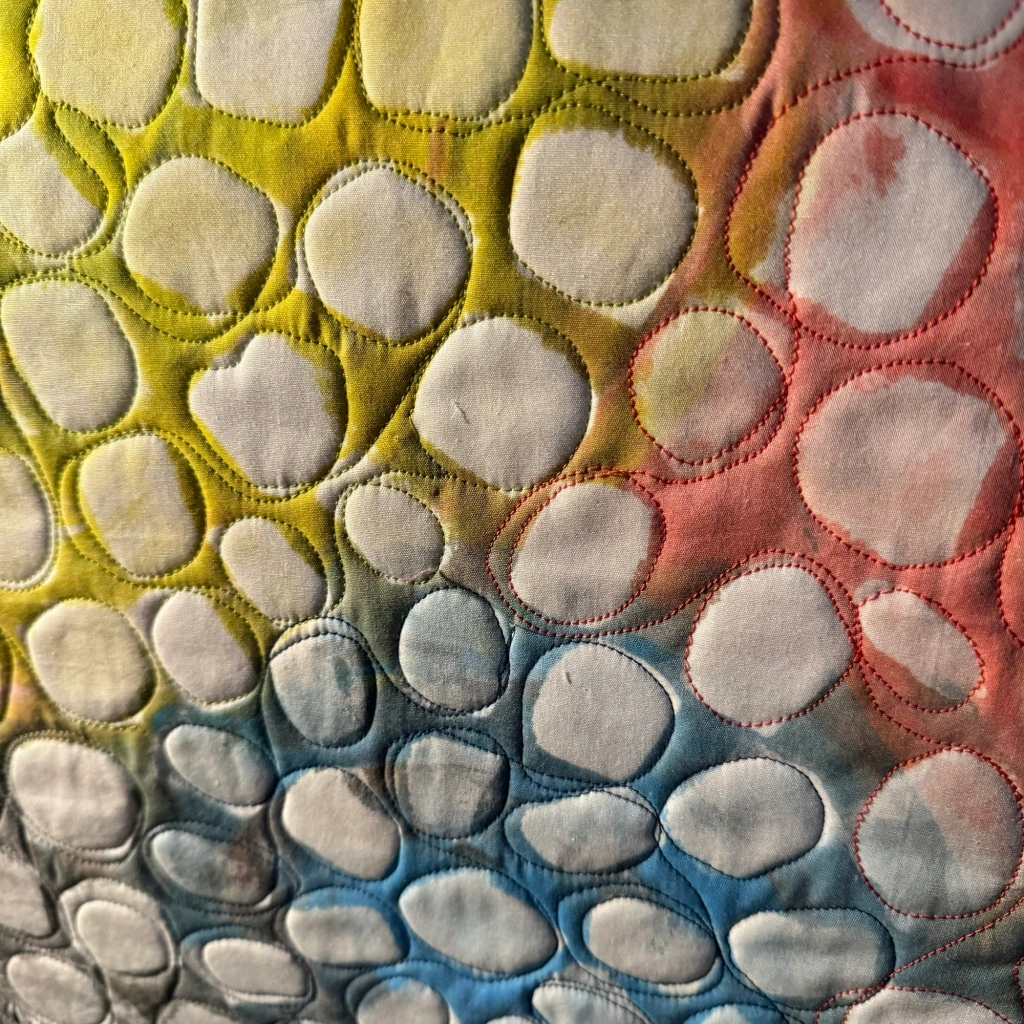
Here’s a close-up…

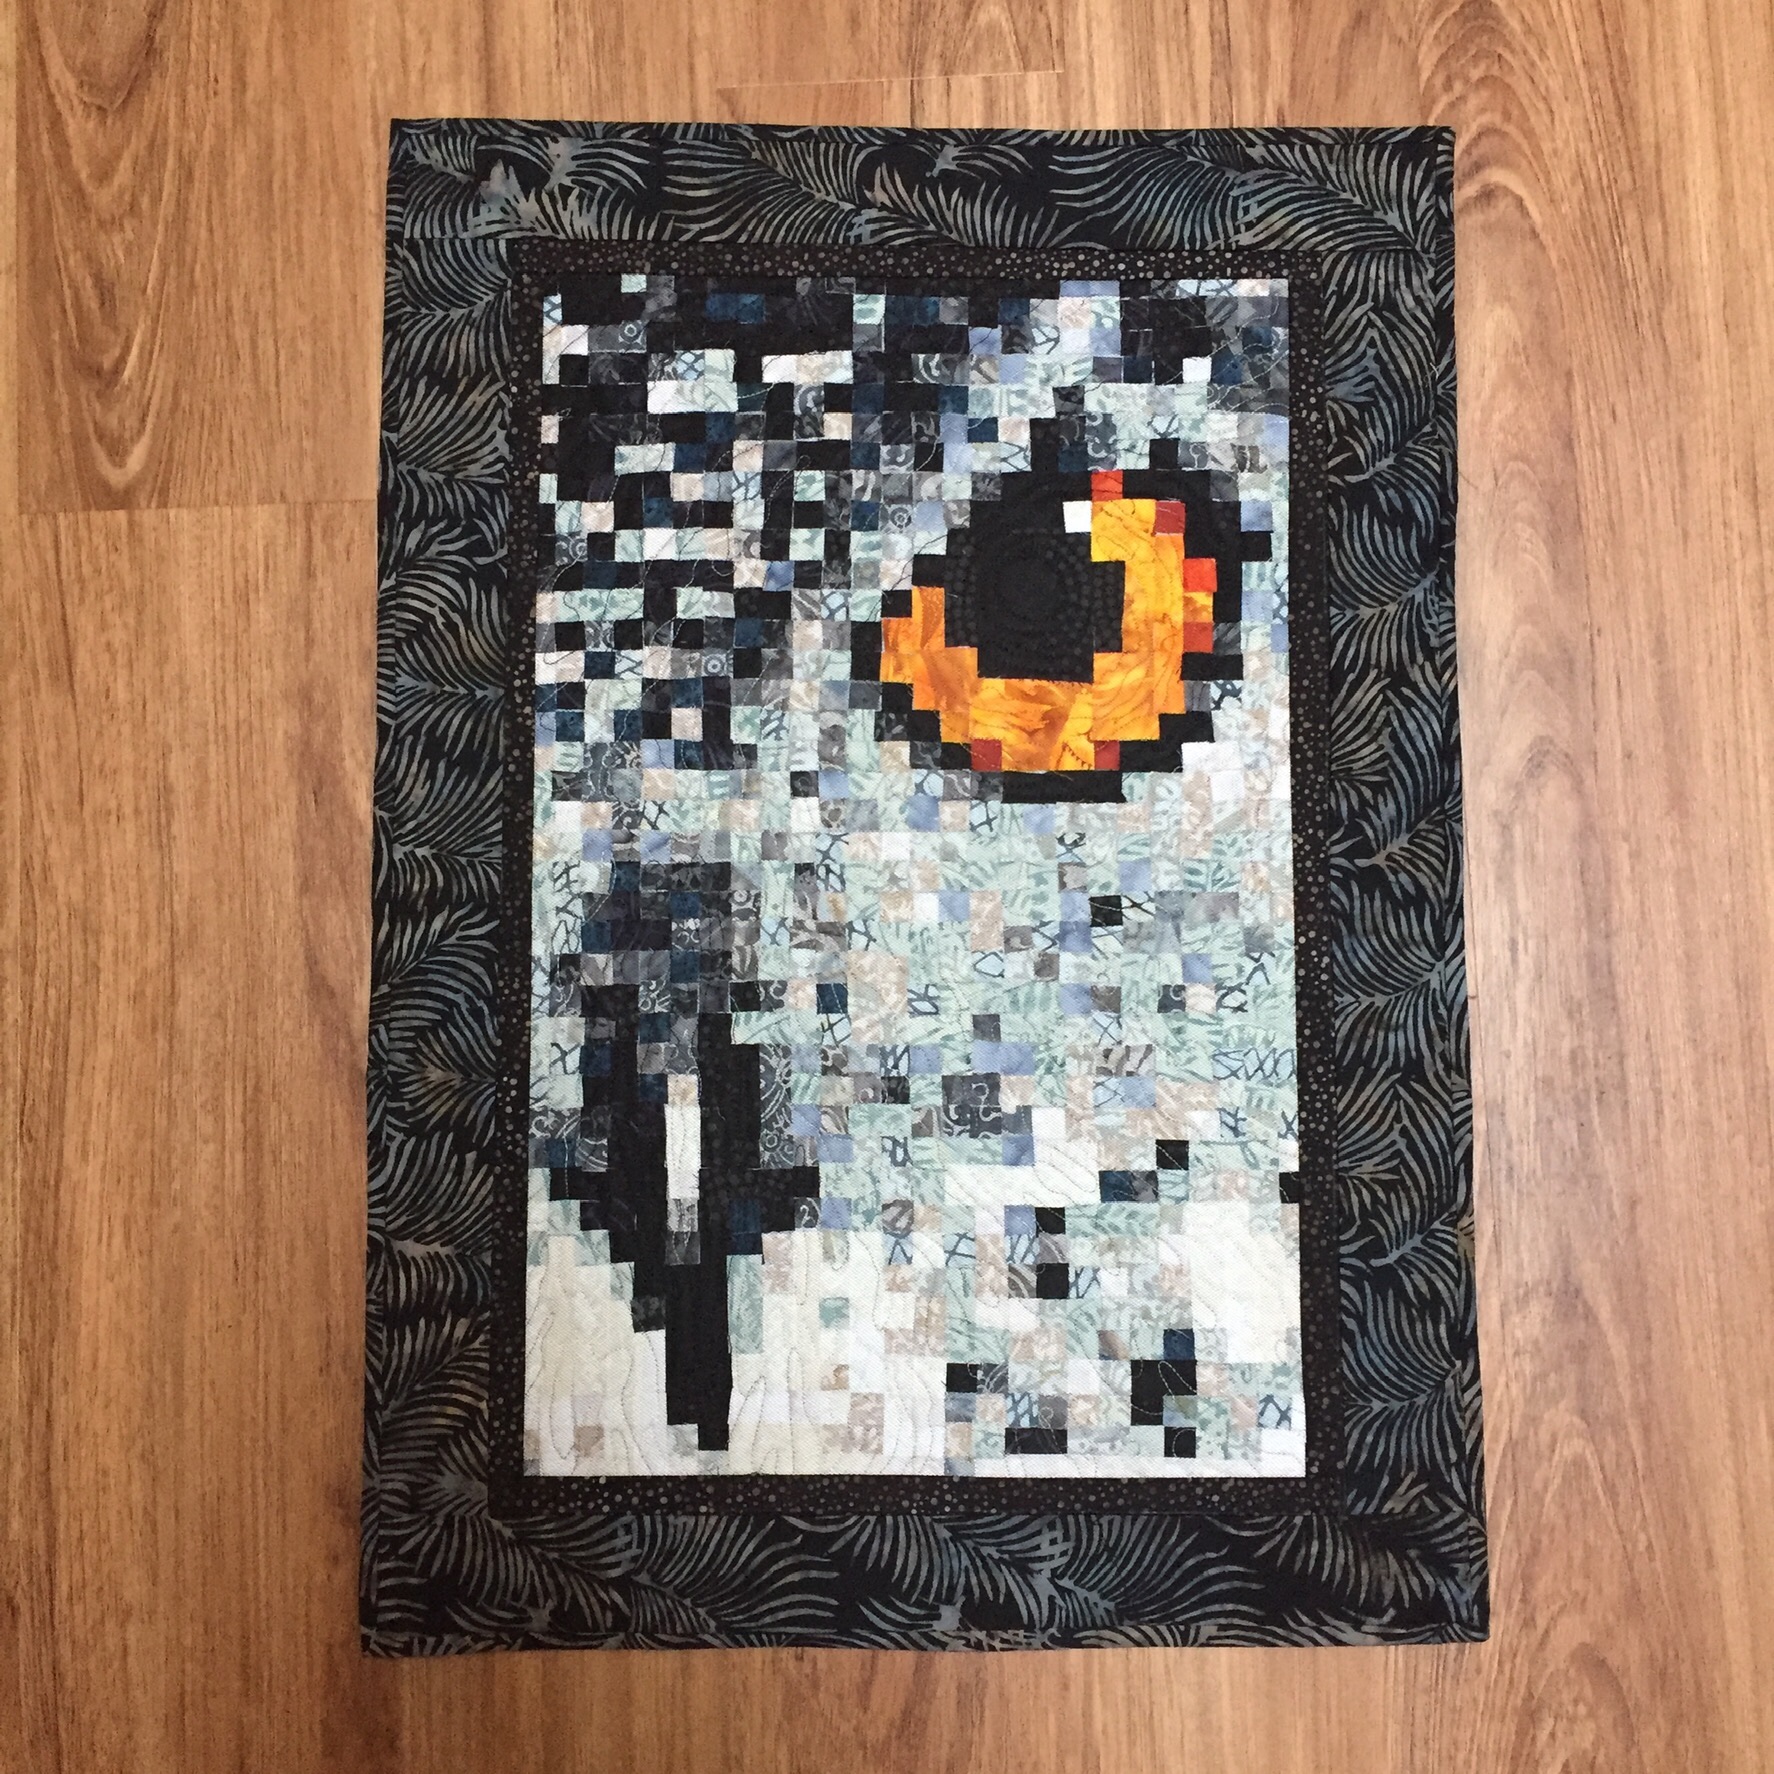
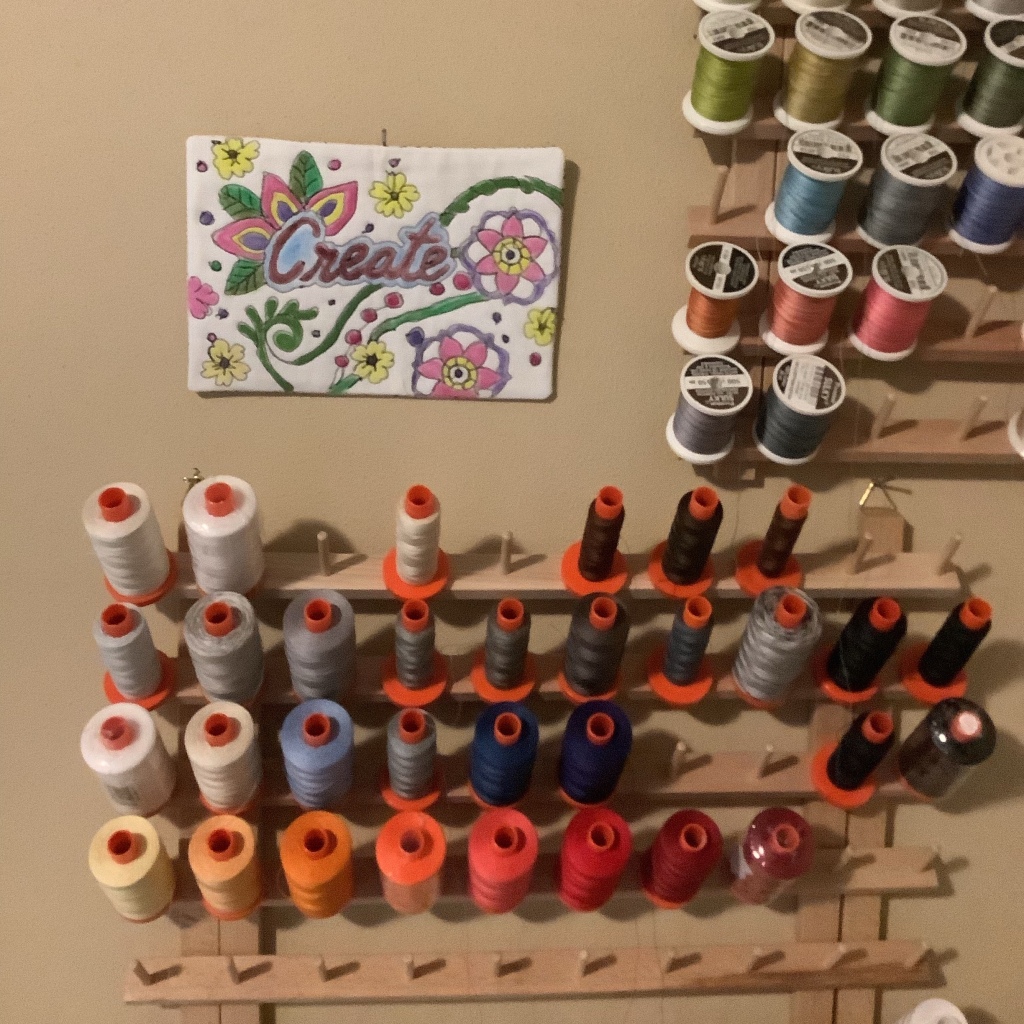
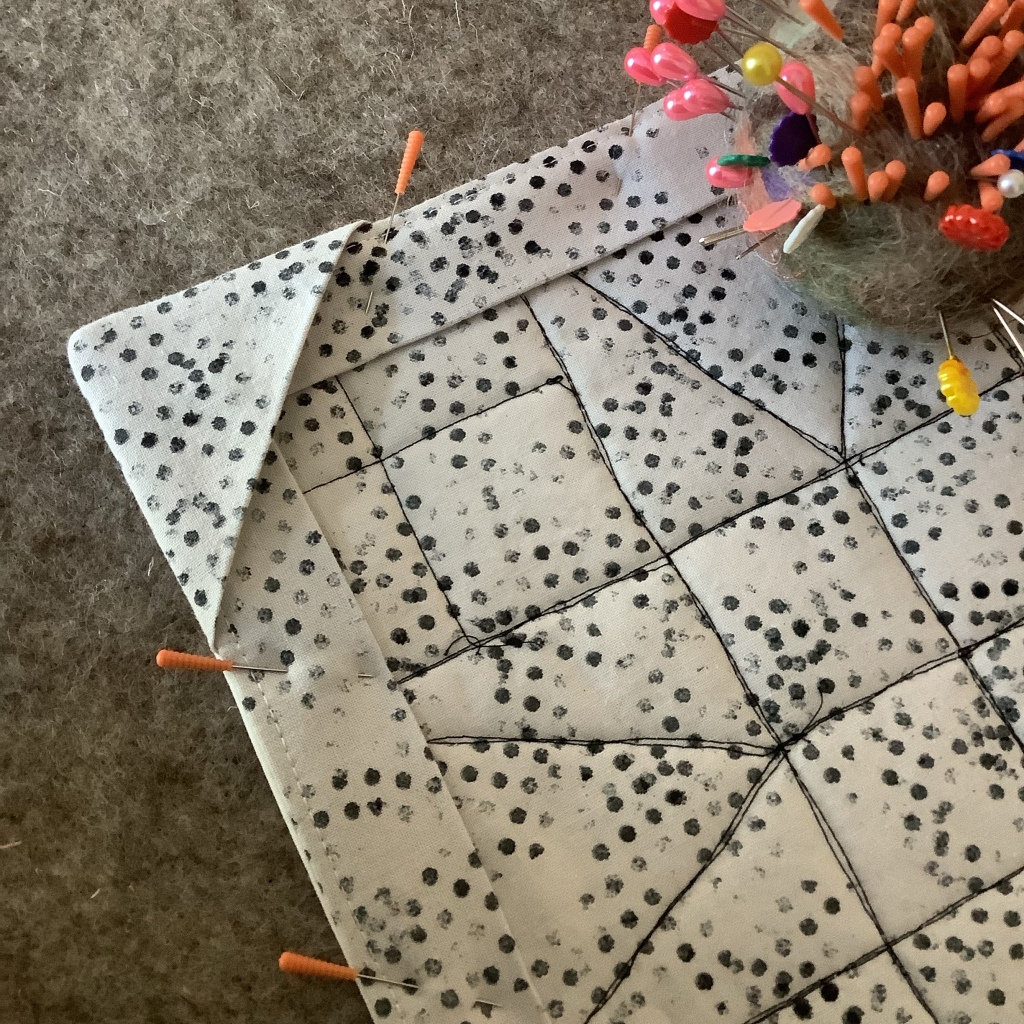
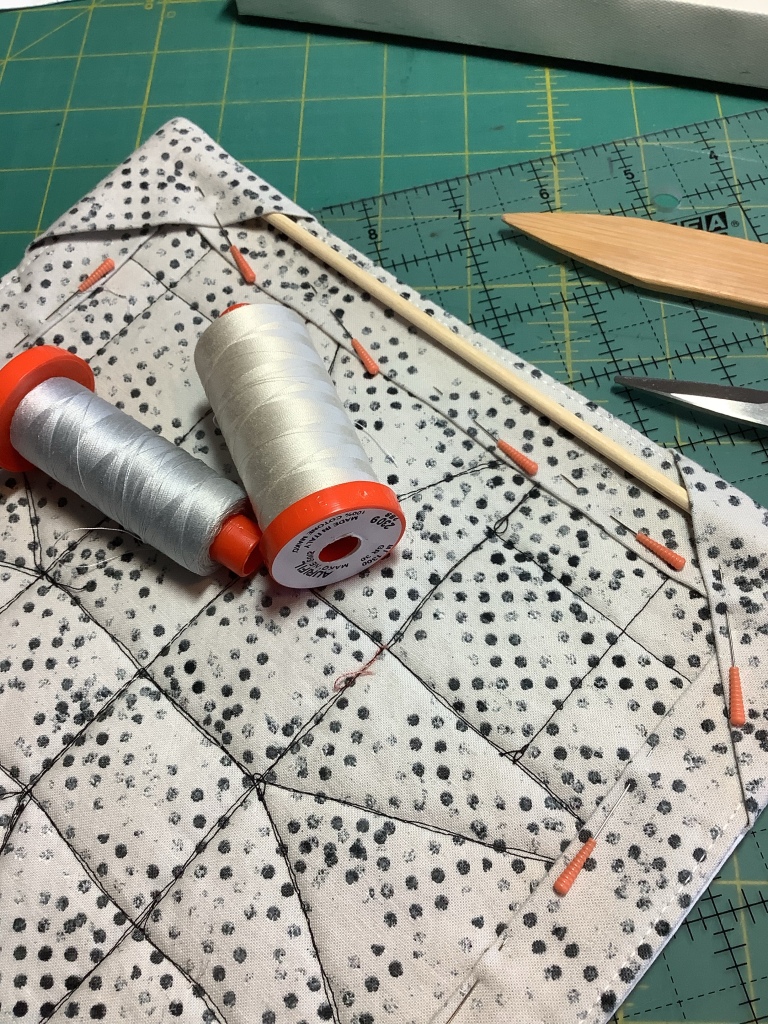
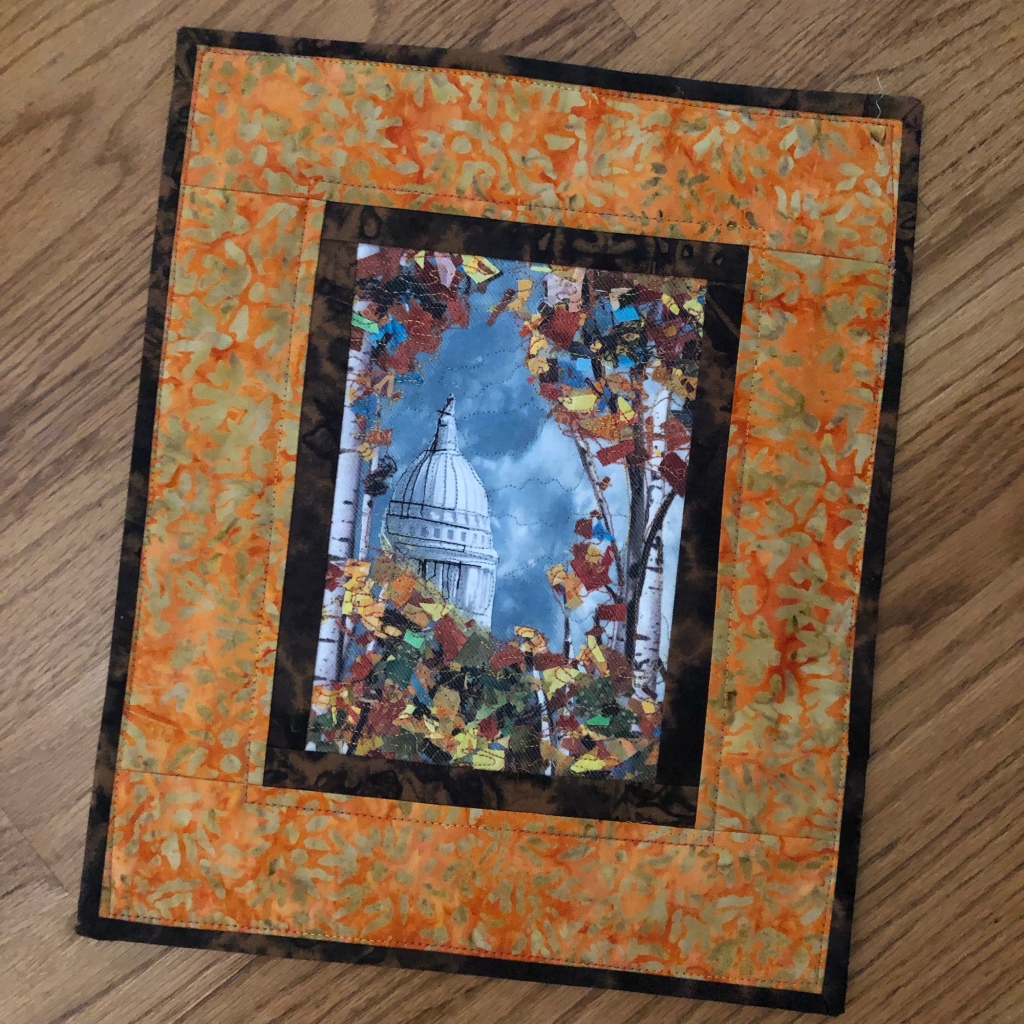
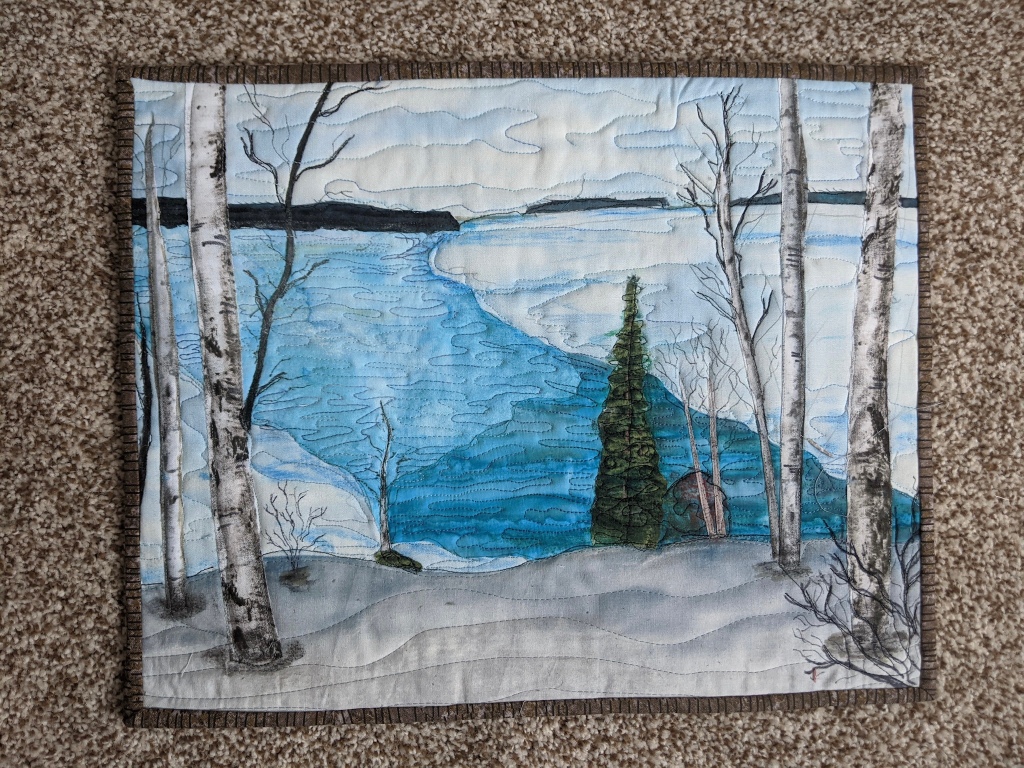
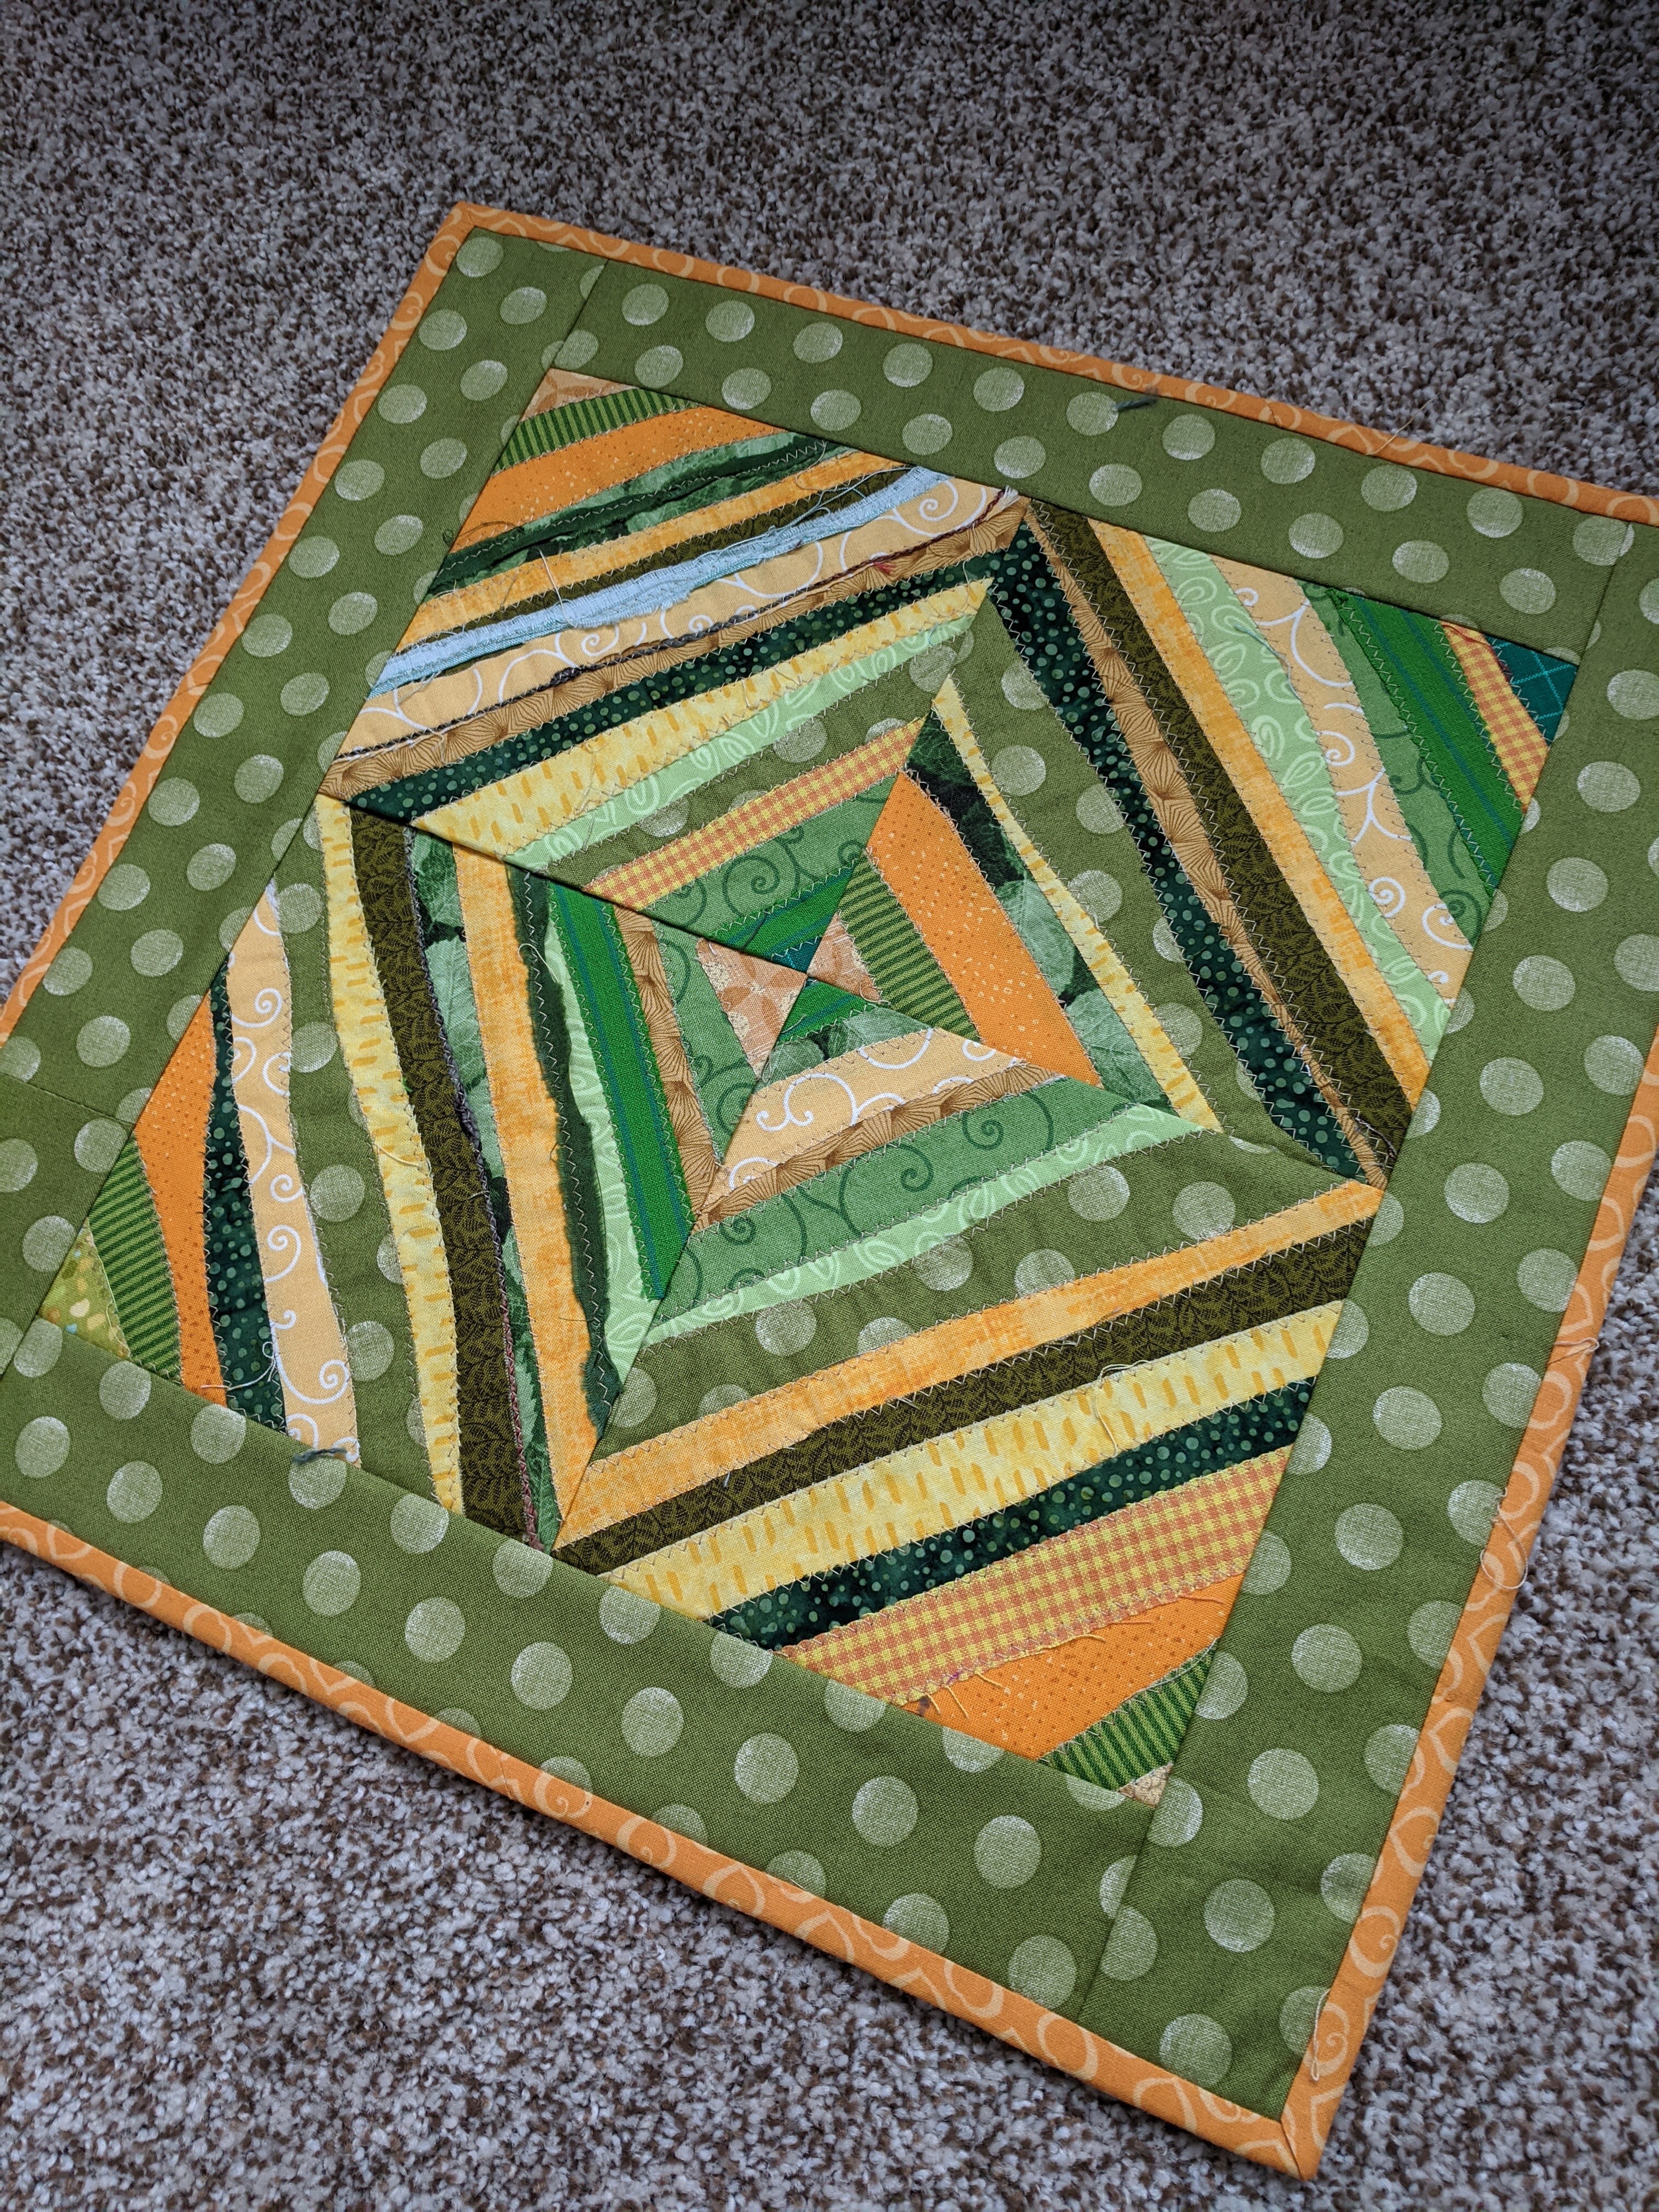
I added triangle corners to all four corners of the back, so by slipping each end of a wooden dowel cut to size into 2 of them you can hang it up on the wall in any direction.

Hanging triangle on all four corners of the back.

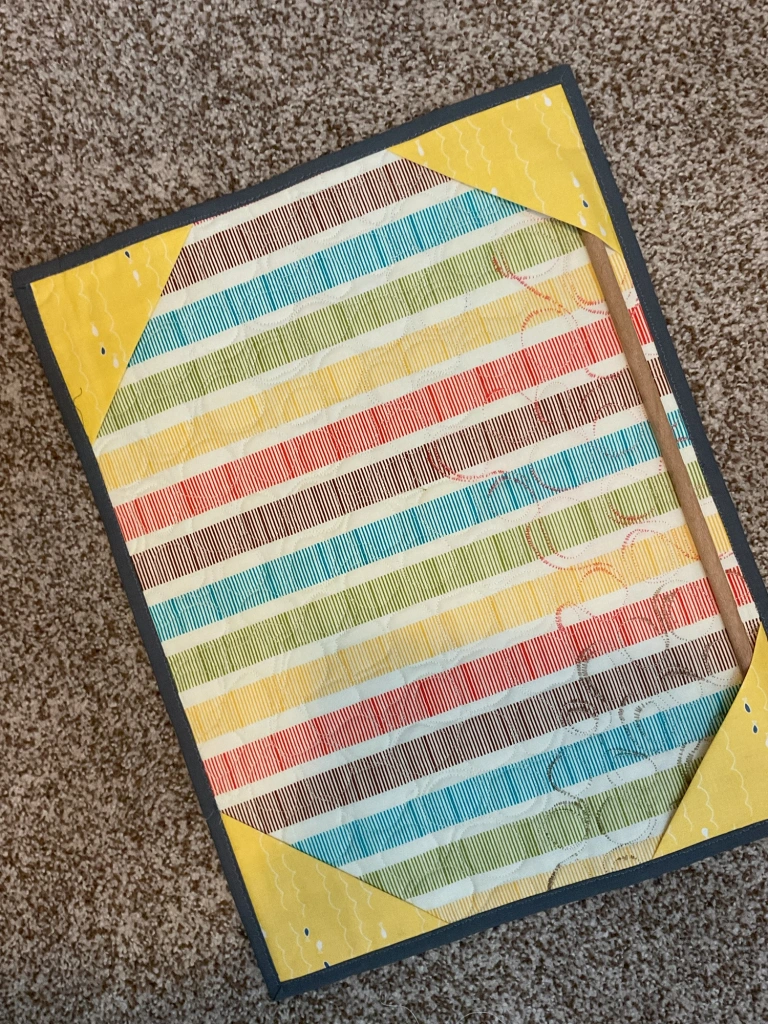
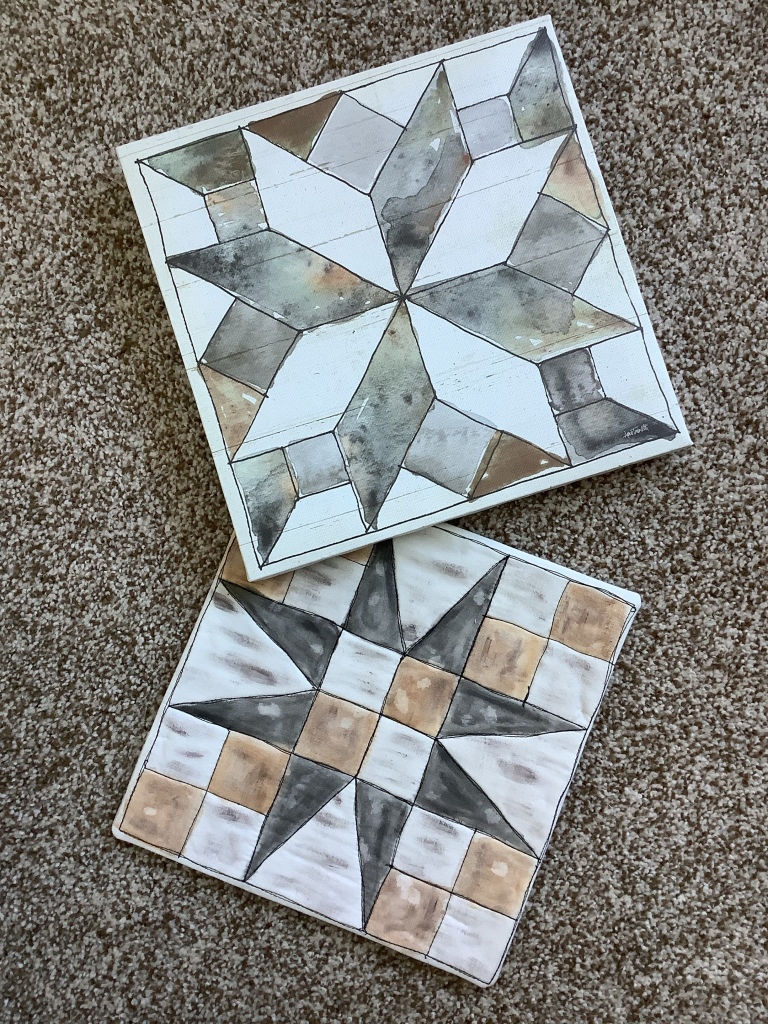
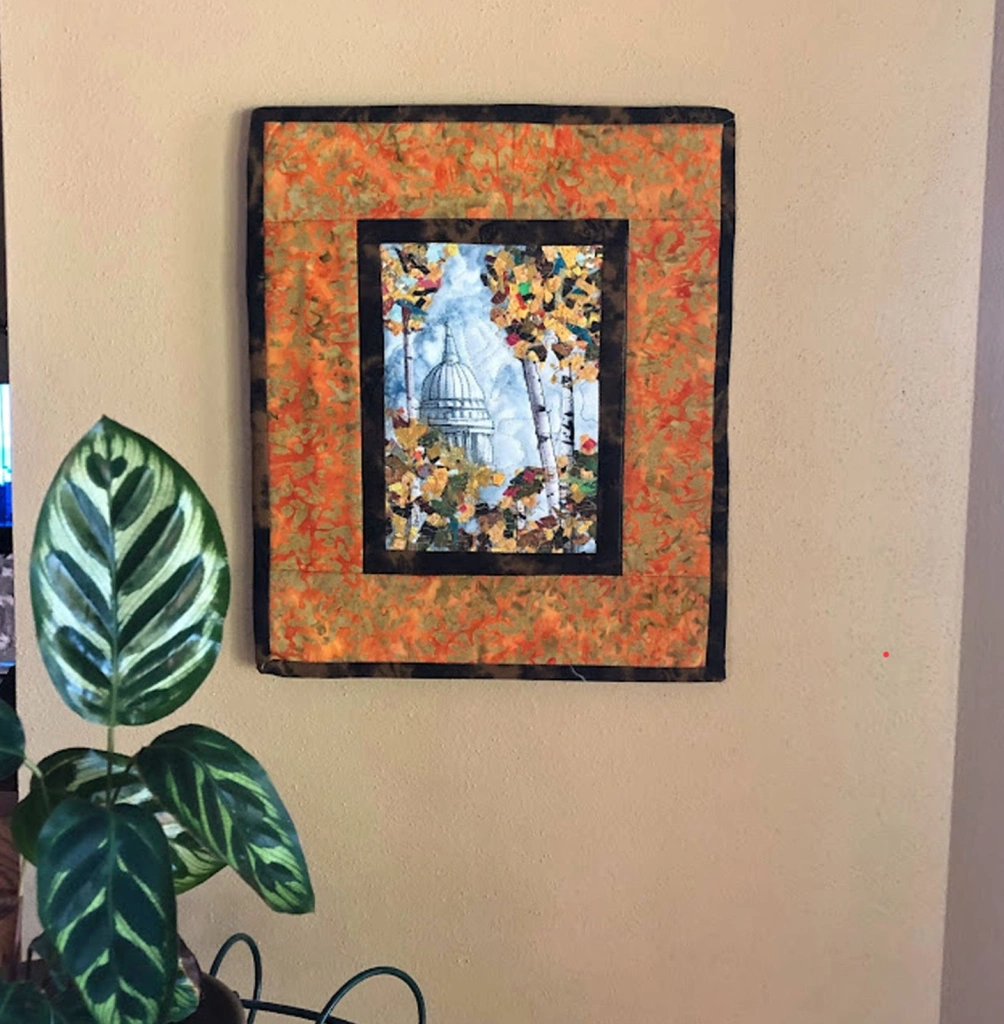
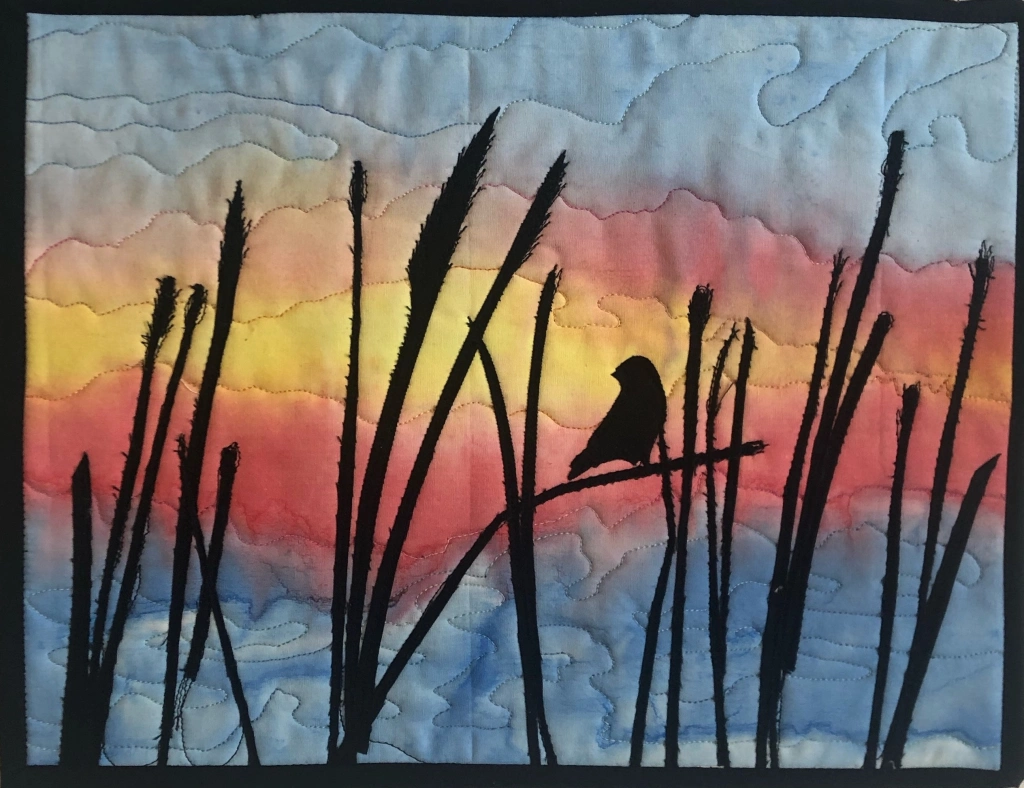
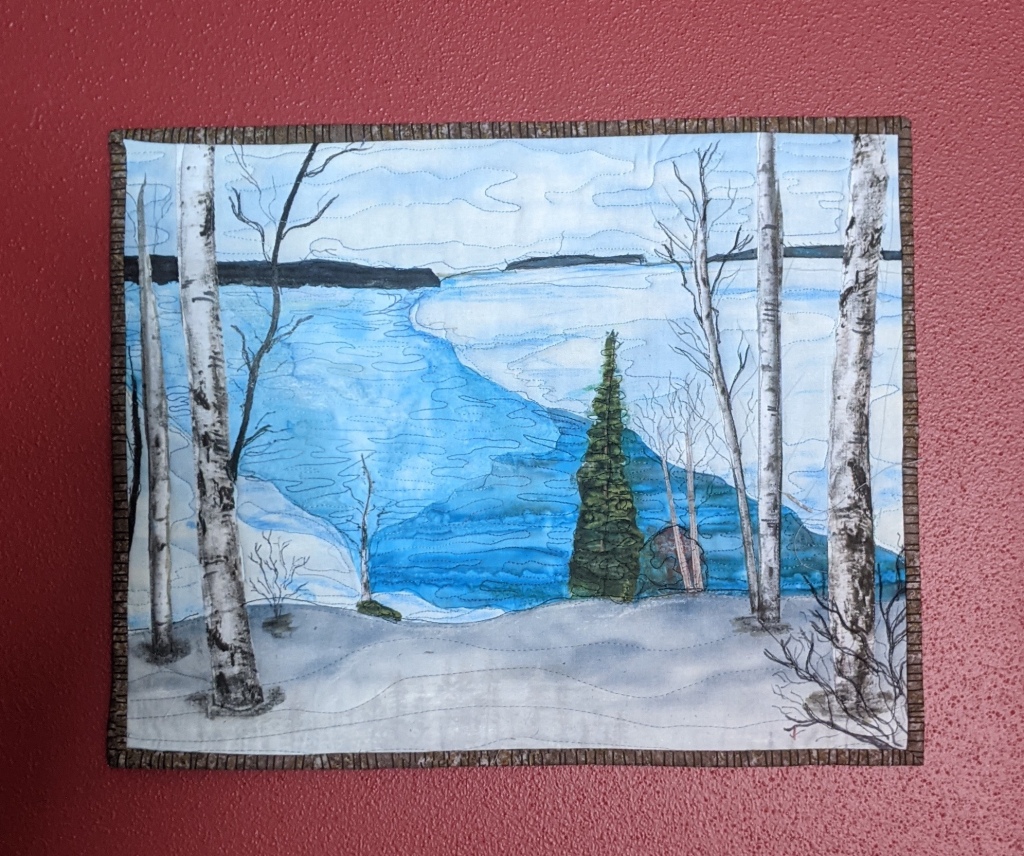
So here’s the finished wall hanging…

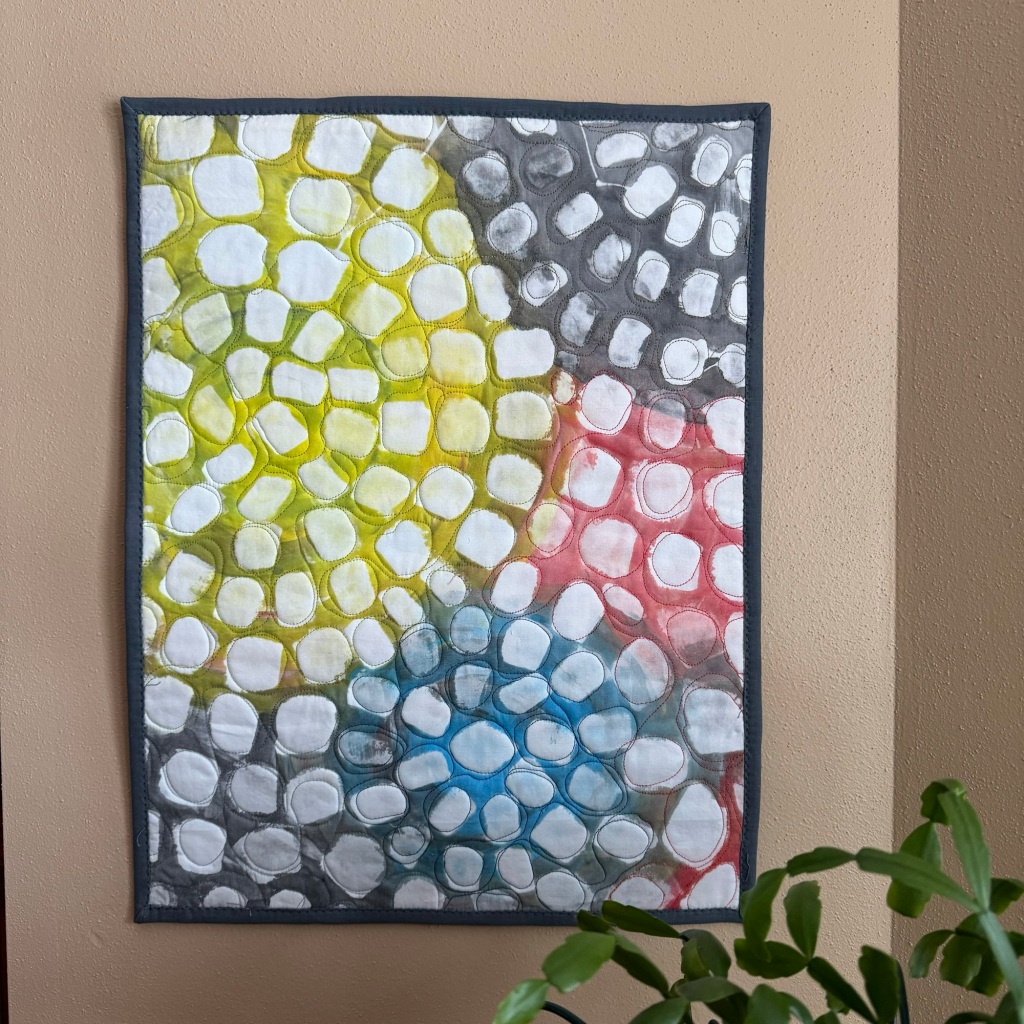
I choose to hang it vertically.

And

It turned out approximately 14 x 18-1/2”

It was a fun experiment I’d like to try again. To see all the quilted items for this week’s challenge, go to the Project Quilting Season 15.2 website and scroll to the bottom.

Until next time, Happy Quilting!

Jane, Mulberry Patch Quilts

My Project Quilting 14.6 Entry:  Conquer Your Fear (of failure) with art quilts

My Project Quilting 14.6 Entry: Conquer Your Fear (of failure) with art quilts

This week Project Quilting Season 14 (2023) has as their very last challenge: Conquer Your Fear

They say in their post, “if you only do what’s safe and comfy, you’ll stagnate and grow soft.” I agree. You need to push your boundaries from time to time … and get out of your comfort zone.

As you probably know, the challenge is to make a quilted object (any size) from start to finish in one week using the challenge title as your inspiration. And post a photo at their website before the deadline.

So, after pondering all the fears that I might want to conquer, I thought about my journey with quilting and how I’ve grown from simple (and safe) traditional quilts, to more advanced techniques, and then pushed myself a little further out of my comfort zone to create original art quilts. I promised myself that this year I’d try to create more art quilts. But there’s a “fear” involved in making an art quilt. And that nagging little fear makes me procrastinate. A new technique, a new design. The fear is … that I can make a mistake! I can fail!

So for my “fear conquering” challenge, I’m trying a new technique on a new art mini-quilt. It involves quilting FIRST and then coloring the fabric after. Let’s see how.

The first step is to trace (or draw) a design onto PTD cotton fabric that I ironed onto freezer paper. The freezer paper stabilizes the fabric ti make it easier to draw on. I used a pen that disappears with heat (Frixion). I thought a coloring-book like design might be fun to stitch and color…and the word “create” will help to remind me to have fun and to play while I’m doing it…without fear!

After adding batting & backing, I began free motion quilting over the drawn lines with black thread on my Bernina and my BSR foot. It’s ok to “draw” outside the lines, it’s ok to go over the lines several times … with no fear.

… Did you know that “do not fear” is found 365 times in the Bible?

Before ironing…
And after ironing…notice the drawn lines have disappeared.

Then I got out my Inktense color pencils and aloe vera, and began “coloring”.

All that’s left to do is a pillowcase backing that I just saw featured on Quilting Arts TV today. Sew the backing right sides together to the front all the way around. Then trim corners, cut a small X in the backing fabric, and turn right side out and press. Ta-da!

And done!

No worries…I can cover the slits in the backing with the quilt label!

So here’s my mini art quilt, all done and hanging right above my sewing machine, amongst my beautiful threads, to remind me to create …have fun …don’t forget to play, and conquer my fear!

Until next time, Happy Quilting!

Jane

Mulberry Patch Quilts

Experimenting with Inktense on Fabric for Project Quilting 14.3

Experimenting with Inktense on Fabric for Project Quilting 14.3

The Project Quilting challenge for this week (Season 14, #3) is “54/40 or Fight”. It’s the name for a traditional quilt block. If you’re interested to find out more about the block, it’s history, or the Project Quilting challenge, click here: Project Quilting

The challenge has to be done from beginning to end in one week. I was thinking about using the 54/40 or fight block as the center of a square table topper, making pieces wonky to make it more modern. But my heart wasn’t in it. Nothing seemed to come together.

I had just gotten out my set of Derwent Inktense pencils to play with a few days ago, so I was inspired by them on another project. Then the light went on in my brain — Why not paint the block on plain fabric using the colored pencils? Yes!!

I was inspired by a design printed on canvas that I had picked up on sale somewhere few years ago. I’ve always loved the hand-drawn and watercolor look of it. And it has a barn quilt “distressed” vibe that appeals to me. Especially in the unusual muted earthy colors. Could I recreate something like that on fabric with my pencils and then quilt in those black seam lines? I was inspired enough to give it a try. Here’s a photo of the printed block on canvas.

A photo of the original printed block & my sketch of the “54/40 or fight” block

I experimented with the pencils and aloe vera, some water, and several brushes to try to get a similar distressed look on my fabric. My test sheet of samples and ideas are in the photo below, as well as the first stages of my painted block (bottom).

Sample sheet of ideas (lower right) & painted block on PTD cotton fabric ironed to freezer paper (center).

I kept tweaking my painted block with bits of added color in browns and grey to black until I was happy with the outcome. I even sprinkled water in a few areas, then blotted the ink to make it look even more distressed.

Uneven (purposely wonky) lines to echo a hand-drawn look

I added Pellon fusible fleece and a batik backing fabric and quilted along what would have been the seam-lines if it would have been sewn together. I purposely tried not to make the quilting perfectly straight to help give it a “hand drawn” look, like someone drew the lines a few times with ink on watercolor. .

The only thing left to do was to bind it. I used an art quilt technique of sewing folded triangles to the front of each corner, adding strips folded lengthwise to each side (cut just a half inch or so short of each corner). And then (after stay-stitching) I folded them all to the back and hand stitched them down.

I liked the clean edge that mimicked the look of the print on canvas.

Before hand sewing it all down, I added a thin wooden dowel intwo of the corner triangles so it’ll be easy to hang on the wall.

And here it is! All finished in plenty of time to enter in the contest. Wish me luck!

How does it compare with the original inspiration piece? Might not be perfect, but for a first try I’m satisfied.

Derwent Inktense pencils are easy to use, experiment with, and I’m sure I’ll be “playing” and experimenting again soon! Give them a try.

Until next time, Happy Quilting! Jane

Mulberry Patch Quilts

Painting on Fabric with Inktense Pencils

So I haven’t painted or drawn on fabric for quite awhile now. And with the snow falling outside, I declare an official “Snow Day” … a day to relax, stay cozy indoors, and “play”.

I’ve got my Derwent Inktense 24 box of pencils, a few stiff brushes, some plain white fabric (PTD prepared for dying), freezer paper, and water/aloe vera gel/textile medium and I’m ready to play.

For those of you not familiar with these color pencils, once they’re activated with liquid and dry they become permanent. Unlike watercolor or regular color pencils, these pencils have actual ink in them that bonds with the fabric when wet. You can use water (which will give more of a watercolor effect but will bleed more) or a textile medium or aloe vera gel (which are thicker and give you more control). Let’s give it a go!

After tracing a photo on the shiny side of a piece of freezer paper, I ironed it to my fabric. I chose 100% cotton “prepared for dying” white fabric because I had it on hand, but I think any cotton muslin with a tight weave will work.

There are a plethora of how-to videos on YouTube, and I watched quite a few of them. Just search on “Inktense on fabric” if you’re interested.

In my pack of 24 pencils there’s one labeled “outliner”. I’m using that one to sketch in the details of the bluebird.

I’m going to draw on the dry fabric and then use the aloe vera on a stiff brush to blend and make the color pop. My sample sheet might be helpful in choosing the colors.

When I first got my pencils, I made a sample sheet on fabric of all the colors.

I’ll start with the branches.

Dry, no aloe vera added yet.
After brushing on the aloe vera and blending.

You can see how vibrant the color becomes on fabric when liquid is added to it! For the lighter areas I found brushing on the aloe vera first, adding bits of color and blending worked better. I even took my wet bruch and dabbed it right on the pencil to add the color.

Not perfect, but not too bad for a first try

Next I need to let it dry. I may come back and add details using a permanent fine tip marker after it’s done drying.

I’ll come back and show you the finished art quilt when it’s done. For now I’m going to think about what background I’ll use. will it be pieced? Painted? Or a batik?

Until next time, Happy Quilting! Jane

Mulberry Patch Quilts

Combining Art Quilting Techniques

Combining Art Quilting Techniques

When you have an idea in mind for your art quilt, often combining techniques you’ve learned along the way and a little experimentation will help you reach your goal.

My goal for this small landscape art quilt was to recreate a scene of our Capitol shown in the distance through the autumn leaves. The fall season is my favorite, and so beautiful at the UW-Madison with the variety of trees and colors. Having worked in the heart of this beautiful campus for many years, I’ve had many opportunities to view it.

So how do I begin to reach this goal…where do I start? I cut a base of scrim and a thin wool batting about 8×10” and drew a 6×8” border, giving me a background with border parameters.

I knew I needed to begin with two important elements for the background … the Capitol and the perfect hand-dyed fabric for the sky. For the Capitol I used photo-transfer. And for the sky I auditioned several fabrics, until I narrowed it down to four. (Note: The “leaves” in the photos were left over from another project—just used temporarily to me help decide.

When I was experimenting with dying cotton fabric with Procion dye a few years ago, I made lots of fabrics that work nicely for sky and water. It’s great to have that stash on hand!

I liked the sky fabrics in the two bottom photos the most. I felt they had more depth and interest. So I made two. Why not? It’ll give me a chance to experiment more with my stitching and color choices for leaves & thread.

I found several colors of Aurifil and Sulky threads to “thread paint” texture and detail into the building and sky. Shades of grey blend nicely.

Now for the tress and autumn leaves. First I experimented by cutting individual leaves to fuse in larger chunks, but I didn’t like the look (sorry, I forgot to take a photo). So instead I opted to use the “confetti” technique by cutting small “confetti like” pieces of fabric and placing them directly on the background, covering it with tulle, pinning, and then stitching it down to keep in it place.

I rotary cut dozens of batik fabrics in fall colors and started planning out where the leaves would go. A tweezers helps with this process. …don’t sneeze!!

Once I was satisfied with the placement, I covered it with white tulle (to keep it lighter), pinned it together, and auditioned some of my Sulky and Aurifil threads to machine quilt it. Note the birch tree trunks added underneath.

The free-hand machine quilting not only keeps the little pieces of fabric together, but it adds texture and color.

I love the final look with the birch tree trunks under the stitched leaves. Now I need to remove (cut away) the excess tulle. And add a couple of borders, some backing, batting, and finally on the hanging triangles and binding.

Here’s a quick video of most of the final process:

Here’s a one minute video showing my process.

Whenever possible, I like to chose a fabric for the backing that’s interesting or fun. For one of them I found a fabric I’d experimented with marbleized on earlier, and for the other some fabric that gradated from green to brown. I like to sew folded triangles into the upper corners to make it easy to hang on the wall. (See the back of the quilt towards

the end of the video.)

Both art quilts are now in my Mulberry Patch Quilts Etsy Shop.

As always, I hope you enjoyed seeing the process. And that you’ll have fun creating your own favorite scene and experiment with different techniques along the way.

Happy Quilting!

Jane, Mulberry Patch Quilts

Silhouette Art quilt: Project Quilting 13.2

Silhouette Art quilt: Project Quilting 13.2

The challenge for this week’s Project Quilting Season 13.2 inspired me: “In Silhouette”. Participants have only a week to begin and finish a quilted item for the challenge, and it took me a few days just to come up with the idea.

But once I did get the idea, I was off and running or should I say off and sewing)! I found the perfect fabric for the background from my stash of hand dyed and painted fabric. It reminded me of a sunset.

I free motion quilted the background first using a variety of variegated threads. Next I fused Steam-a-Seam 2 onto my black fabric and cut out the shapes and fused them to the background.

Then the black shapes were quilted with black thread, and I thread sketched the blades a bit to give them the look of grass or cattails. Blowing in the breeze.

I finished it off with a simple black binding, adding folded corners on the top corners for hanging.

Done and ready to enter in this week’s challenge. And it’ll be for sale in my shop later today.

Until next time, HAPPY QUILTING!

Jane, Mulberry Patch Quilts

Art Quilting Class: Dream Come True

Art Quilting Class: Dream Come True

Ever since I first saw her art work on Quilting Arts TV, and her articles in Quilting Arts Magazine, I’ve dreamed of taking a workshop from Ann Loveless.

Well last Saturday that dream came true — thanks to a workshop given by our very own Wisconsin Museum of Quilts and Fiber Art. So Off I went on a road-trip to historic Cedarburg WI.

We were also treated to view the museum’s current exhibition of quilts by artist Victoria Findlay Wolfe

The workshop was given in their historic barn. A beautiful space below the museum and gift shop with the original beams exposed, but well lit, cozy, with wonderful tables and ironing stations and lots of room to spread out.

Ann Loveless demonstrating her wonderful technique.

I came well prepared with every scrap of batik fabric I could find in my stash along with my trusty Bernina B570QE sewing machine with it’s free motion stitch regulator and an assortment of thread. Maybe I overdid it…just a bit.

I think I might have overdone it with my batik fabric scraps

Ann gave us wonderful step-by-step instructions. And we were treated to a trunk show of dozens of her beautiful art quilts.

Ann showing us her finished masterpieces

I love all Ann’s work, but I’m especially interested in her very small, and very detailed, mosaic landscapes. They’re amazing. And this class focused on her technique for creating them. Perfect!

I wasn’t able to buy her finished pieces, but I did buy some awesome note cards & her autographed book.

Starting out, my little landscape didn’t look like much…

But it’s amazing how it took on life with more color and detail added…

Ann was very supportive and gave us a lot of suggestions and help. She’s a marvelous artist and teacher.

I was so pleased with the results

By the end of the all-day workshop, everyone had a beautiful landscape done, or almost done…I thought every one of them was beautiful. Don’t you agree? That’s the sign of a great workshop!

Everyone was pleased with their work.

And here’s my finished piece. I plan to frame it and hang it on my wall to remind me how amazing that day was.

Here’s my finished piece, ready to frame.

If you ever have the opportunity, I hope you’ll take a workshop from your favorite quilt artist! And if Ann Loveless is the teacher, you’re sure to have a wonderful learning experience.

Until next time, Happy Quilting!

Jane

Mulberry Patch Quilts

Dreaming of a Vacation Art Quilt: Project Quilting

Dreaming of a Vacation Art Quilt: Project Quilting

We’ve got mounds of snow outside, temps below zero, and covid all keeping us at home. So when Project Quilting announced it’s challenge theme of Virtual Vacation, I was on board! It was so nice to dream of a vacation while thinking about a quilt to make for the contest.

You’d think I’d be dreaming up a vacation to Florida, sunny Hawaii, or some other place warm. But I happened to see a photo on Pinterest of the Bayfield Wisconsin area in our beautiful northern Wisconsin winter, and it reminded me how much I miss our trips up to Lake Superior, and I wished we were there again. Of course I’d want to be warm and toasty inside a beautiful cozy log cabin with a roaring fire in the fireplace, a hot cup of coffee or cocoa, relaxing and looking at a gorgeous view (like this of Lake Superior) through a picture window (may as well dream big).

So I started digging into my stash to find just the right fabric for the snowy background, water, the islands, and trees…

I started with a rough sketch on paper the size I wanted. Then using my light box, I traced the basic shapes of the lake, hill, trees, and skyline in pencil. I got out my soft pastels and some fabric markers and my fusible web and powder.

I thought I might try my “Bo-Nash Fuse It” powder to help keep the fabrics in place. I sprinkled some powder between the fabrics and pressed to fuse them down. It’s the first time I’ve tried it, and I like it. It gives the fabric a lighter hand than the iron-on double sided fusible web and it keeps everything in place until I can stitch it down.

Does your studio get as messy as mine when you’re “in the zone” creating? I see some cleaning up in my future.

In the photo below, I’m adding the islands to the horizon, the water, and some birch trees. I used double sided fusible web on the trees, fusing it to the back of the tree fabric before cutting.

Now it’s time to use my soft pastels to shade and highlight to add some depth. Shading the trees, and under the trunks.

Oops, that pine tree needs redoing. And I think I’ll use a finer point marker for the additional twigs and branches. It’s a process…trial and error…to get it to where I like it.

Now the branches look better, and I like this pine tree better too. I think highlighting the upper water with a touch of white & pink helped and using a darker turquoise pastel helped to blend the two portions of water together.

I couldn’t resist making a mini art quilt using similar colors and scene. For the mini, I created the background on the batting/backing, and quilt that first.

And then I added the foreground and quilted that. Here I’m choosing different color thread for quilting the lake & snow.

12×15”

Quilting (free motion & walking foot) is done. Here are a few closeups…

And here’s how the little mini turned out (only 5 x 7 inches)…

5×7 inch mini

And here’s couple more photos (below) of the larger version again…

12×15” Landscape on red wall
12×15”

Since they were both done start to finish within the challenge dates, either one qualifies for the Project Quilting challenge. I think I’ll enter the larger one. Wish me luck!

And they’ll both be listed for sale in my Etsy shop soon.

Until next time, HAPPY QUILTING!

Jane

Mulberry Patch Quilts

Project Quilting -Team Colors

Project Quilting -Team Colors

So as you’ve heard me talk about before, Project Quilting is similar to Project Runway–you’re given a challenge & a limited period of time to make it, start to finish…but no one is voted off! It’s the creation of Kim Lapicek with her friend, Trish (AKA Quilt Chicken), and helps take the “cabin fever” out of the middle of winter here…although they have quilters from all over the world entering!

This is Season 11, Challenge 2: And the phrase is “Team Colors”. Well, I’m from Wisconsin, so of course (being football season) it’s either the Green Bay Packers or UW Badgers. I happened to have green & “gold” fabric in my stash & a technique I wanted to try…a perfect combination.

So info my stash I dove & cut strips of varying widths…even some with curves.

I layed them on a square of fusible interfacing (slightly overlapping) & just ironed them in place. Then I turned it upside down (photo above & below), and re-trimmed to size.

Then comes the fun part! I added yarns, ripped twisted thin strips of fabric, and zigzagged it all down.

Here’s a close up…

Then I simply put four squares together, and added the border on top of tge batting/backing and bound it.

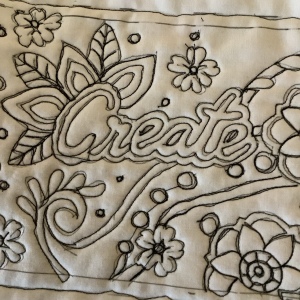
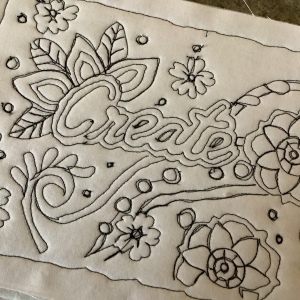
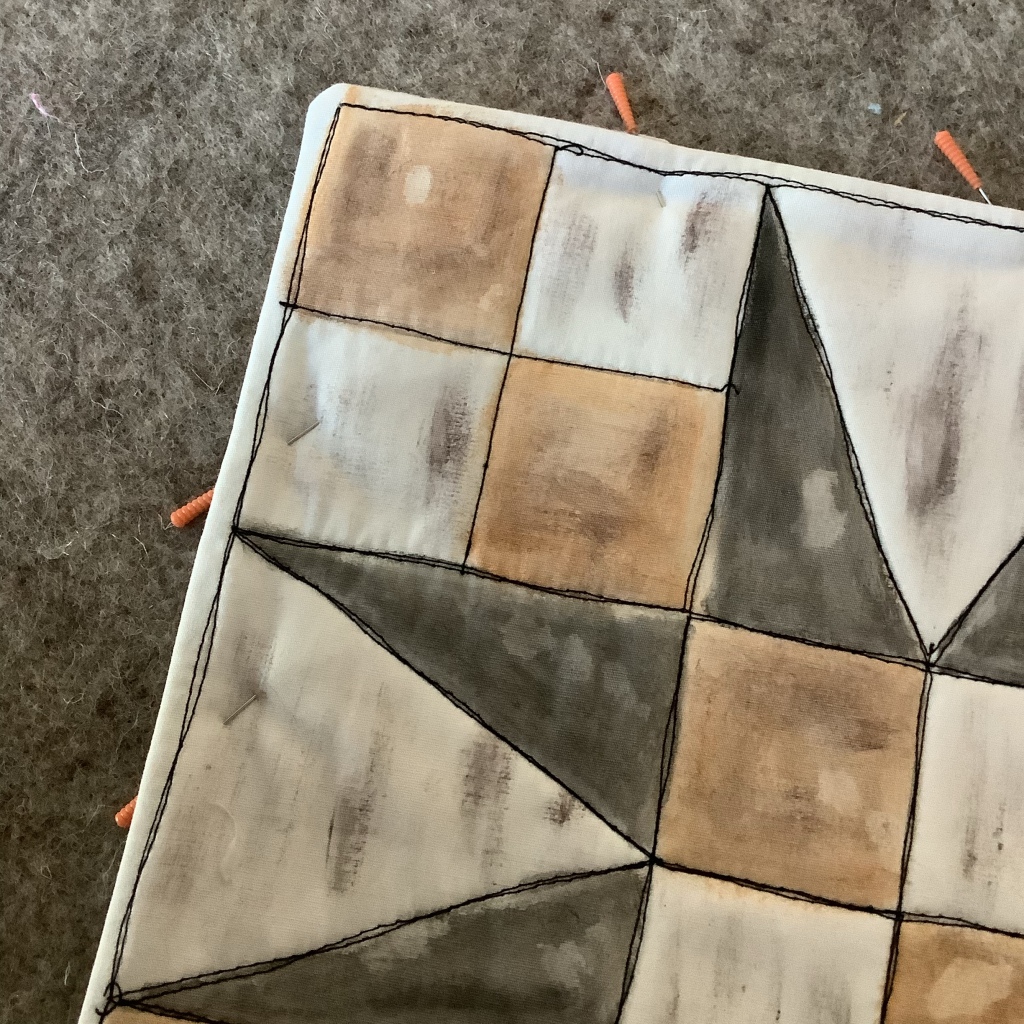
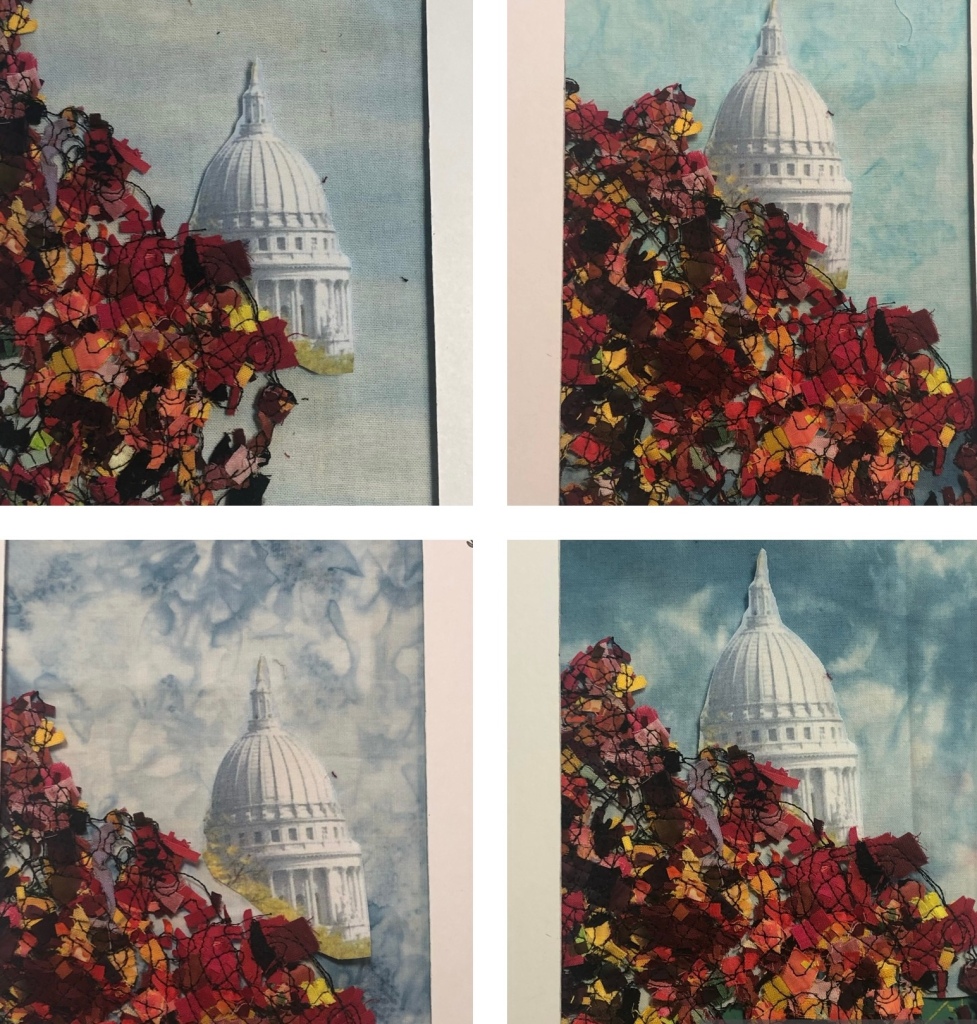
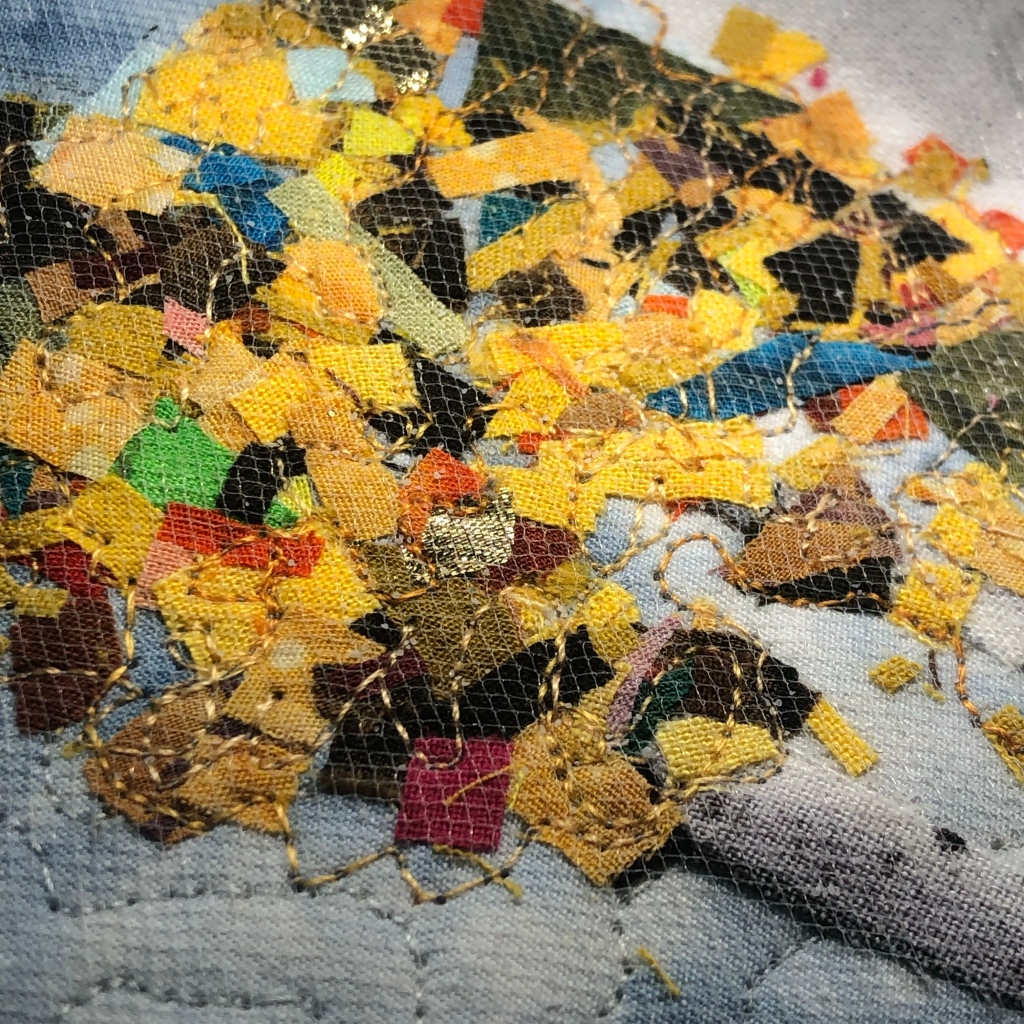
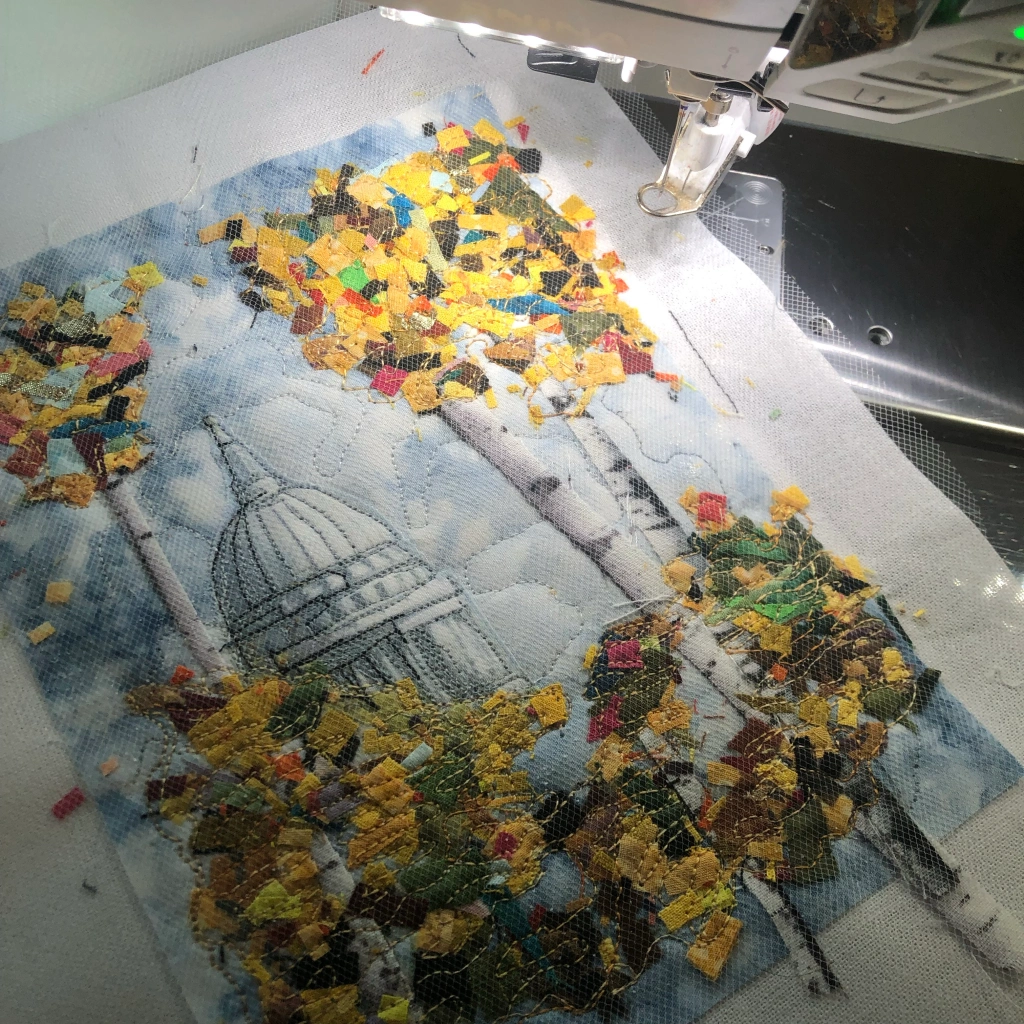
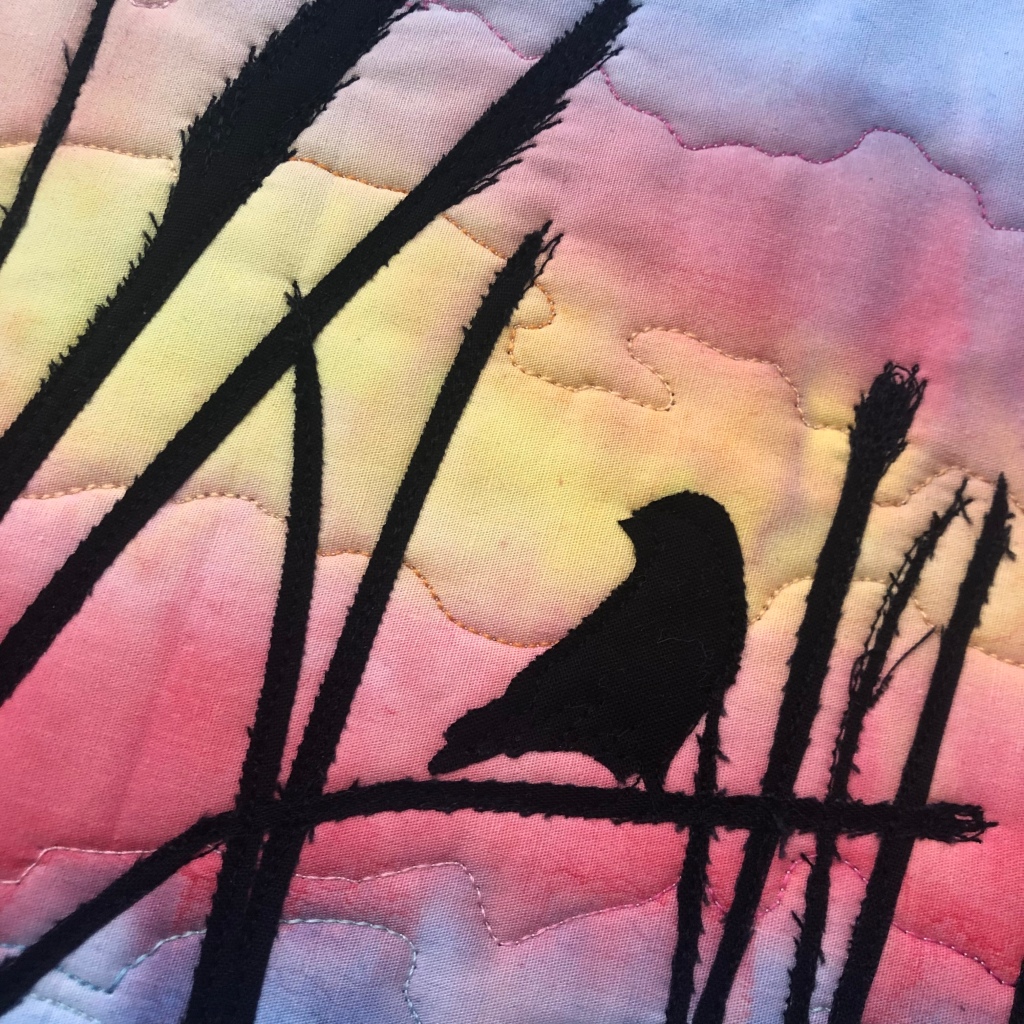
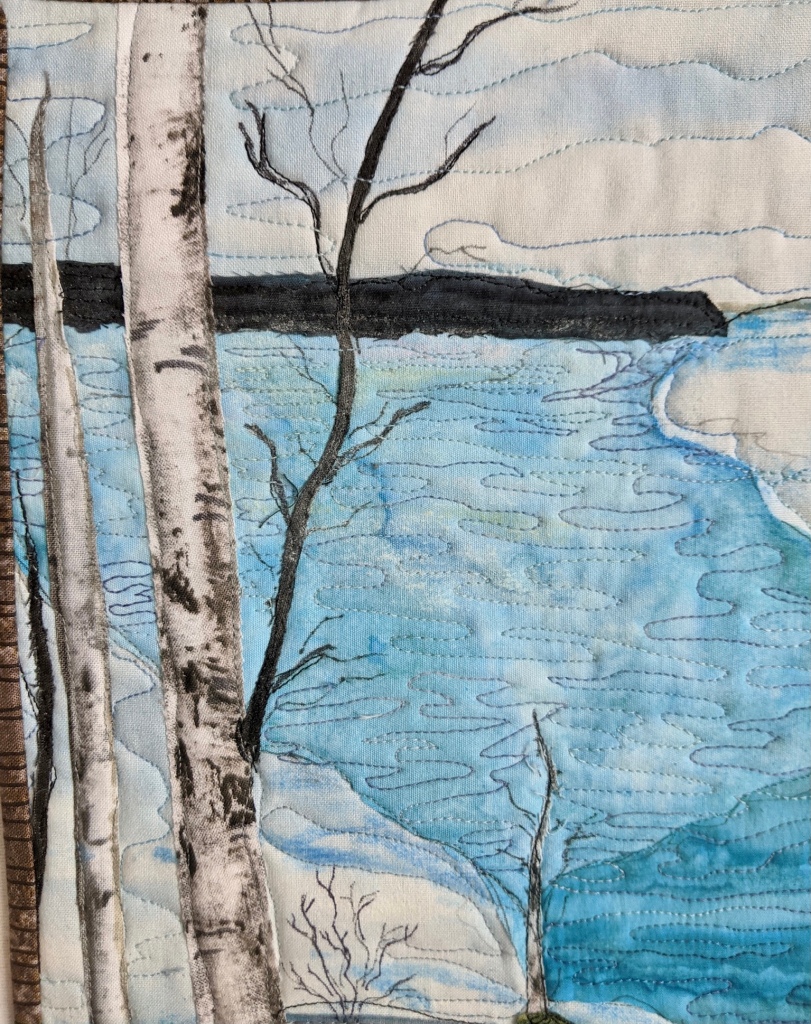
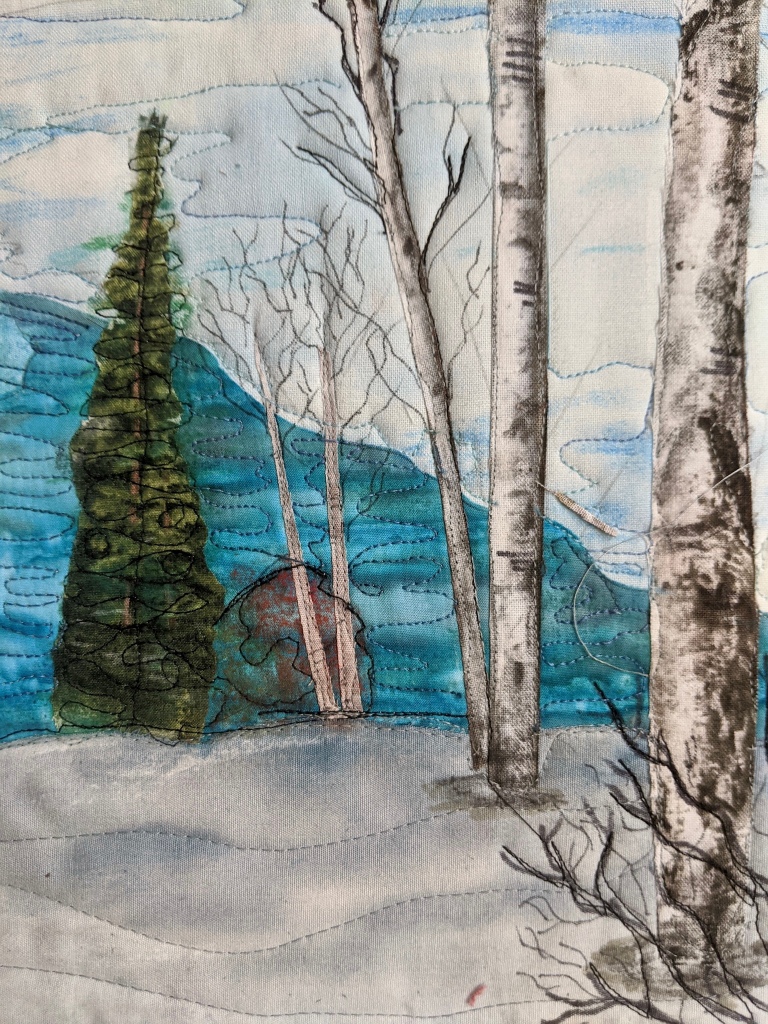
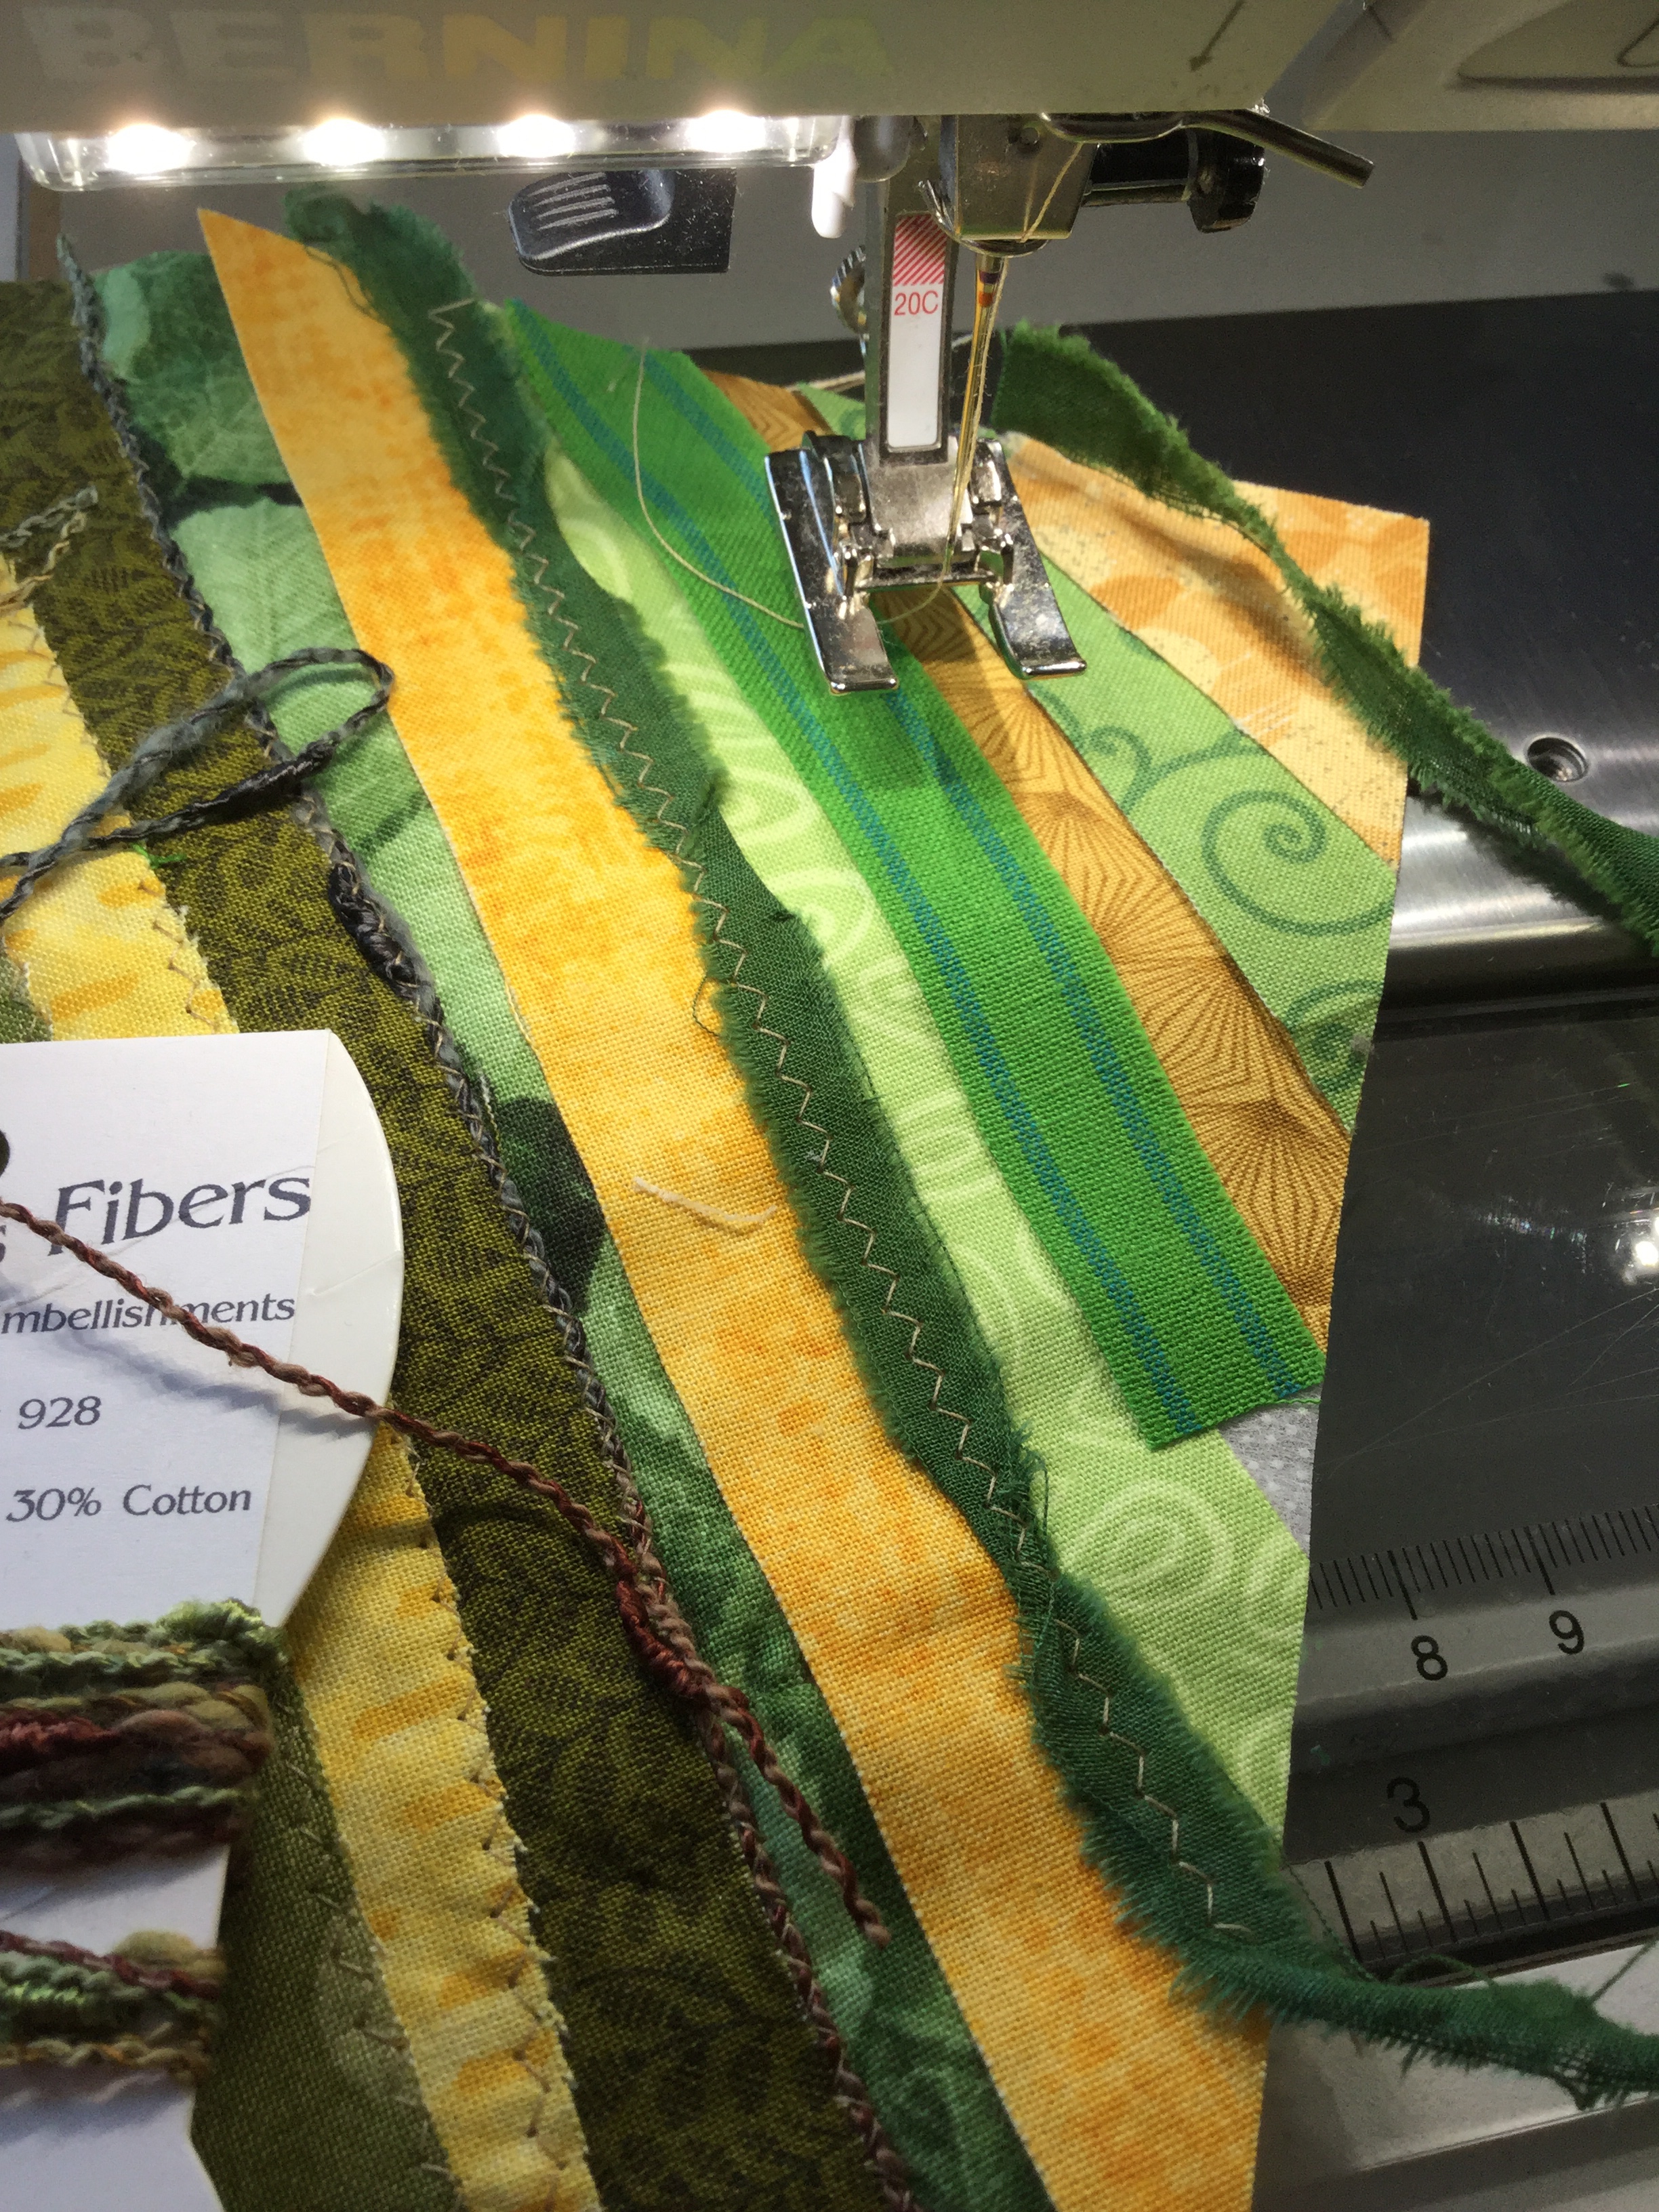
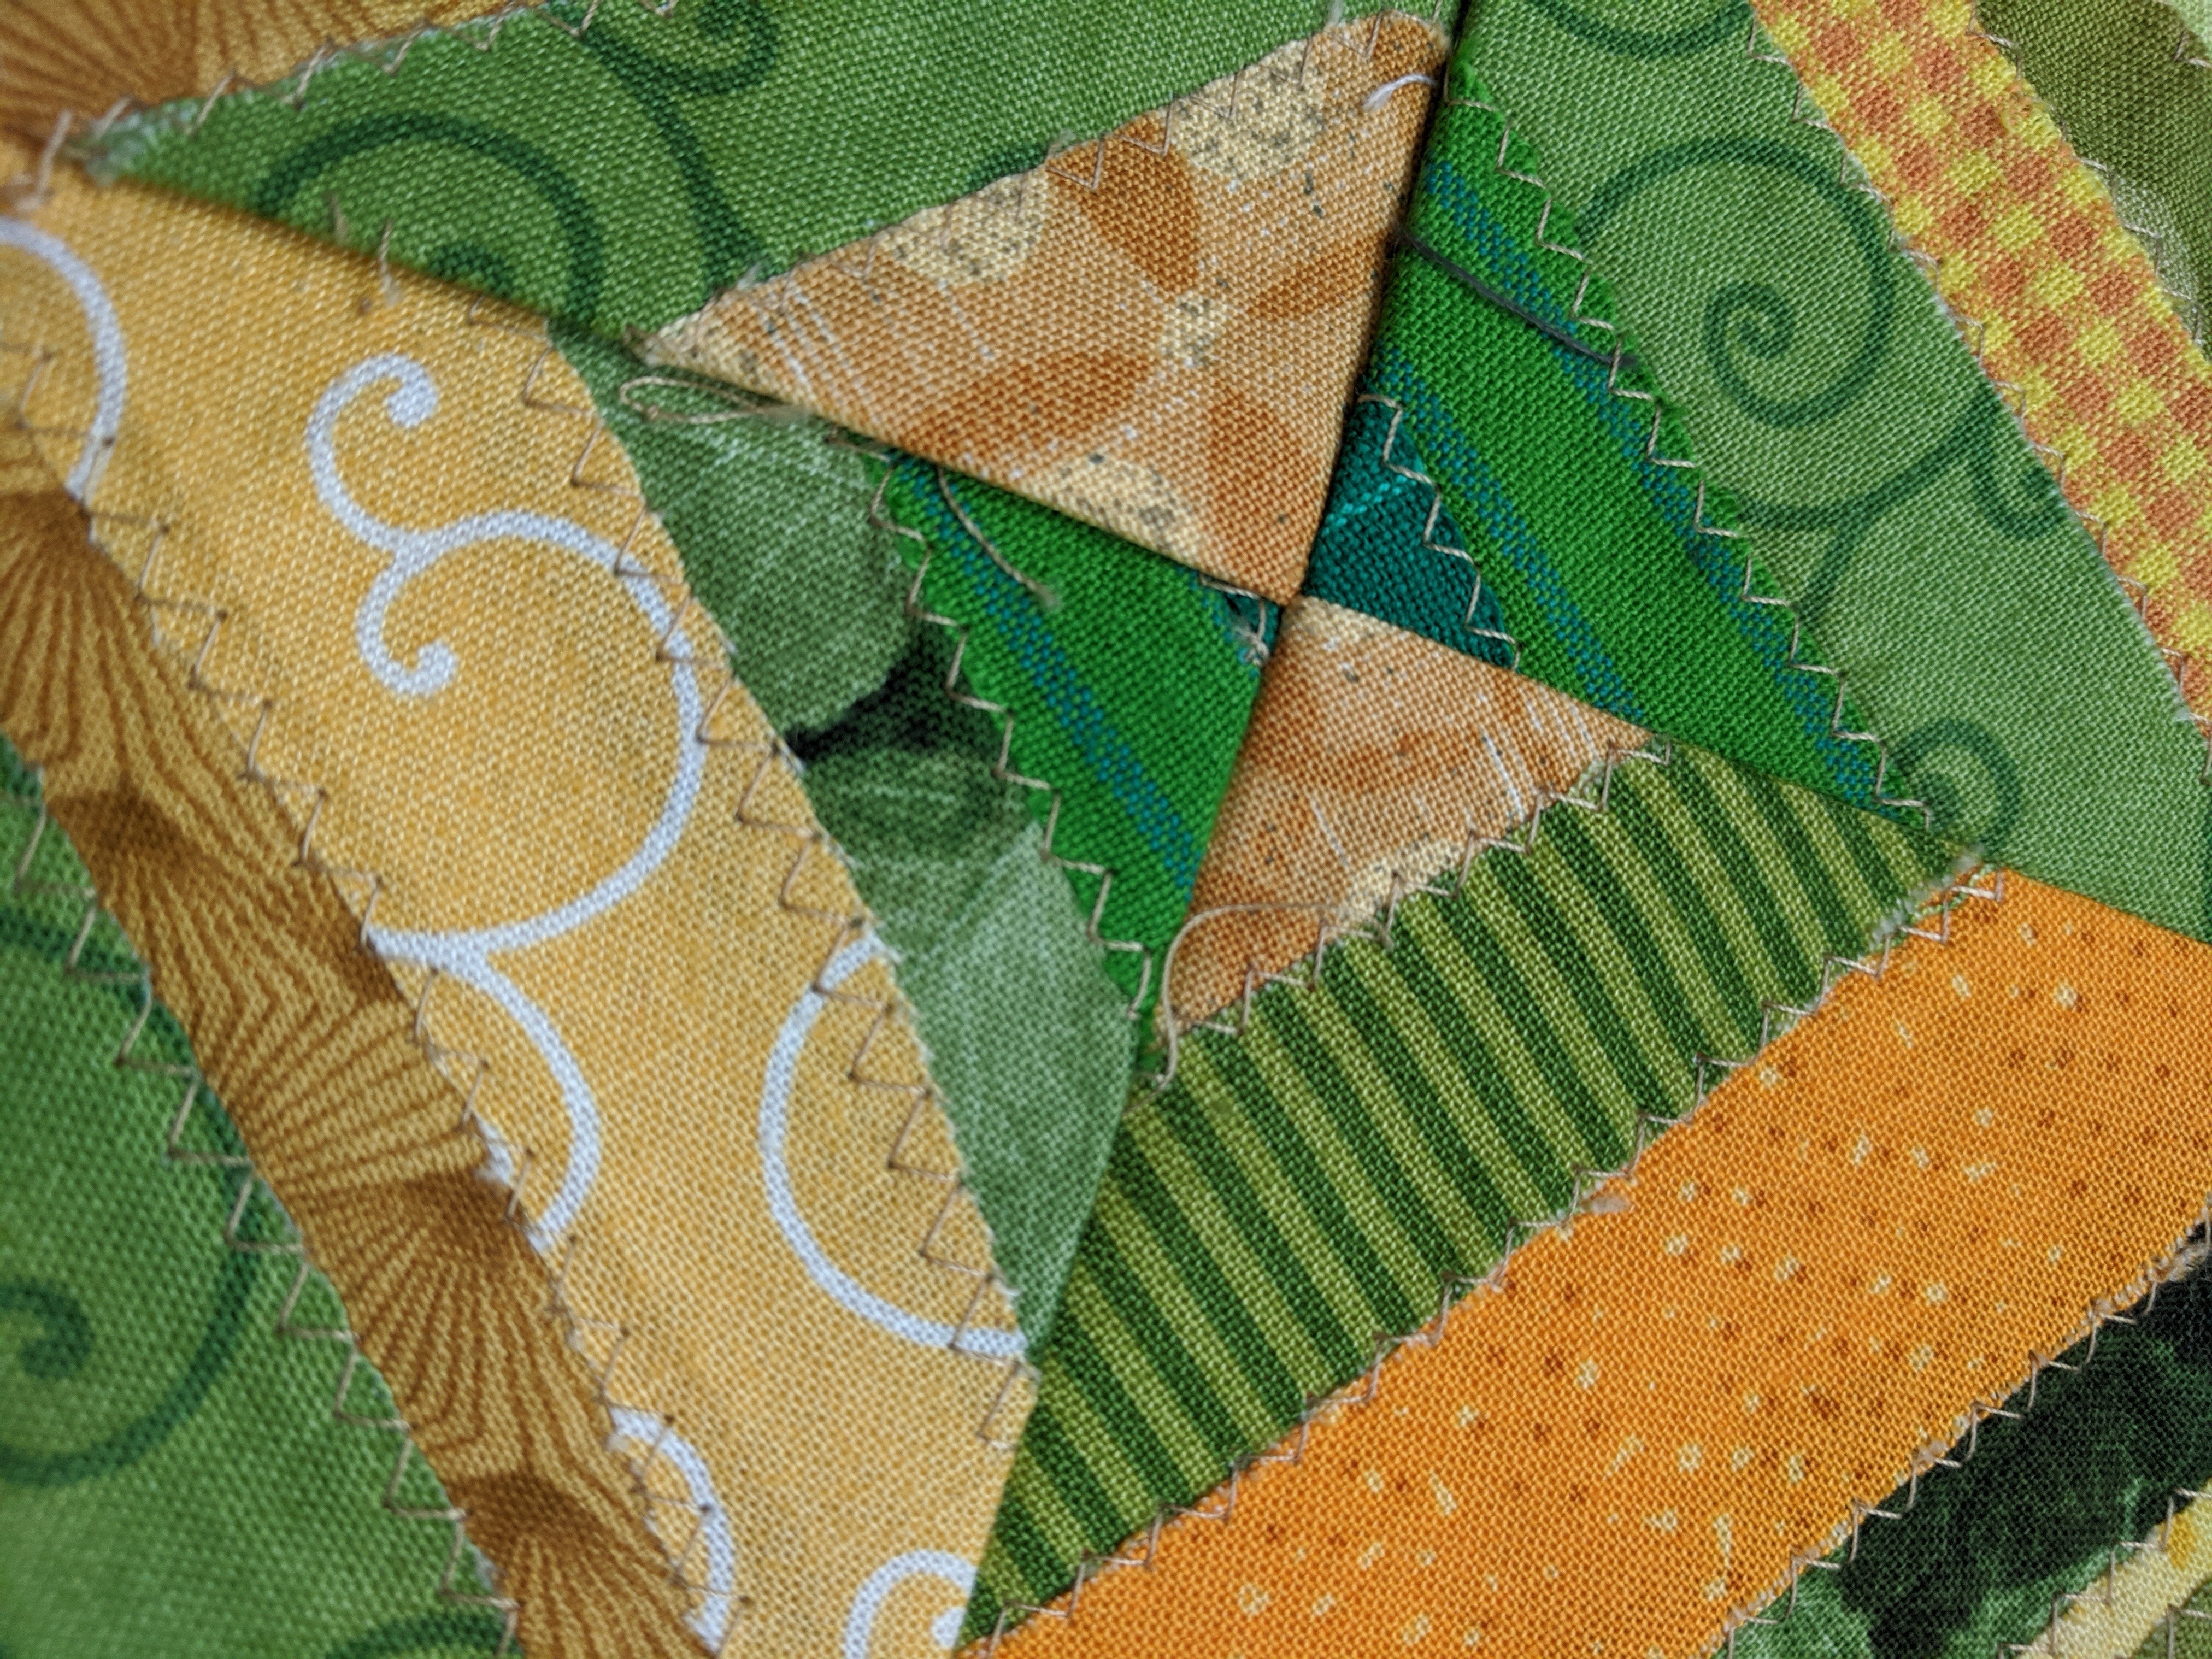
I love the texture it creates. Fun!

It’s posted for this week’s challenge. There’s no voting, but check the Project Quilting website to see how other quilters have interpreted it. And give this fun technique a try.

Until next time, HAPPY QUILTING!

Jane

Mulberry Patch Quilts

Fear-less — Pixel Play Project Quilting 10.4 Challenge

Fear-less — Pixel Play Project Quilting 10.4 Challenge

This week Trish (our challenge designer for Project Quilting) chose PIXEL PLAY for our 10.4 challenge.

This week, I’d like you to be inspired by these particles, whether you pixelize a picture, make use of low resolution like 8-bit graphics, or are merely inspired by these hard-working colored boxes.

Since I love to work with mosaics, the thought of working with pixels was inspiring. So I’m definitely IN this week. Thanks Trish!

I found a website (Pixel Stitch) that will convert a photo to an embroidery pattern made up of squares. Although it’s made for embroidery, it creates a grid of the pixels in the photo with colors, so it works for pixelated quilt patterns just as well. All I had to do was figure out how big each square would need be to make a reasonably-sized quilt that I might actually be able to finish during a busy week.

https://www.pixel-stitch.net/index.html

Another site (Pic2Pat) does the same thing: http://www.pic2pat.com/index.en.html

We had an juvenile owl, called a “jumper” (because it was just learning to fly), in our back yard a few years ago. You can read about it HERE. It was rescued and placed back in its nest. I’ll never forget the surprise I got when I saw the little guy several days later. He had learned how to fly and was sitting on our back yard fence staring at me with those big yellow owl eyes, almost as if to say “thank you…I’m fine now…and I’m fearless”. I knew that I had to capture the fierce look in those riveting, yet beautiful eyes in a future quilt.

I thought I needed to print the pattern to the full size, but later realized all I really needed was a copy large enough to follow alongside my gridded work surface.

The printed pattern sheets taped together

The next decision was what technique to use to get all those little squares (half inch) together on a quilt? The squares are far too small for me to piece. I’ll have to use a raw edge technique. Hmmmmm… how about placing squares on some sort of foundation and stitching over them to keep them in place. But what kind of foundation? I’ve used fusible woven interfacing before and ironed them into place. I’ve also used Steam-a-Seam II. Or I could use a temporary glue on muslin to keep them all in place until they’re stitched down. Or even pin tulle over them before stitching.

I decided to use a technique I used to do the quilt of my father in a previous post. It involves marking a quarter-inch grid on a fusible light weight interfacing and ironing each 1/4″ fabric square to the grid using the printed pattern as my guide.

Half-inch squares of batiks sorted by value

Placing squares side-by-side on the fusible interfacing grid

Original print out helps keep me on track

I placed a shear tulle over the squares before I started free motion quilting.

Strips of paper help keep me in the right place

Superior & Aurifil threads for quilting

Closeup of free motion quilting

Closeup of the owl eye

And the little guy is done! Doesn’t he/she look fearless? And I finished just in time to enter it in this week’s Project Quilting Challenge Season 10.4 (2019).

COME JOIN IN THE FUN…go to their website to see this week’s entries and to vote for you favorites (hope one of them is mine, #36 “Fear-less Owl”, hint, hint). Voting starts Sunday afternoon, Feb. 24th and runs through Friday, March 1st, 2019.

HOW TO VOTE: Just go to the link above, scroll down to the bottom until you see the thumbnail photos of the quilts. Then click on the heart in the upper right hand side of the photo of the entry you want to vote for ❤️ and it’ll fill the heart in & tell you how many votes you have left. If there are over a hundred entries, you’ll get 10 votes. Enjoy!

Until next time, HAPPY QUILTING!

Jane

Mulberry Patch Quilts