Newborn Charity Quilt

Newborn Charity Quilt

Mikayla’s Grace is a wonderful charity in my area of Wisconsin that supports families with a baby in the NICU (neonatal ICU) and those who experience the death of a child or pregnancy loss at hospitals in the Dane County area.

Crafters from all over make beautiful handmade baby items that they sew, knit or crochet and send to Mikayla’s Grace — from gowns, hats, and booties, to baby blankets and quilts. Several times a year volunteers meet to assemble these donations into care packages and deliver them to local hospitals to distribute.

Melissa recently sent out an email asking for several handmade items that are needed for their next assembly day this June, including a special need for larger “newborn-size” blankets and quilts (from 22 to 30 inches square).

I’ve been thinking about devoting a few days to make some of these quilts to donate, and when I saw that this week’s Project Quilting Challenge was “Irish Chain” it was a perfect opportunity to join in on the challenge AND make the charity quilts. I have some pink cotton fabrics —charms, jelly rolls, layer cakes, and squares — left over from other projects. And found some pink flannel for the backing.

My first step was to pull fabrics from my stash that go together. For this little quilt, I found a few left-over layer cake squares with some other yardage.

Layer cakes aren’t ideal for strip quilting the sets for the single Irish chain, but I come from a frugal generation, and wanted to use up what I had. I was able to cut enough fabric to make the strip sets for two quilts. I drafted a quick little pattern on my Electric Quilt (EQ8) software to get an idea of how much background and border fabrics I needed and to make sure it ended up the right size.

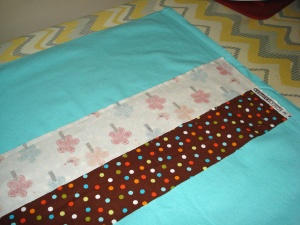
The strips were cut 2-1/2” wide (the length of the layer cake) and sewn together in strip sets of three fabrics each (see photo). I pressed each seam towards the floral fabric.

Next, I sub-cut the strip sets 2-1/2” wide and then sewed them together into 9-patches (see photos).

You can see through my window that we’re having a snowstorm today, so it’s the perfect day to be in the sewing room!

The hardest part is finding enough scraps in my stash to coordinate and make two matching NICU quilts. I found just enough of a matching fabric print for a thin border & corner blocks, and just enough leftover green “bee print” to make them…yay! (cause I’m not going out inbthe snow to buy more!)

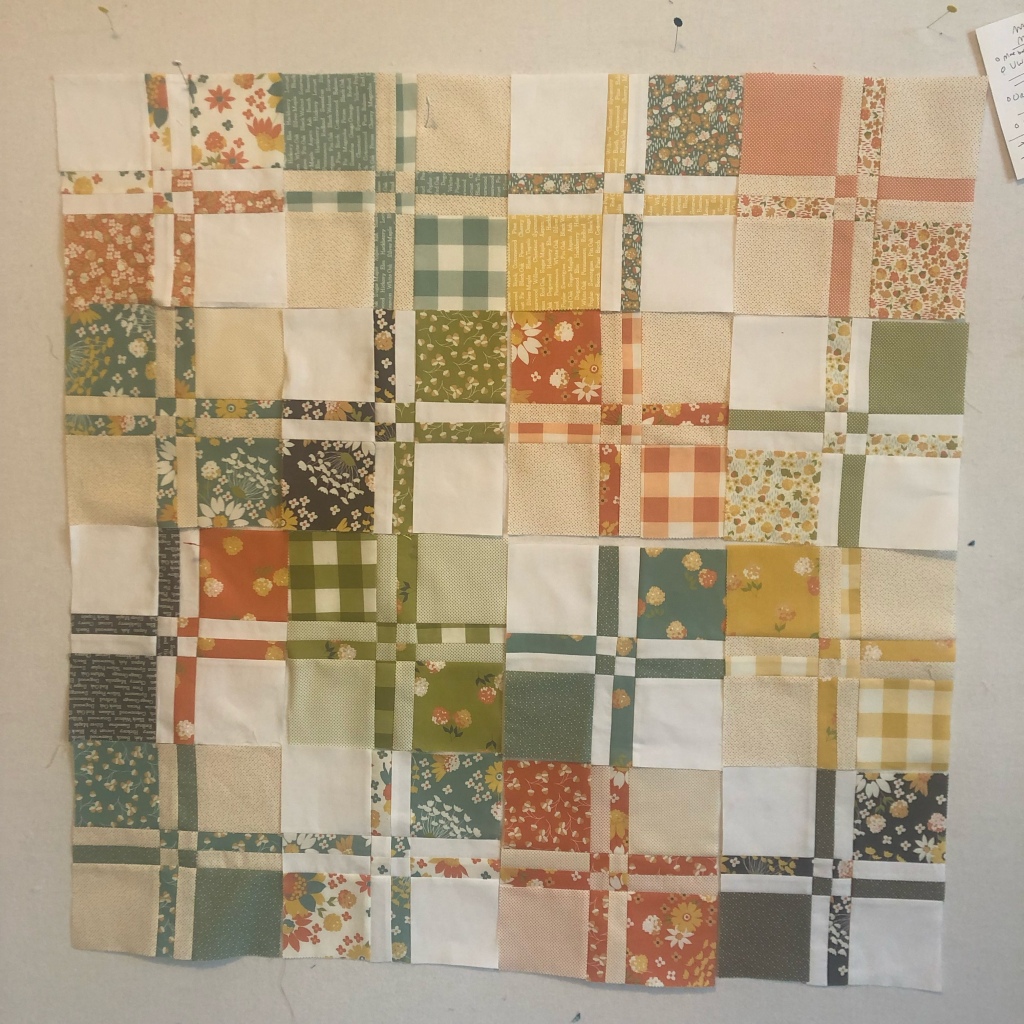
I’m happy with the pieced top. It turned out to be 25×25 inches. All that’s left is to quilt it and make a second one just like it!

I’m entering this photo in the Project Quilting challenge before I do.

Simple, fairly quick, and I hope they’ll be a blessing snd encouragement to a family and their new little one in the NICU. I know I’ll be praying for the recipients of each one.

I hope this encourages you to dig in your stash and make a quilt for your favorite charity!

Until next time, HAPPY QUILTING❣️

Jane, Mulberry Patch Quilts

Disappearing 4-Patch Quilt: Merging the Best Instructions

Disappearing 4-Patch Quilt: Merging the Best Instructions

A “Disappearing 4-Patch” may look intricate and complicated, but it’s really very easy. If you can sew a simple 4-patch, you can sew this quilt.

There are many great how-to tutorials out there. I chose these two YouTube videos as my favorites—

Jenny at the Missouri Star Quilt Company and

Laura Ann Cioa at Sew Very Easy.

After watching both, I decided to “merge” their info together to make my own Disappearing 4-Patch. Here’s how…

Jenny (MSQC) has you use a charm pack in her version, while Laura (Sew Very Easy) has you cut larger squares from fat quarters. I chose to go with Jenny on this one because I had this sweet little charm pack from Moda called “Cozy Up” on hand. Isn’t it cute?

I pulled 32 of the medium to dark squares from the charm pack for my quilt. I also needed 32 background 5” squares. I was going to use white muslin, but there were several light charms leftover from my charm pack, so I mixed them with the white.

The first step (from both videos) is to sew your squares into a 4-patch. Easy! I like the way Laura (Sew Very Easy) shows you how to press the seams to make your 4-patch nice and flat. Check it out on her video.

The next step is to place the 4-patch on a spinning cutting mat & line up the 1” line on your ruler with center seam and cut.

Then spin your mat and repeat until your block looks like the one above.

This is where I diverted from Jenny’s instructions in favor of Laura’s. Jenny had you swap each corner block and spin the center 4-patch a quarter turn. I gave that a try, but the seams didn’t nest together and I found it difficult to sew.

But Laura had you switch just the center top 2-patch rectangle with the bottom one, and the left center 2-patch with the right one! That’s it. The seams nest perfectly, making this block a breeze to sew.

Here’s the finished block, 8-1/2” (8” finished).

Now it’s time to play! Put the blocks up on your design wall until you find your favorite layout. I liked this layout (above) which has 4 blocks across and 4 down (a total of 16 blocks). I’ll add a 1-inch white inner border and I might add a 4 inch outer border, so my finished baby quilt will be 42 x 42 inches.

Here are two different drawings (done on my EQ8 program) as examples of just two of the ways you night sew it together.

And here’s the finished baby quilt. I decided not to add the extra border. This is the perfect size for a baby stroller or “tummy time”.

I hope you’ll give it a try. It’s fun. Post your quilt below in the comments and let me know how you did.

Until next time, HAPPY QUILTING

Jane, Mulberry Patch Quilts

Easy Preemie Baby Quilt from Jelly Roll Strips

I’m participating again this year in Project Quilting, and this week’s Season 11.5 challenge is “Give It Away”. TRISH we must be on the same wavelength (LOL)!! Just the week before the challenge I made ten baby quilts for one of my favorite charities, Mikayla’s Grace! What are the chances? See that blog post here.

BUT those quilts won’t count for entry into this week’s challenge. The rules clearly state the quilt has to be made–beginning to end–during the challenge week. That’s not a problem… I see by their website that Mikayla’s Grace is still in need of baby quilts in their “large preemie” size. So I made two more quilts during the challenge this week.

Last time I used leftover blocks to make the quilts. This week I thought I’d change it up by using leftover jelly roll strips from a recent quilting project. I gathered up all the 30s reproduction strips I could find in my stash and started sewing them together.

If each strip has been 42″ (WOF), this would have gone faster–but most of the strips I had left were only 10″ …but it still worked just fine.

My “plan” (and I use the term loosely) was to make two similar baby quilts, each about 22″ square. Why two quilts? Because Mikayla’s Grace requests that donated items be made in sets of two. I also knew I wanted them to look “scrappy”, so I grabbed strips randomly and sewing them together until I had strip sets 11 strips wide (my simple math plan was 2″ finished x 11 =22″)… at least it sounds like a plan.

Once several strip sets were made (and I’d exhausted my pile of strips), I sub-cut them into 2-1/2″ strips and joined the edges together to make four identical really, really long strips.

I laid the subcut strips side by side and offset them by one square–“un-sewing” the last square from the bottom (see photo above) & re-sewing it to the top (see photo below).

I did the same thing with the third long strip, only offsetting it by taking two squares off the bottom & resewing them at the top… etc etc.

You get the idea!

If I had begun with full size (WOF) strips, or if I had more strips left to plan it all out perfectly, I could have figured out the exact size I needed to make the two quilts…but of course I didn’t have quite enough strips, so once I sewed all four long strips together, I simply un-sewed them into four sections and then combined two sections into each quilt…make sense? You can see in the photos how the diagonal stripes change color at their centers. But I don’t think it matters. It makes them more interesting.

I didn’t have quite enough subcut strips to make them square, so I added a strip to each side.

Both quilts are backed with the softest cotton flannel, sewn right sides together, then turned right side out, with just enough quilting in the ditch to hold the layers together nicely.

Off these go in the mail to Mikayla’s Grace in McFarland, WI. I hope they’ll bring comfort to a little one in the NICU of one of our area’s hospital, and that these quilts will offer love, hope, and comfort to their families as well.

Do you have some jelly roll strips left over? Why not consider making a baby quilt for Mikayla’s Grace, or a charity near and dear to your heart? I hope this blog has inspired you to give it a try!

Need more ideas? Check my blog on using your leftover blocks here. Or click “Charity Quilting” under “Categories” on the right side of this blog to see even more ideas.

Enjoy! I’d love to see what YOU create.

And I’m excited to see all the charities supported and ideas by the wonderfully generous and talented quilters make for Project Quilting this week.

Until next time, HAPPY QUILTING!

Jane

Mulberry Patch Quilts

Charity Quilts from Leftover Blocks

Charity Quilts from Leftover Blocks

Every year I like to make little quilts or knit tiny hats for Mikayla’s Grace. So when they put out an urgent request for specific needs, I signed up to fill the need for 10 medium size baby quilts to support families with small infants in the NICU (Neonatal ICU).

I had some leftover quilt blocks that worked perfectly for the center of each quilt. The “Fantasy Folk Art” fabrics by Contempo (Bernatex) are so beautiful, and I had enough coordinating fabric for the extra borders..

It’s a snap to figure out the math using EQ8 (Electric Quilt)…make a one-block layout and add borders until you reach the desired size. So easy.

Each center square finished about 8 inches, so by adding a 2 inch (2-1/2″ cut) white border around it, and then a 4 inch (4-1/2″ cut) border from a coordinating print, they turned out just the right size…about 20 inches square.

For some I made the second smaller border of a coordinating print and added a third white border, slightly larger than the first one.

Each baby quilt was finished with a soft cotton flannel backing, attached by sewing the edges right sides together and leaving an opening large enough to turn it right side out. I hand-stitched the opening closed.

A simple “stitch in the ditch” with my walking food and Aurifil cotton thread near each border was all the quilting necessary.

My hope is that these quilts will encourage and comfort those families going through the emotional stress and heartache of having their tiny baby in the NICU.

Do you have any extra blocks from your projects? Why not consider using them in a baby quilt for Mikayla’s Grace, or for a charity close to your heart?

Until next time, HAPPY QUILTING!

Jane

Mulberry Patch Quilts

Quiltsy Team Charity a Day for National Quilt Month

Quiltsy Team Charity a Day for National Quilt Month

March is National Quilt month!
My Quiltsy Team (a group of quilting artists who sell their work on the Etsy.com website) is celebrating by featuring a different member each day and the charities they support.  So today I’d like to share photos of donations I’ve just finished up to give to Mikayla’s Grace.

Preemie9

Mikayla’s Grace is a local charity in my area that supports families with a baby in the NICU (neonatal ICU) and those who experience the death of an infant at hospitals throughout Wisconsin by providing NICU care packages that offer both practical and emotional support for parents.  They also reach out to comfort women who experience miscarriages.

I’ve knitted quite a few preemie hats throughout this past year, but when a call came out for special small items, it was an opportunity for me to try a new technique…combining quilting with crochet!  I’ve seen quilts that were made up of squares with crocheted edgings and then put together like a granny square afghan.

So, starting with small squares of cotton and soft flannel, I made little tiny quilts by sewing them right sides together,

Squares1

with a quarter inch seam (leaving an opening to turn)

Squares2

And then turning the right side out and top stitching around the edges.

Squares3

I found yarn was too thick, but white pearl cotton was just the right size, to do a blanket stitch around the perimeter of the square.

Squares4

That gave me something to anchor my crochet edge stitching to.  And then it was a matter of crocheting whatever edge stitch I desired around the entire square for several rows.

Squares5

Here’s a few simple edgings done in green baby yarn (top) and blue cotton yarn (bottom). I liked using the soft baby (or sports weight) yarn the best.

Squares6

And here’s a few more in coral and mint green.  You can see I tried to use the yarn to do the blanket stitch (one on the right), and although I like the look of it better I found it very difficult to thread and poke through the edging, so I went back to using the pearl cotton.

Squares8

By folding, they make the cutest little wraps—you can see how small they are next to my hand…

Next I decided to make some little quilts for preemies out of some beautiful cotton fabrics and soft flannel.

Preemie1Preemie2

Squares put together and backed with soft flannel.

Preemie5apreemie6

Aren’t the chicks cute?  I love the bright, cheerful colors.  And here are a few more pieced in strips across the quilt with soft minky fabric on the back.

Preemie4aPreemie7

Last but not least, I added a couple of tiny knit afghans that I made out of soft yellow baby yarn with a blue crochet edging.  Can you see the “heart” created by the pattern? So fun.

Preemie8

I hope these small gifts bring love and comfort to the families they go to!

I’m so blessed to be a part of such  great Etsy Team.  Each member is not only creative, but so caring and generous.  Just this past month when one of our members found out about a need for quilts for victims of fires in Tennessee, our Quiltsy Team immediately went to work and made 67 quilts to donate to them–yup SIXTY SEVEN!!  An amazing group that I am so thankful for.

Until next time,

HAPPY QUILTING!

Jane

Mulberry Patch Quilts

Project Quilting Challenge 5: Through the Eyes of a Child

Project Quilting Challenge 5: Through the Eyes of a Child

We’re in Challenge 5 of PROJECT QUILTING (Season 7)…”Through the Eyes of a Child”.

I remember when my boys were little and we’d go hunting for bugs.  Off we’d go with a butterfly net and a magnifying glass to find as many different bugs (and other critters) as we could.  It always amazed them to see the small world open up with the magnifying glass.  So I created this baby quilt “Under the Magnifying Glass” for the contest this week.

magnify9b

First I found this wonderful turquoise fabric in my stash that features bugs, frogs, salamanders, dragonflies, and turtles and a lot more.  To make it look as if the magnifying glass was actually zooming in on one section of the fabric, I enlarged it on my copier by 300% and traced a pattern.

Magnify1

I transferred the pieces of the master pattern onto Steam-a-Seam-2, making sure to turn the pattern backwards before I traced it onto the fusible so it would turn out the right way around in the end.

magnify2

The magnifying glass was black fabric cut with a circle template—the handle was eyeballed and cut out.  By  using a lighter background within the circle I thought it made it stand out more.  Everything was fused in place with the heat of my iron.

magnify3

Adding the batting & backing, I machine stitched the pieces in place.

DSC06070

And added a few hand stitches to accent the bugs, butterfly, and put a happy face on the turtle.

magnify5

The 3D butterfly was made by fusing fabric to both sides of the Steam-a-Seam-2, pinking the edges, and stitching it in place with a little tuck.

magnify6

And here’s the finished quilt…with the polka dot borders it turned out 30 x 34 inches.

magnify7

It’s machine washable, or could be used as a wall hanging in a child’s room, and is for sale in my Etsy Shop.

magnify8

I tried the “flange binding” — it adds a very thin faux piping accent and is so easy to do—it’s super easy to machine stitch into place.

magnify9

I hope you’ll come by the Persimon Dreams blog by Kim Lapacek to vote for your favorites.  You get to vote for 5 items (hope mine’s one of them), starting this SUNDAY (MARCH 6) and runs through March 11, 2016).

UPDATE:  The voting is over, and my entry was #7 out of 38 entries.  Although I didn’t win, everyone was a “winner” since we all won a pdf of a new messenger bag pattern from StudioCherie!  Thank you so much Cherie!  AND on top of that, my name was picked for a prize from Persimon Dreams — a beautiful charm pack by MODA called Simply Colorful II.

IMG_4912

Thanks so much Kim!

  
Oh, did I mention I got to talk with Kim at last week’s Sun Prairie Quilt Show?

Until next time, HAPPY QUILTING!

Jane

Mulberry Patch Quilts

4 Baby Quilts in 4 Hours with 4 Fat Quarters +: Tutorial

4 Baby Quilts in 4 Hours with 4 Fat Quarters +: Tutorial

Make 4 baby quilts

Make 4 baby quilts

I wanted to make some soft and cuddly charity quilts for Mikayla’s Grace, and came up with this idea. I hope you’ll give it a try the next time you want to make a baby quilt for charity, or for a friend.  It’s easy to whip up all four in an afternoon of sewing, and are great for giving to charity, or to keep on hand for gifts for friends (new moms & grandmas).

Ok, so you’ll need a little more fabric than 4 fat quarters–you’ll need an additional 3/8 yd for the center strip on top, and some fabric for binding & backing–but it all starts with 4 coordinating fat quarters.

I happened to have purchased a packet of coordinating prints I found at “Pineapple Fabrics'” vendor booth at the Quilt Expo in Madison (“Over The Top – Bonus Quarter 5 Pack”, no longer available) and added a bit of yardage for the backs from my stash. It’s fun to use soft flannels and “minky” or “cuddle” fabrics as backing material. See if you can find fabrics from your stash to use, or purchase fabric from the list below.

Richard Blake's

Fat quarter fabrics from the pack

To make four quilts, here’s a list of the coordinating fabric you’ll need:

  • 4 fat quarters of coordinating cotton fabrics (for the fronts)
  • 3/8 yard of coordinating cotton fabric (for the fronts)
  • 1/4 yard (of 42-45″) cotton fabric (bindings)
  • 1-1/4 yard of cotton flannel (backings)

I like to wash & dry all my fabric before starting to be sure nothing bleeds or shrinks.  But many quilters opt not to wash it first.  It’s totally up to you.  However, I would advise that you wash the flannel–as flannel usually shrinks quite a bit.

Stack the 4 fat quarters one on top of the other (right sides up) on your cutting mat, and with your rotary cutter & ruler, cut:

  • Two 3-1/2″ strips, and
  • Two 4-1/2″ strips

From the extra yardage (3/8 yd), cut:

  • Two 6-1/2″ strips (WOF=width of fabric) & subcut these in half so you’ll have four 22 x 6-1/2″ strips.

Cut the binding out of the 1/4 yard:

  • Cut 1-1/2″ strips WOF (you’ll get about 6 strips)

Cut the 1-1/4 yd cotton flannel into 4 squares, each just a little LARGER than 20 x 20″

Cut strips through all layers

Cut strips through all layers

You'll have enough strips to make four quilts!

You’ll have enough strips to make four quilts!

Once the strips are cut, you’ll need one 6-1/2″, two 3-1/2″, and two 4-1/2″ strips for each quilt–so take some time to be sure you have “stacks” of the required strips–each pile of strips should contain 5 different fabrics.

On the backing, find the center mark on two opposites sides and place a pin or mark.  Find the center of the short ends of a 6-1/2″ strip and pin or mark.  Lay the backing on a flat surface wrong side up.  Then place the 6-1/2″ strip right side up on top of the backing, matching the center pins/markings.  (Yup, you’re right, you’re putting wrong sides together).

CharityQu3

Lay 3-1/2″ strip against one long edge of 6-1/2 RST & pin

Next lay a 3-1/2″ strip right side down (RST) along the raw edge of one long side of the 6-12″ strip you just laid down.  Pin and sew 1/4″ along.

CharityQu4

Sew through all layers with a 1/4″ seam

CharityQu5

Lay it back on your ironing board

CharityQu6

Flip open and press

Take it back to your ironing board and press it open.

Then take the remaining 4-1/2″ strip and lay it right sides together along the raw edge of the 3-1/2″ strip you just sewed and pin…and stitch.

CharityQu7

Repeat–working from the center strip out

Do the same on the opposite side of the center 6-1/2″ strip until the entire backing is covered.

CharityQu8

Until all the backing is covered

After a final press, take it to your cutting mat and square it up, making sure the backing and top align around the edges.

CharityQu9

Give it a final press, then trim/square up

Join the short ends of your 1-1/2″ binding strips together (as you normally would for a quilt) and fold over one edge 1/4″ to the wrong side and press.  Sew raw edge of binding to the quilt sewing it to the BACK first with a 1/4″ seam, using the same procedure as for any quilt.  Cut and join the edges together and finish sewing.

CharityQu9a

Cut binding 1-1/2″, press 1/4 on one side & sew to BACK

Now turn the binding to the RIGHT side (top) of the quilt and pin or clip to hold.  Using a serpentine stitch (or zig zag), top stitch the binding in place.

CharityQu9b

Topstitch from the front using serpentine stitch

See how the serpentine stitch allows it to “catch” on the back?

CharityQu9c

It looks good on both sides

Faster than hand stitching and it looks nice from the front or the back.

CharityQu9d

Four quilts! (Notice: I didn’t cut enough binding so 1 is different)

Repeat the process to make the other quilts, and TA-DAH!  You have FOUR beautiful 20×20″ baby quilts ready to go!

CharityQu9e

My backings are different colors because I used up 20″ scraps that I had on hand.

Aren’t they cute and cuddly?

I donated these to a charity called Mikayla’s Grace…  I’m hoping they’ll cheer some parents of newborn preemies.  Their mission is to support families with a baby in the NICU (neonatal ICU) and those who experience the death of an infant at hospitals in Wisconsin by providing NICU care packages and angel memory boxes that offer both practical and emotional support for the parents.

What’s your favorite charity to send your quilts to?

I’d love to hear from you–

And if you make these, let me know if you have any questions.

Until next time,

HAPPY QUILTING!

Jane

Mulberry Patch Quilts

Finished Quilting My Second OBW (One Block Wonder)

Finished Quilting My Second OBW (One Block Wonder)

I worked really hard yesterday on finishing my One Block Wonder top that I finished a couple weeks ago (see previous blog).

Having the rainy, humid Sunday afternoon helped get me get out of the garden and get the ambition to go down to do the quilting on my Tin Lizzy.


And while I hand sewed the binding to the back of the quilt, I was able to catch up on a few episodes of  “Call the Midwives” before the big finale Sunday night. (I was finished in time to give the final episode of  “Selfridge” my full attention… LOL!)OBW6


I like the way it turned out.  I tried to echo the flowers in the pattern of the “Samba” fabric, by quilting free-hand swirls and flowers throughout.

OBW1

I think the deep blue border & binding help “reign” in the color explosion!

OBW2

…as well as the calm blue backing.  Do you agree?

OBW3

OBW4

I can’t wait to do this again.  One Block Wonder’s are so much fun to do.  I think it’s the surprise you get when you start cutting out the 60 degree triangles and sewing them together.  It’s amazing how fabrics off the bolt turn out in the final project.  On my travels to visit my sister in Michigan—I’m going to keep my eyes peeled for a fabric that will make another interesting One Block Wonder…

BTW, this OBW is for sale in my Mulberry Patch Quilts Etsy Shop

Until next time, HAPPY QUILTING!

Jane

Mulberry Patch Quilts

Blanket Wraps for Mikayla’s Grace, Ready to Go…

Blanket Wraps for Mikayla’s Grace, Ready to Go…

I found a tiny diaper pattern through Tiny Tears and decided to make matching diapers to go with each blanket wrap. Just email them and they’ll send you a pdf pattern with instructions.

After cutting & sewing the patter pieces right sides together, I found pinking the edges easier than just trimming.

Turn them right side out…

After topstitching, each one is folded and pinned.

So sweet, so tiny…

Set #1—with pieced blanket wraps.

Set #2—pink, soft and cuddly.

Set #3—baby blue

Set #4—aqua, soft and cuddly.

Ready to send off…

If you’re interested in making blanket wraps for Mikayla’s Grace, see my previous blog or go to their website here.

Next, I’m going to be doing some experimenting with rulers on my Tin Lizzie quilting machine!

Until next time, HAPPY QUILTING!

Jane

Mulberry Patch Quilts

Halloween 2 Quilt

Halloween 2 Quilt

Since I had some of the cute fabrics left from the Halloween Quilt, I went into my EQ7 (Electric Quilt program) and decided to design a second quilt using the fabric I had left over.

EQ7 Halloween 2It took several tries, but finally came up with this idea—kind of a topsy-turvy block set.

I had just enough of all the fabrics left to do it.


Here’s the individual block centers being fussy cut…my remainder looked a little like swiss cheese (so many holes)!

DSC05263

And here they’re surrounded in either the black/orange stripe or candy corn…

DSC05262

It took me several tries before I figured out the math to cut the right size rectangles (sliced corner to corner) to create the triangles to make the blocks tilt!

DSC05264

And a little trial and error as well to remember how to piece them! There’s a “trick” to this trick-or treat quilt!

DSC05265

But in the end, I think it will work just fine…I used an eyebrow pencil to mark the area to square up the tilted block.  (Eyebrow pencil will show up on the ruler, but is easy to wipe off after you’re done–and it doesn’t come off while your working as easily as dry-erase pen.)

DSC05266

All that’s left is to piece the rows & columns, add the borders.  I’ll post the final photos of both Halloween quilt tops soon.

HAPPY QUILTING!

Jane

Mulberry Patch Quilts