Easy Preemie Baby Quilt from Jelly Roll Strips

I’m participating again this year in Project Quilting, and this week’s Season 11.5 challenge is “Give It Away”. TRISH we must be on the same wavelength (LOL)!! Just the week before the challenge I made ten baby quilts for one of my favorite charities, Mikayla’s Grace! What are the chances? See that blog post here.

BUT those quilts won’t count for entry into this week’s challenge. The rules clearly state the quilt has to be made–beginning to end–during the challenge week. That’s not a problem… I see by their website that Mikayla’s Grace is still in need of baby quilts in their “large preemie” size. So I made two more quilts during the challenge this week.

Last time I used leftover blocks to make the quilts. This week I thought I’d change it up by using leftover jelly roll strips from a recent quilting project. I gathered up all the 30s reproduction strips I could find in my stash and started sewing them together.

If each strip has been 42″ (WOF), this would have gone faster–but most of the strips I had left were only 10″ …but it still worked just fine.

My “plan” (and I use the term loosely) was to make two similar baby quilts, each about 22″ square. Why two quilts? Because Mikayla’s Grace requests that donated items be made in sets of two. I also knew I wanted them to look “scrappy”, so I grabbed strips randomly and sewing them together until I had strip sets 11 strips wide (my simple math plan was 2″ finished x 11 =22″)… at least it sounds like a plan.

Once several strip sets were made (and I’d exhausted my pile of strips), I sub-cut them into 2-1/2″ strips and joined the edges together to make four identical really, really long strips.

I laid the subcut strips side by side and offset them by one square–“un-sewing” the last square from the bottom (see photo above) & re-sewing it to the top (see photo below).

I did the same thing with the third long strip, only offsetting it by taking two squares off the bottom & resewing them at the top… etc etc.

You get the idea!

If I had begun with full size (WOF) strips, or if I had more strips left to plan it all out perfectly, I could have figured out the exact size I needed to make the two quilts…but of course I didn’t have quite enough strips, so once I sewed all four long strips together, I simply un-sewed them into four sections and then combined two sections into each quilt…make sense? You can see in the photos how the diagonal stripes change color at their centers. But I don’t think it matters. It makes them more interesting.

I didn’t have quite enough subcut strips to make them square, so I added a strip to each side.

Both quilts are backed with the softest cotton flannel, sewn right sides together, then turned right side out, with just enough quilting in the ditch to hold the layers together nicely.

Off these go in the mail to Mikayla’s Grace in McFarland, WI. I hope they’ll bring comfort to a little one in the NICU of one of our area’s hospital, and that these quilts will offer love, hope, and comfort to their families as well.

Do you have some jelly roll strips left over? Why not consider making a baby quilt for Mikayla’s Grace, or a charity near and dear to your heart? I hope this blog has inspired you to give it a try!

Need more ideas? Check my blog on using your leftover blocks here. Or click “Charity Quilting” under “Categories” on the right side of this blog to see even more ideas.

Enjoy! I’d love to see what YOU create.

And I’m excited to see all the charities supported and ideas by the wonderfully generous and talented quilters make for Project Quilting this week.

Until next time, HAPPY QUILTING!

Jane

Mulberry Patch Quilts

Blanket Wraps for Mikayla’s Grace, Ready to Go…

Blanket Wraps for Mikayla’s Grace, Ready to Go…

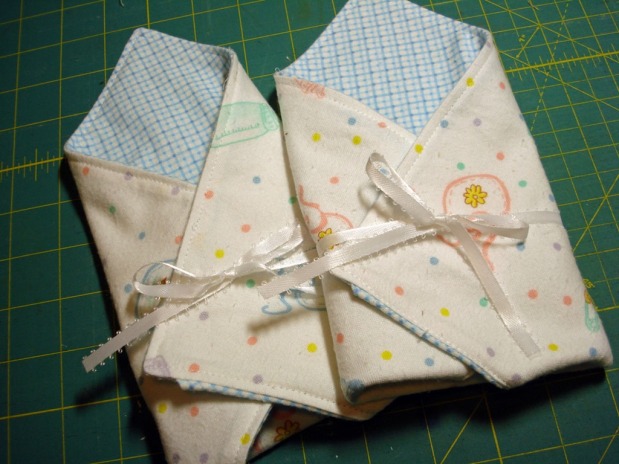
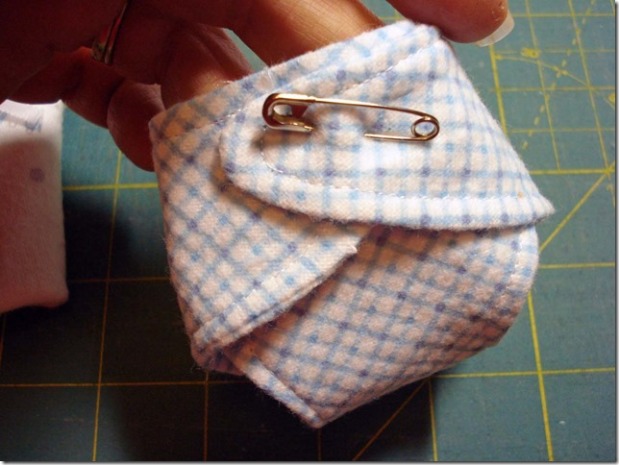
I found a tiny diaper pattern through Tiny Tears and decided to make matching diapers to go with each blanket wrap. Just email them and they’ll send you a pdf pattern with instructions.

After cutting & sewing the patter pieces right sides together, I found pinking the edges easier than just trimming.

Turn them right side out…

After topstitching, each one is folded and pinned.

So sweet, so tiny…

Set #1—with pieced blanket wraps.

Set #2—pink, soft and cuddly.

Set #3—baby blue

Set #4—aqua, soft and cuddly.

Ready to send off…

If you’re interested in making blanket wraps for Mikayla’s Grace, see my previous blog or go to their website here.

Next, I’m going to be doing some experimenting with rulers on my Tin Lizzie quilting machine!

Until next time, HAPPY QUILTING!

Jane
Mulberry Patch Quilts

Blanket Wraps for “Mikayla’s Grace”

Blanket Wraps for “Mikayla’s Grace”

I was watching an episode of “Nancy’s Notions” and found through their website Nancy’s Corner a link to “Mikayla’s Grace”.  After reading the more, I decided to set aside Sunday afternoon to sew “Blanket Wraps”.

Mikayla’s Grace, started by Mike and Melissa Terrill, was created with the mission of giving comfort and support to parents with a baby in the NICU (neonatal ICU) and those who experience the death of an infant or pregnancy loss at hospitals in Wisconsin…and they serve many of the hospitals right here in my city.   Did you know that 1 in 4 women experience a pregnancy loss?  Just this past year, over 10% of the babies born in Wisconsin were born premature.

Since 2011 Mikayla’s Grace has donated 431 Angel memory boxes, 420 NICU care packages, 50 Christmas NICU care packages, 310 Baby Loss Comfort Packages (for early pregnancy loss less than 16 weeks), 400 baby blankets, and 400 gowns with matching booties and hats to hospitals in Wisconsin.

After looking over their website of suggested handmade items requested—see website here—I decided to make several 10” Blanket Wraps.   Aren’t they sweet?

There’s a great PDF step-by-step guide and a YouTube video at the website provided through UtahShare.org.

I started looking through my soft flannel stash, added a few new pieces from the store, and ribbons.  They ask that you create two blanket wraps that are identical.  Here’s how I did mine…

To make two matching blanket wraps, all you need are four 10” squares (2 from the outer fabric; 2 from the inner lining).  Cut one lining square in half diagonally (use one and save the other for the 2nd).

Zig-zag or serge the cut diagonal edge, and fold over 1/4” and top stitch

With both pieces right side up, place the triangle on top of the matching square & baste the edges…this creates a pouch.

Then (with right sides together) join the outer square to the lining/pouch squares, leaving an opening to turn.  Trim the corners & turn right side out.

Press and top stitch around the outside, being sure to catch the edges that were open.

Repeat to make the second one, and you’re done!  So easy and so sweet.  Use a ribbon (attached to the back) to fold & close.

I’ve made 8 so far, and plan to make a few more before I sent them in.

I tried piecing the outside square of two of these (upper left above), using 30’s reproduction fabrics with white muslin (2” squares), but using soft flannel for the lining.  I’ll have to check with the organization to see if that’s acceptable…as a quilter, I really enjoyed trying it.  Otherwise, all the rest are done with two contrasting but complimentary pastel cotton flannel prints/solids.

Wouldn’t they be cute with a little lace around the edges? …a decorative stitch?  …or a different ribbon?  Each pair takes about 45 minutes to make—so they’re quick and easy.

If you love to sew, consider creating some of these blanket wraps—or other items on their list—for donation to Mikayla’s Grace, or similar organizations in your area.   They also have patterns to knit and crochet on their website.

Until next time, HAPPY QUILTING!!

Jane

Mulberry Patch Quilts

The 30’s Granny Square Baby Quilt: Pt 1

I saw this Granny Square pattern on the Moda Bake Shop website, and had to give it a try.  (Originally submitted to Moda Bake Shop by Joline of Blue Elephant Stitches blog)

It reminds me of the granny square afghan my grandmother crocheted for me so many years ago–and the many granny squares I crocheted back in the day (I made everything from an afghan to matching vests for my nieces).

The directions were for a larger quilt (52 x 62″), so I re-configured the pattern yardage for my baby quilt size.

I bought an entire jelly roll of Moda’s “30’s Playtime” fabric (just ’cause I loved it so), and added some off white Moda solid I had on hand.

ASST32790 15YD 40 PCHaving the jelly roll strips already cut at 2-1/2 inches speeds up the process. Although I only needed to use 12 strips for my baby size quilt, having the entire jelly roll let me choose the colors I needed.  And I’ll have lots of leftovers to make more.

GrannyBlog1


Note:  there’s a slight error in the Moda Bake Shop cutting directions, so if you decide to make this quilt be sure to check the comments at the end of the blog before you start.

GrannyBlog2Each strip is cut to specific sizes, and then they’re put together like this:

  • center (see bright yellow strip)
  • inner rings (see blue strips)
  • outer rings (see pale yellow strips)
  • background (white strips–cut 3″ instead of 2-1/2″ like the others)

These are sewn into three strata


And then subcut into 2-1/2″ strips (see below).

GrannyBlog3


These new sub-cut strips are sewn into this configuration.

GrannyBlog5


The final step is to cut them down to the block size, making sure you leave 1/4″ of background fabric at each tip.

GrannyBlog6


Three strips (plus 1 center) makes two blocks.  Be careful–the edges on the bias of the newly cut blocks can stretch easily.  I sprayed & pressed a bit of  “Best Press” (or a sizing) to help them keep their shape.

GrannyBlog7


My 30’s Granny Square Baby Quilt will end up being 3 blocks across and 4 blocks down (12 blocks total) with white sashing/inner border.

GrannyBlog8Originally I was going to just bind it in a 30’s solid green, but I think it needs an outer border…

Oh oh…Time to go shopping! (…any excuse will do, right?)

…to be continued…after a quick trip to one of my favorite shops,where I’m always inspired — Mill House Quilts!

Happy Quilting!

Jane

Mulberry Patch Quilts


The “Go Pack” Baby Quilt

GoPack1

During the Wisconsin Shop Hop, I found these great Wisconsin fabrics at my favorite quilt stores.  The green and yellow just screamed Green Bay Packers–so I had to find a few other fabrics to go with them into a “Go Pack” Baby Quilt.

Have you discovered the spectacular YouTube Tutorials from the Missouri Star Quilt Company?  (If not, be sure to click the link on their name to view them).  I just love Jenny–she’s inspiring and fun.  Anyway–Even though I used her YouTube Tutorial on the Disappearing Nine Patch I had to “sketch” it out myself on the computer using EQ7 (Electronic Quilt 7 software) first to be sure of the size and amount of material:

EQ7 Go Pack Quilt

Then I cut out the squares…

GoPack1a

…sewed them into 9-patches (first rows, and then sewing those rows together).

GoPack2

Don’t you just love the football-theme fabrics?  As I mentioned, several of them are from the Wisconsin Shop Hop (designed by Kim Schaefer for Andover Fabrics).  One has the names of Wisconsin cities printed on it).  There’s also a referee-type stripe, some random green & yellow circles/stripes, and even green turf with yard lines.  I added some fabrics with footballs and helmets (Robert Hoffman).  Fun.

The next step was to cut each of the 9-patch blocks right down the center–both ways…

DSC04376

And then put them up on my design wall and scramble them–making sure no two seams matched…

GoPack3

My backing wasn’t wide enough–so I had to add a few strips of fabric, which just screamed–add the words “Go Pack” in green on the yellow strip!  So I fired up my Cricuit to cut out some paper templates, traced and cut them out of green fabric, and added them to the backing with a zig zag stitch.  Now the back is big enough…

GoPack4

I think deciding what design to quilt is the hardest part.  Do you agree?  I always get stuck.

I decided to follow the fabric designs–going around the little helmets, footballs, and do an overall loop-DE-loop in-between.

Closeup1

It was fun to make, and is now for sale in my Etsy Shop.

GoPack5

Next time I give this a try, I might do it in pastels — I loved the scalloped border that Jenny used in her tutorial, so sweet.  (hmm…I might need to get that special scallop ruler… Can we ever have enough plastic rulers?)

Thanks for stopping by!

Let it snow, let it snow, let it snow!

Greetings from the cold tundra of Wisconsin!

I know, I know….spring is almost here.  But during this time of winter, after months and months of cold, snowy weather, it’s hard to believe.  Yesterday was glorious with sunshine, snow melting a bit, and a hint of spring…but today we’re anticipating 1-5 inches of snow overnight!

Such is Wisconsin and our “anything-can-happen” weather.

So what does a quilter do when they’ve been cooped up for months on end (that is, besides making quilts!)?…

...Snow dye, of course!

Snow dying is a way to dye fabric using snow!  I had forgotten I wanted to try this technique until I looked again at Pinterest and the board I have “Dying to Dye Fabric” with a link to Dharma Trading Company for their instructions:

http://www.dharatrading.com/html/eng/13399009-AA.shtml

So….I searched my stash for some white 100% cotton PFD (prepared for dying) fabric and cut 2 yards–one for each of two trays.  Using their directions, I soaked each yard in a soda ash solution for 10 minutes, squeezed out the solution, and set them in two plastic trays (found these from another project trying to grow seedlings in my basement–but it was too cold, didn’t work–but that’s another story).  I scrunched the fabric, making lots of peaks and valleys.

Next, the fun part — going in the back yard and finding some clean, fresh snow and piling it on top.

Then I poured the Procion Dye solution (see directions) over the snow!  I tried a blue and yellow on one tray–hoping for some greens to appear, and a turkey red and  orange on the other.

Now all I have to do is wait for the snow to melt, then cover them in plastic and bring them up to a warmer area (70 degrees plus) to let the cure overnight.

I’ll let you see the results tomorrow….. (to be continued)!